
How To Grow Peppers From Seed
Disclaimer: As an Amazon Associate, I earn from qualifying purchases. Pepper Geek takes part in various affiliate programs. This means that purchases through our links may result in a commission for us.
Here it is: The pepper growing guide you have been looking for. If you are new to growing peppers, or simply want to improve your pepper plant productivity, you’re in the right place.
In this article, we’ll share all of the most important techniques and tips we use for growing peppers. Learning how to grow peppers from seed should be fun and exciting, and there is no reason that you shouldn’t be successful on year 1.
Take note, this article is pretty long, so we’ve made a navigation menu to help jump around. Click on the topic you’re interested in reading about to skip ahead.
Table of Contents (Skip Ahead):
- *Quick start guide*
- Planning your pepper garden
- Supplies
- Germinating seeds
- Grow lights vs window light
- Fertilizer
- Watering
- Container size and soil
- Transplanting (potting-up)
- Hardening off
- Common problems
- Harvesting and using peppers
- Helpful growing tips
Quick Start Guide to Growing Peppers
Before we take a deep dive into growing peppers, let’s start with a basic overview of the entire process, from planting seeds to harvesting ripe peppers.
Choosing Pepper Varieties
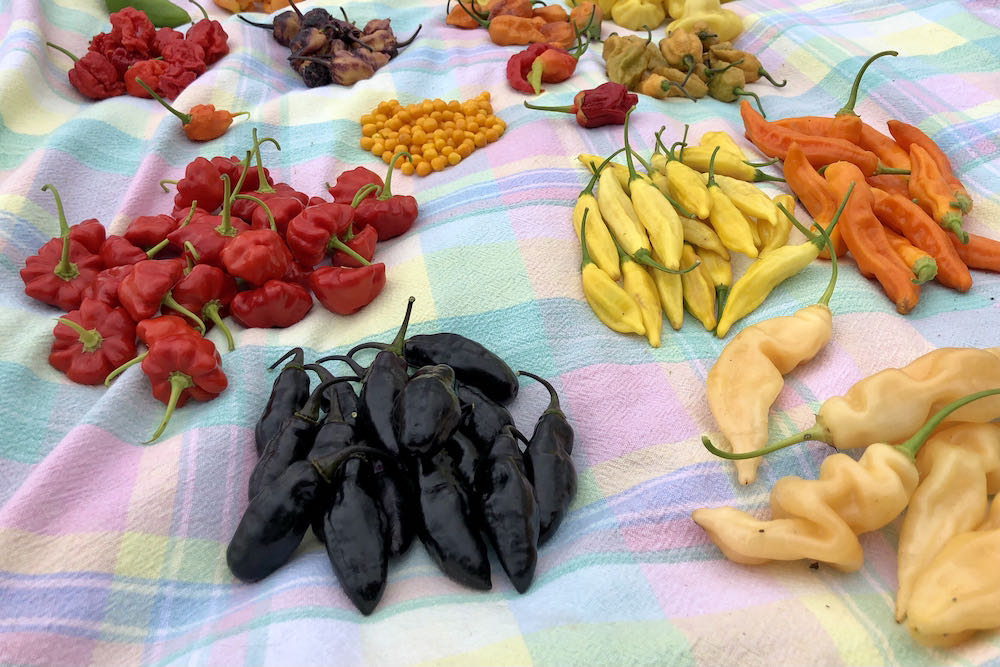
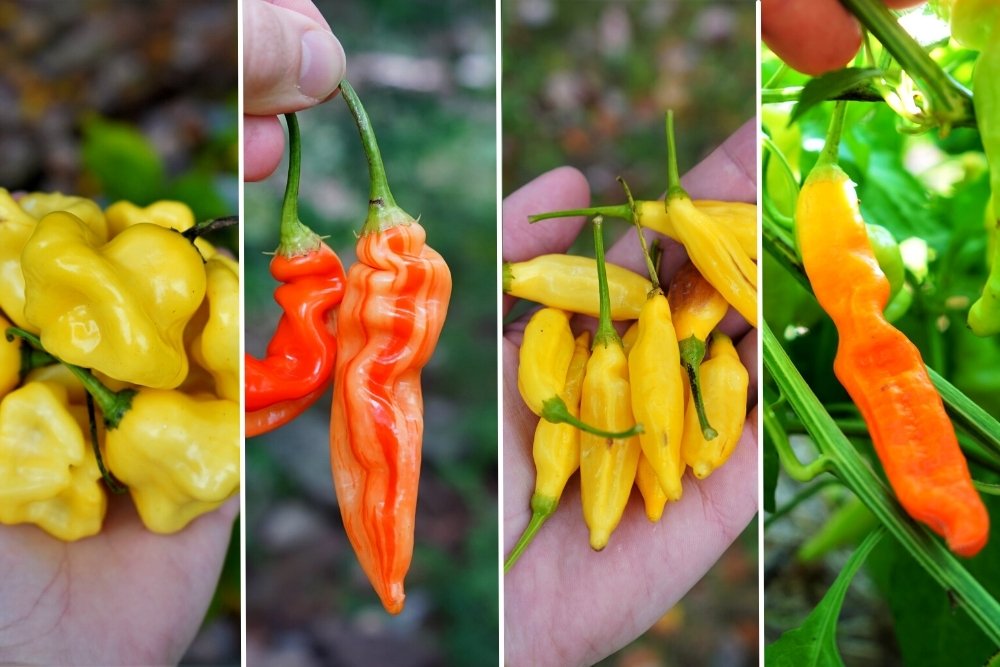
As you will soon learn, there are a massive number of pepper types. Yes, this guide will work for growing bell peppers, jalapeños, banana peppers and habaneros. However, there is a truly staggering selection for you to choose from when you get comfortable growing from seed!
Planting Seeds
Pepper seeds are typically started indoors 6-8 weeks before your location’s last frost date. This gives the plants a longer growing season to ensure you get ripe peppers before cold weather arrives.
Indoor Lighting
Young, indoor pepper plants need strong light to get a healthy start. This is especially important for growing peppers indoors year round. For this, we recommend using LED grow lights. They are efficient, silent and tend to run cool. Artificial lighting is optional, as a South-facing sunny window will suffice.
Fertilizing
Though many potting mixes contain nutrients, peppers benefit from fertilizing. We have several recommendations, depending on how you plan to grow (in pots, in the ground, etc.). Organic, water-soluble fertilizers are great, but we also like slow-release soil amendments.
Topping and Pruning Flowers
Young plants can be topped to encourage a sturdier, lower-growing plant. This is optional, as some growers don’t see any benefit over leaving the plants unpruned. Early flower buds should be removed until the plants are established outdoors.
Moving Outside
As the weather warms up, your pepper plants should be gradually adjusted to the outdoors by increasing outdoors time daily. Once the weather is consistently above 55°F (13°C) at night, your peppers can stay outside for good.
Container Size
If you plan to grow your peppers in containers, the size of the pot can make a big difference in your yields. This is especially true for hot C. chinense varieties (ghost, habanero, scotch bonnet). We typically recommend 3-5 gallon containers as a safe bet for any variety.
Temperature and Humidity
Peppers thrive in warm, moderately humid environments. This means temperatures between 70-85°F (21-29°C) and relative humidity between 40-50%. However, most pepper plants can handle cooler and hotter temperatures, but will die in a hard frost.
Harvesting
Once plants are established outside, your job is to water evenly, provide nutrients only when necessary, and do your best to control pests and disease. Peppers are the king of ‘set it and forget it’ garden plants if you like to be hands off.
Once you have your first successful pepper grow behind you, you’ll be excited to learn more about the wonderful world of unique varieties, cross-breeding, and superhot types. But let’s not get ahead of ourselves!
With a basic understanding of the process, let’s get started with the details on how to grow peppers from seed.
Planning Your Pepper Garden
You may very well have a good idea of how many and what types of peppers you will grow. However, for those unsure, I’d like to pose some questions that will help you decide on the important options.
Where Will I Plant?
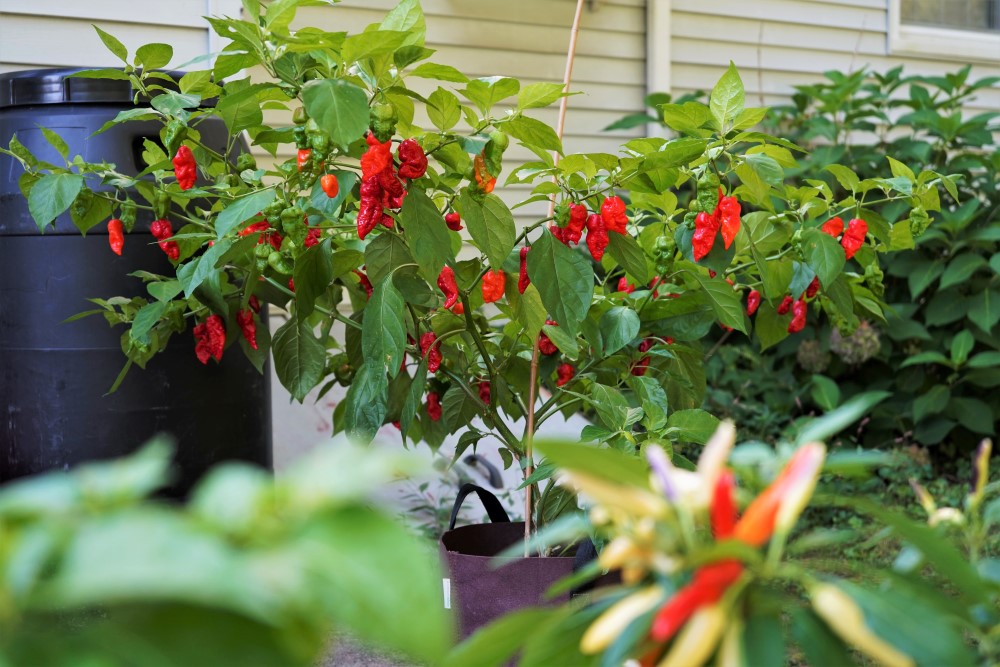
This is often overlooked by new growers. Pepper plants can grow to be fairly large, even in a single growing season! If you are growing C. chinense plants, they can easily reach 5′ in height with a similar width.
For pepper plant spacing we recommend 1.5-2 feet apart, stem to stem, with larger varieties requiring more room. Just make sure your grow space won’t be too crowded come mid-summer.
Containers or In-Ground?
Are you planning to grow your peppers in containers or in a raised bed/garden bed? The growing process will be similar regardless, but there are distinct advantages to each method.
Container plants are easier to move around, easier to control nutrients and watering, and are convenient for apartment or condo living. However, they require more frequent watering and high-quality potting soil can be expensive.
In-ground plants are great for big harvests, require little or no bagged potting mixes, and need less frequent irrigation. However, they are stuck in the same place after transplanting, and their leaves can be attractive to rabbits and mice when they are first moved into the ground.
We grow peppers both ways each year, so we’ve got you covered either way.
Do I Have Room Indoors?
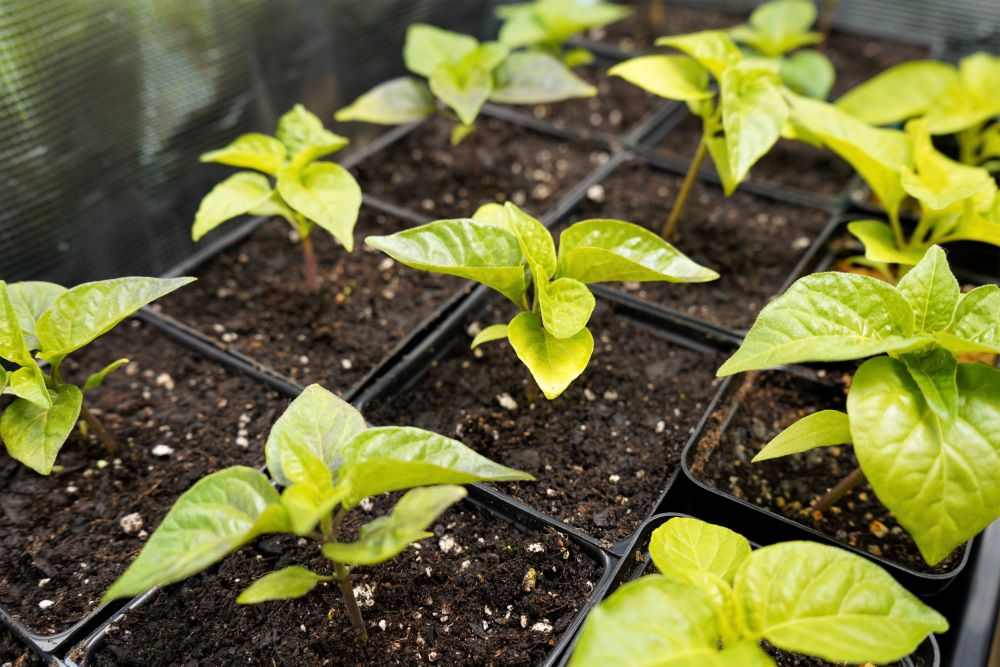
If you are growing from seed, you’ll need a nice open area to germinate and grow your peppers from seedlings to 4-6″ plants. It can be tempting to start dozens of plants, but they grow fast! Just make sure you’ve got the space to keep them all happy before they get outside.
If you are buying started plants at your local nursery, this is not a problem, as you can simply move them directly into their final planting location.
Which Pepper Varieties Should I Grow?
Selecting the pepper varieties to grow can be difficult. With so many to choose from, it is hard to narrow it down. Some of our favorite starter varieties include the serrano, jalapeño, golden marconi, bhut jolokia, and scotch bonnet.
Try starting with our favorite beginner pepper varieties here.
Or, if you’re going for an ornamental garden, try growing one of these amazing ornamental pepper varieties. Your options will be much more broad if you are growing from seed.
Tip: Check small, independent nurseries for unique pepper starts – we have seen some rare varieties at our local garden center!
Growing Supplies
Growing peppers can certainly be done on a budget. We take our pepper growing pretty seriously, so we tend to go beyond the basic needs, but you don’t have to!
We’ll break this section down into essential supplies and optional items. Each item has a purpose, but some are more vital than others.
Essentials:
- Seeds* (check out some of our favorites here)
- Seed tray and humidity dome* (we use durable trays and seed cells)
- Medium pots* (we use these 3.5″ plastic pots)
- Large containers (these grow bags work great, or 10-12″ plastic pots)
- Seed starting mix* (for seed germination)
- Potting soil (this FoxFarm soil works great for potted peppers)
- Organic fertilizer (Miracle Gro organics is an affordable option)
- Spray bottle
Optional (but recommended):
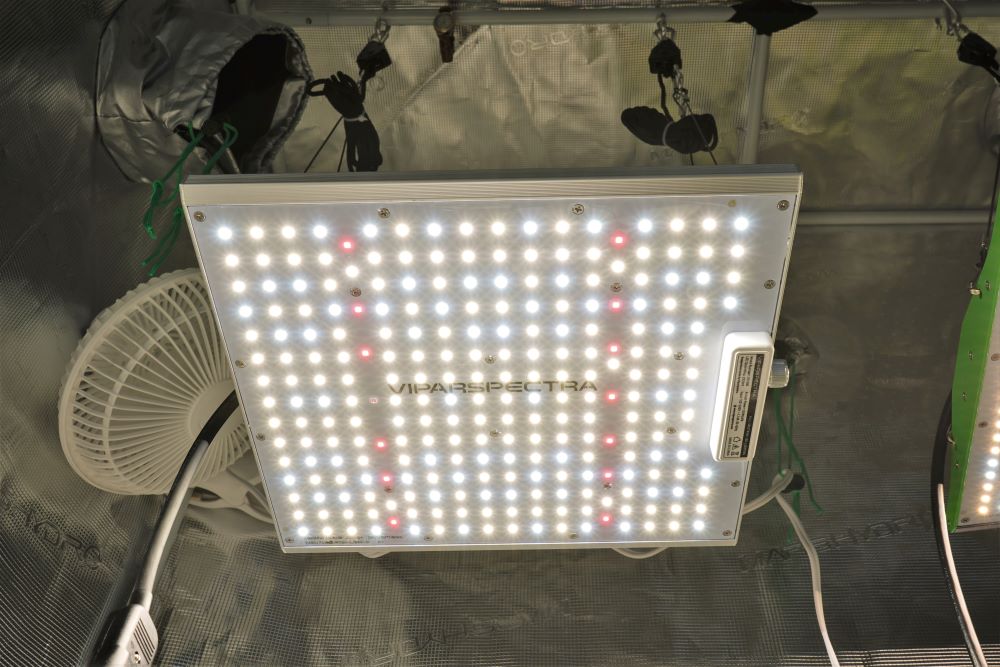
- Grow light* (we currently use this ViparSpectra light – save with promo code: “peppergeek”)
- Seed heating mat* (greatly increases germination rate)
- Thermometer
- Gardening gloves
- Pruning shears
*Items required only if growing from seed.
Though a grow light and heating mat are optional, they are highly recommended for best results when growing from seed. These two items help avoid failed germination and weak growth early in a pepper plant’s life.
Even so, there are warm places in the house, like above the fridge, and bright locations, like in a sunny windowsill. So don’t break the bank on these items if you don’t feel the need.
Germinating Pepper Seeds
With supplies in hand, you can begin planting your pepper seeds. Well, not quite yet! First, you have to figure out exactly when you should plant your pepper seeds, and that will depend on your location’s climate.
When should I plant pepper seeds? In general, we recommend that you sow pepper seeds indoors 6-8 weeks before your plants will be moved outdoors permanently. In our experience, this gives the plants just enough time to grow and be ready to move outside.
Use this site to find out when your last date of frost occurs on average, and add about 2 weeks to know when temperatures will remain above 55°F (13°C). Peppers shouldn’t be outdoors overnight in temperatures much lower as this can cause stunted growth.
The Ideal Germination Environment
Once you know when to start your pepper seeds, you can begin the process. So what is the ideal environment for a pepper seed to germinate successfully?
First, the temperature should be warm. This is the most critical factor for high germination rates. Pepper seeds germinate best between 80-90°F (26-32°C), which is much warmer than a typical home. This is why we love our seed heating mat.
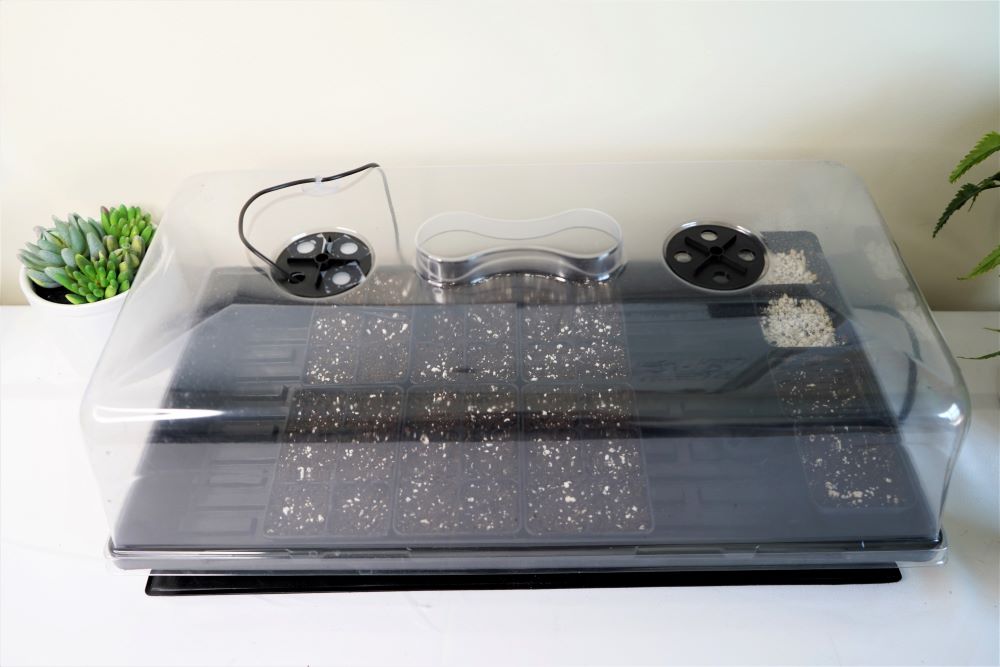
Second, water must be present at all times. If your seeds dry out for even a single day before germinating, they may end up failing. This is why we use a humidity dome. It keeps the air humid and slows down evaporation from your seed starter mix. We also use a spray bottle to lightly moisten the seed every day or two.
Lastly, oxygen must be present. This shouldn’t be an issue if you’re living on planet Earth, but we do recommend fanning out your trays daily to refresh the air.
How to Plant Pepper Seeds
With the main environmental factors in mind, it is time to plant your pepper seeds. These supplies allow us to easily control the important factors along the way.
Supplies:
- Seeds
- Seed starter mix
- Seedling cell trays
- Water reservoir tray & humidity dome
- Seedling heat mat
- Water & spray bottle
- Masking tape and sharpie (for labeling)
Again, these are not all required to successfully germinate seeds, but this is the setup we use and recommend. If you’re going to omit one item, it should be the heating mat, as they are a bit bulky and are only useful for germination.
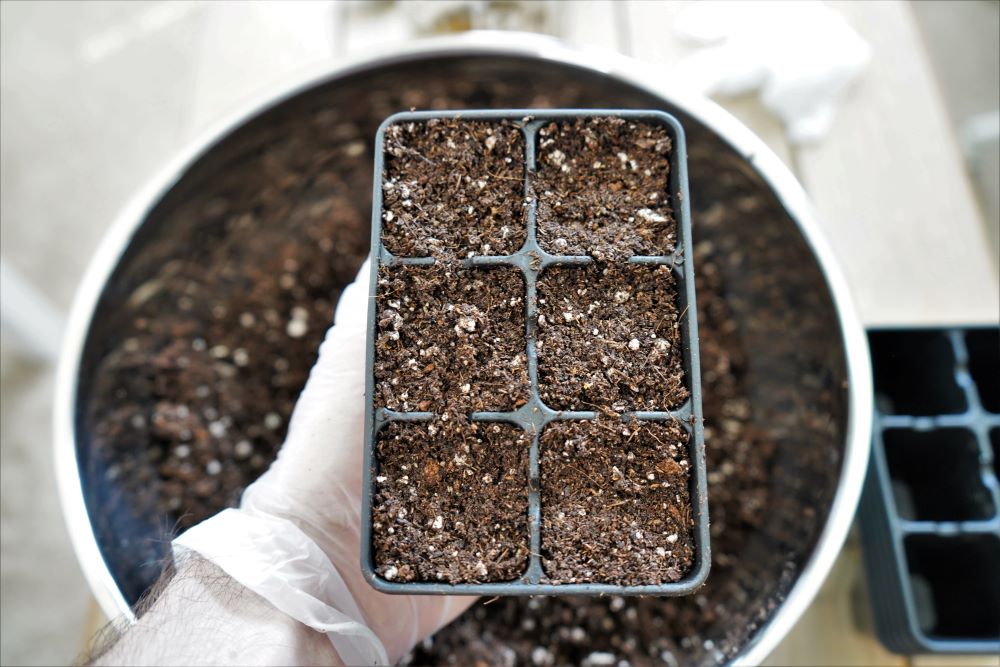
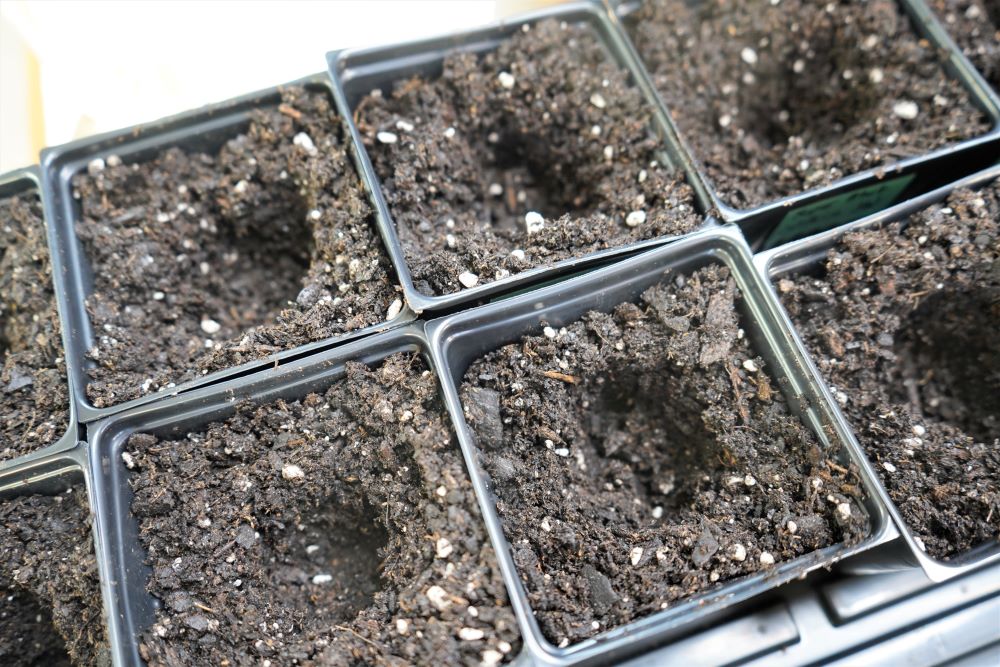
1. Pre-moisten seed starter mix. Start by pouring enough seed starter mix into a mixing container. We like to use a large bowl. Slowly add water and mix the soil evenly until is sticks together when compressed, but does not drip water.

2. Fill seed cell trays with mix. Add your moistened seed starter mix to the seedling trays. Compress the mixture until you feel some resistance, filling each container to about 1/4″ from the top.
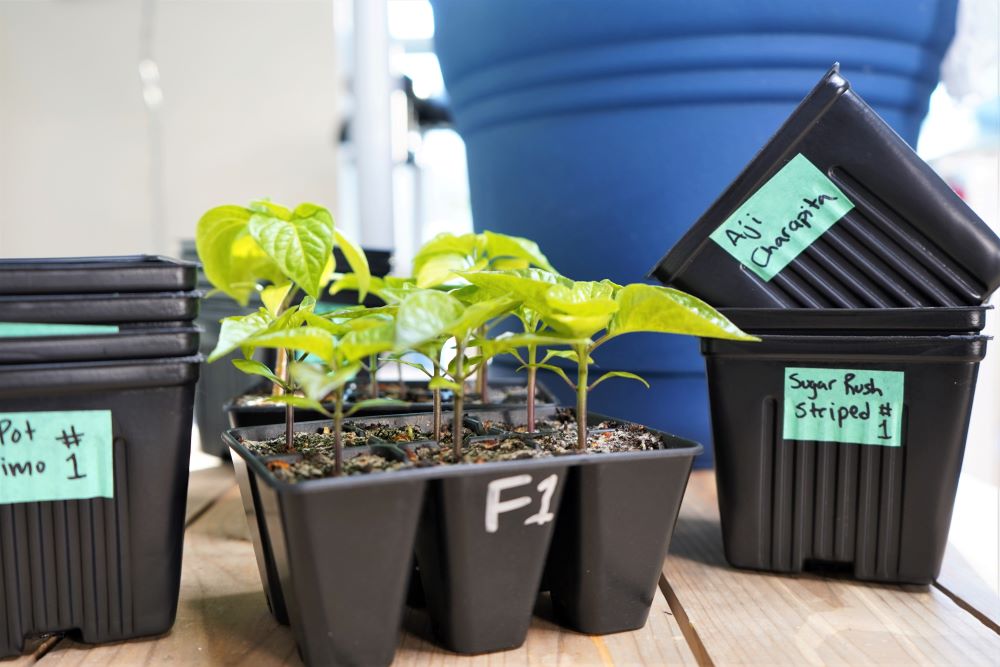
3. Label trays with plant variety. If you are growing more than one type of plant, it is always good to keep organized. Label your containers with the varieties that you will be planting.
4. Push seeds about 1/8-1/4″ into mix. Now it is time to sow your pepper seeds! Add 1-2 seeds in each seed cell, pressing it about 1/8-1/4″ (~1/2cm) deep. Don’t plant too deep or the seedlings may have trouble surfacing. We like to use a pencil tip or similar to press the seeds into the soil.
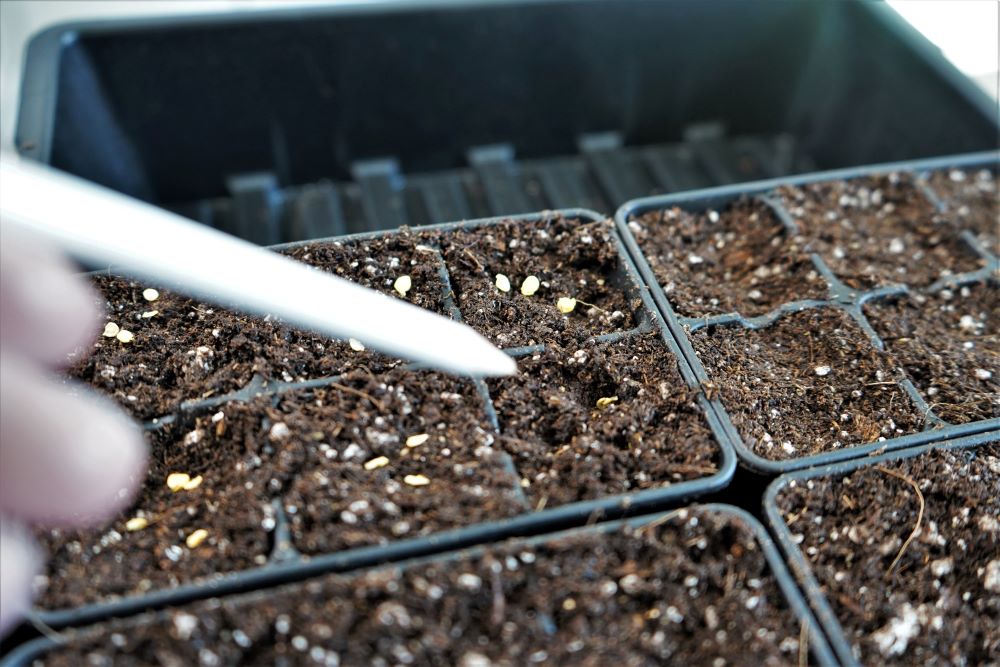
5. Cover with mix. Cover each seed with mix so that it is below the surface.
6. Spray surface of soil to moisten seeds. Once your seeds are nestled in their trays, use a spray bottle to moisten the first 1/2″ or so of mix. Make sure that the seeds below are wet.
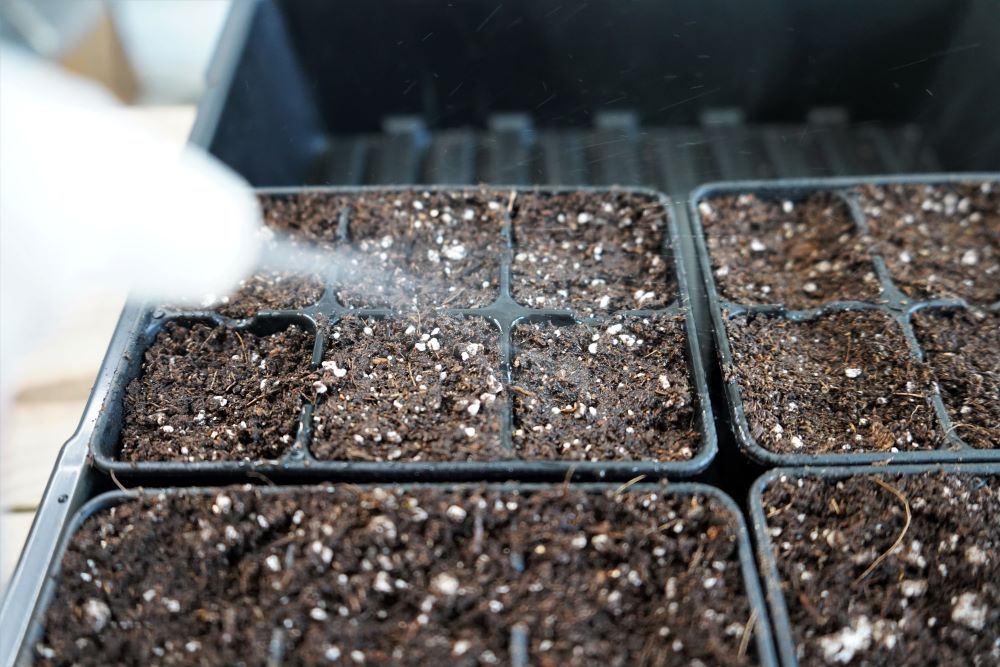
7. Cover with humidity dome. Now, all that is left to do is situate your seeds and allow them to germinate. Place the humidity dome over the trays and place them in a warm location.
8. Set seed heating mat to 80°F (26°C). If you decided to use a seedling heat mat, insert the thermometer probe into the soil of one of the seed cells. Then, set the temperature to 80°F (26°C) and place the tray on top of the mat.
Note: These are essentially a thermostat – the probe measures the soil temperature constantly, turning on the heating mat when it dips below your set temperature.
9. Aerate trays daily and spritz with water. As you wait for the pepper seeds to germinate, give them fresh air daily. Also, watch for any drying soil and spray with water regularly to keep the seeds damp. Never let them dry out!
Tip: Avoid watering with a watering can or sink faucet, as this can cause the seeds to become displaced. A spray bottle is gentle and will not disturb the seed’s position below the soil surface.
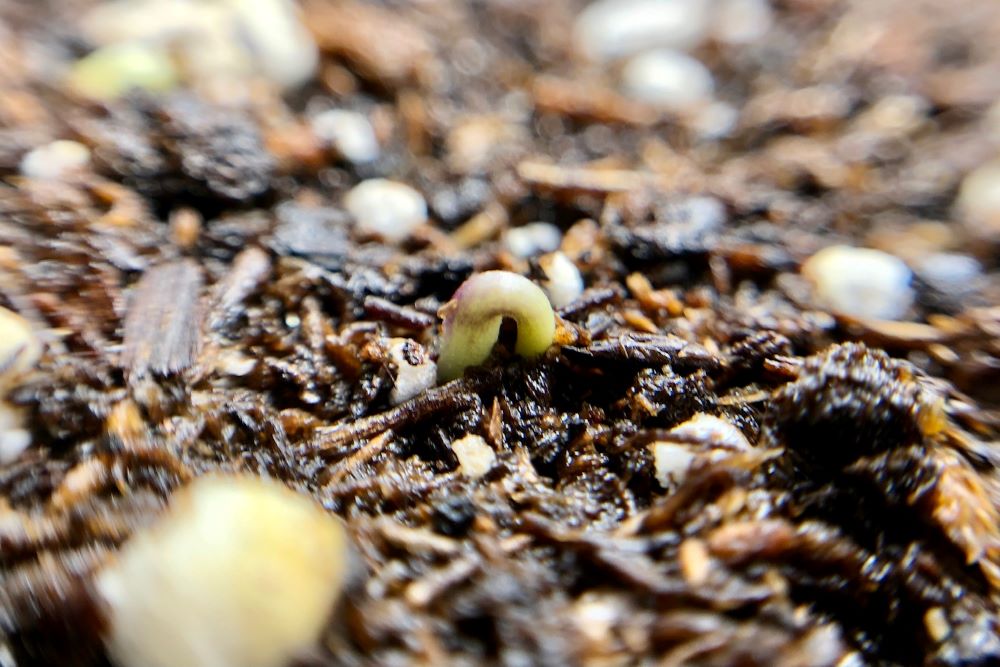
With your seed trays set up and situated, all that is left is to wait for the seedlings to sprout!
How Long Until Pepper Seeds Germinate?
Typically, pepper seeds will germinate within 7-10 days. However, for certain varieties, or older seeds, sprouting can take 14 days or more. Be patient and do your best to maintain the perfect environment for germination, and your seeds will eventually sprout.
If your seeds still fail to sprout after about 3 weeks, you may have a low quality seed, or otherwise inviable seeds. Consider trying a different seed supplier (we use several reputable seed suppliers here).
Grow Lights
Once your seedlings sprout, they will need light to begin growing. Don’t wait! Give the seedlings the light they are searching for, right away. If you have many trays of seedlings, a good rule of thumb is to move them under grow lights when about 50% of the plants have sprouted.
Once the pepper seedlings sprout, the humidity dome can be removed. If you have a transparent humidity dome, put the tray under lights with the humidity dome still on until all the seedlings sprout.
Best Grow Lights for Peppers
For the purposes of starting pepper seedlings indoors, we recommend LED panels. They are energy efficient, slim, lightweight, long lasting, and relatively affordable.
We wrote a dedicated article all about grow lights, along with a few of our personal recommendations. Read more about grow lights here.
The ViparSpectra P-series lights are a great light for small indoor grow spaces. They are a great price for what you get, water resistant, and have an easy-to-use dimmer knob. We use the P1500 for our grow tent and it has been perfect.

How High Above the Plants Should My Light Be?
If you choose a powerful LED light like the one we recommended above, you should hang the light around 18″ above the plants at full-strength. However, you can also use the dimmer knob to reduce the light’s intensity and keep them closer to the plants.
Fluorescent bulbs are much less intense and scatter more light in all directions. This means they must be placed much closer to plants, around 3-4″ (~10cm) on average.
If you see any signs of light burn, you know your lights are too close. If the light is too strong, the plants may begin to curl their leaves inwards, forming a ‘taco shell.’ If you see this, back the light away or reduce the intensity.
Can I Use a Sunny Window?
Absolutely! However, plants will likely not be as strong as those started under grow lights, but the plants should grow just fine. Some tips for using a sunny window:
- Choose a South-facing window (if in the Northern Hemisphere)
- Keep an eye on temperature, as windows can be drafty in early spring
- Rotate the trays every few days to prevent the plants from leaning towards the light
- Move any shading obstacles outside the window
We have grown plants without any artificial lighting with success, though the plants do seem to take a bit longer to develop a sturdy main stem. Still, if you’re on a budget, the window will do just fine.
Fertilizer
As your peppers continue to grow larger, they will require nutrients. Seed starting mix does not usually contain any nutrients, so fertilizing can begin when the seedlings are about 1 week old.
Read more about fertilizing peppers in our article here.
Fertilizing Peppers in Stages
We break down our fertilizer regimen into 3 basic stages: Seedling stage, growth stage, and fruiting stage. Let’s go over each stage, how old the plants should be, and how to properly feed them.
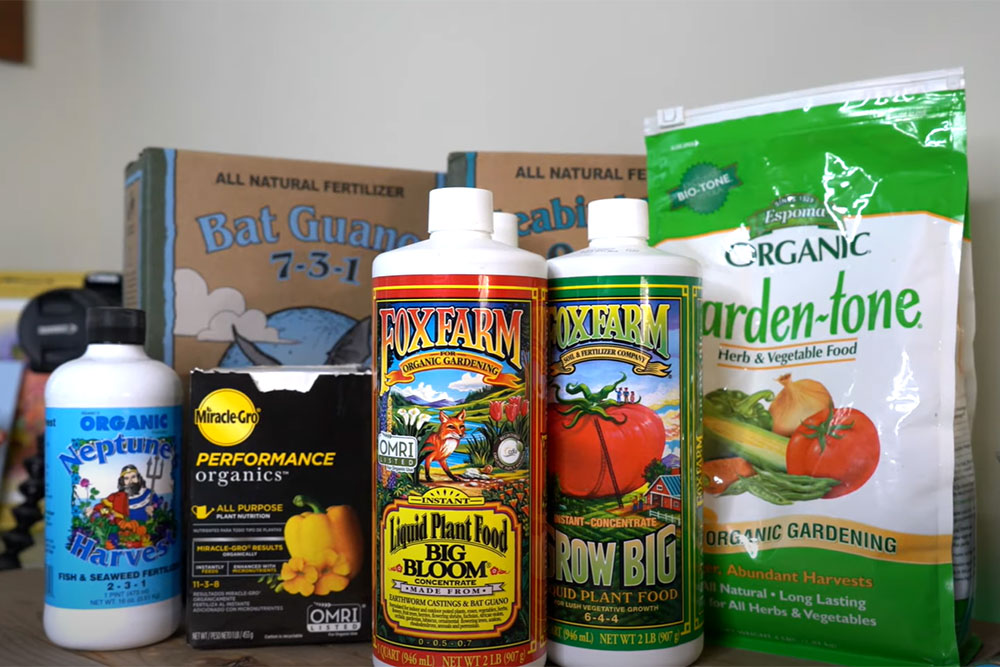
We love how easy the FoxFarm fertilizer trio is. The nutrients are not all-organic, but they are all easy to use. Switch from Grow Big to Big Bloom/Tiger Bloom when the plants are starting to produce fruit. Simple!
- Seedling stage. After your seedlings have been alive for about 1 week, you should apply a light feeding. We have used FoxFarm’s Grow Big, Miracle Gro Organics, or Neptune’s Harvest Fish & Seaweed fertilizer with success.
- Growth stage. After you transplant your pepper seedlings into larger containers, they will grow for several weeks until they are well-established and moved outside. During this time, they like to have an even supply of all nutrients, but need more nitrogen. This is the most important fuel for healthy leafy growth and a nice green canopy of energy-producing foliage. Simply continue using Grow Big or Miracle-Gro, only use them at full-strength.
- Fruiting stage. As your plants transition to producing fruit, they still need a good balance of nutrients. However, the most important shift is to reduce nitrogen. Too much nitrogen will lead to a beautiful pepper bush, without many peppers on it. To reduce nitrogen, switch to FoxFarm Tiger Bloom or another bloom stage fertilizer with higher levels of potassium, phosphorus and calcium. Or, you can simply reduce the amount of all-purpose fertilizer.
Tip: If you use a potting mix with a complete nutrient supply, you can usually allow the plants to grow for several weeks before requiring fertilizer. For example, when we transplant into FoxFarm Happy Frog, the plants usually grow well for 3-4 weeks before needing additional fertilizer.
Side dressing is the process of adding granulated fertilizers or other amendments around the base of an established plant. As it rains or during watering, the nutrients will seep down into the soil, reaching your pepper plant’s roots and nourishing the plant.
More About Fertilizing Peppers (Video):
Inadequate nutrients can lead to a variety of issues, including yellowing leaves, curled leaves, poor plant production, and eventually plant death. Container peppers usually require the most attention as you are controlling everything in the soil, from scratch.
Watering
Water is essential for all plant life. Peppers need a consistent water supply, so not too much, not too little. To achieve this, let’s discuss the signs of over-watering and under-watering.
Over-watering will quickly stress your pepper plants. They need good drainage so that the roots can access oxygen. Water can close off the root system from air, essentially drowning the plant. To avoid this, always allow potted plants to drain, remove excess water after bottom watering seedlings, and always check soil for dryness before watering again.
Under-watering is less of a problem, as the plant will give you a clear sign that it needs a drink. Wilted leaves is a clear distress signal of a dried out pepper plant. The leaves will go limp, drooping significantly. Thankfully, watering the plant should revive the leaves in a matter of an hour or so.
Automatic watering is usually safe, so long as the planting container has good drainage. Raised beds are naturally good at draining, and pots usually have pre-drilled holes.
We like automatic irrigation, like drip lines and soaker hoses for easy watering for lots of plants. However, if you plan to use an auto watering system, make a habit of checking the moisture levels before watering.
Learn more about watering pepper plants here.
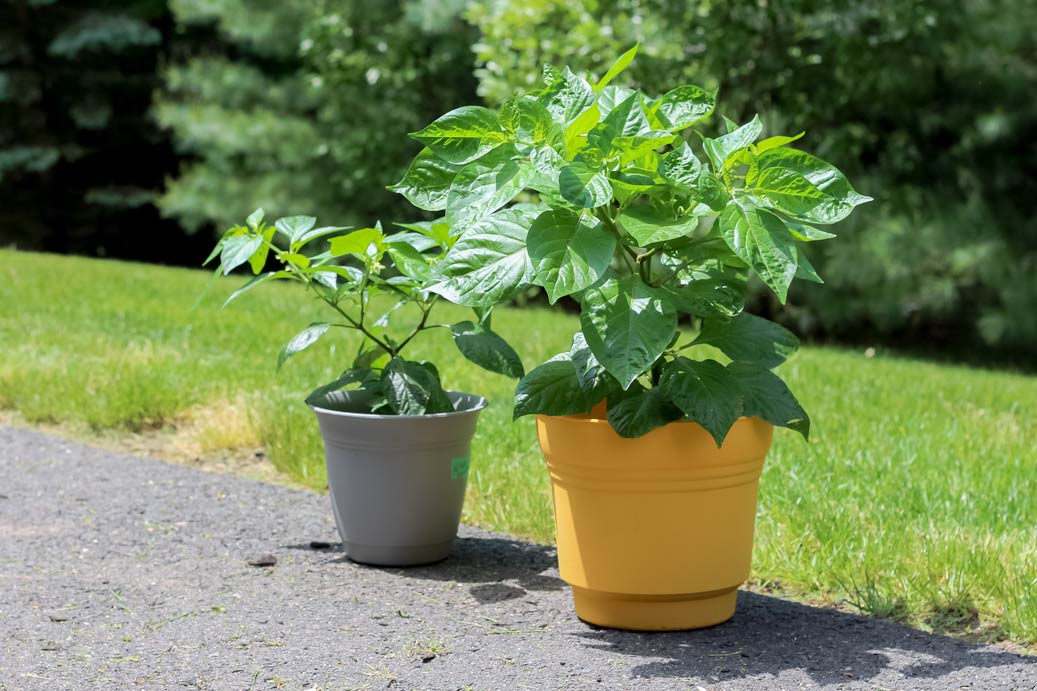
Container Size and Soil
This section will focus on containers, potting mixes and in-ground soil. Container gardening is all about creating and controlling the soil ecosystem for your peppers. But first, you have to decide on a container size.
How Big of a Pot for Peppers?
In general, we recommend using a 3-5 gallon (11-19 liter) pot for any pepper variety. This translates to about a 10-12″ (25-30cm) diameter pot, measured at the top.
Jalapeños, banana peppers, fish peppers, thai chilies and other small C. annuum varieties should grow well in a 10″ pot. Some large types, like ghost peppers, habaneros and bell peppers, will benefit from up-sizing, and some can grow to be huge!
My favorite example of a massive pepper plant is ‘Nigel,’ the huge Dorset Naga plant that produced over 2,400 peppers in a ~37 gallon pot. Check him out here.
Potting Mix
Potting mix can make or break your entire grow. Without the proper balance of aeration, drainage and water retention, your peppers will suffer.
One all-in-one soil that we have had great success with is FoxFarm’s Happy Frog. The soil is not cheap, but you get what you pay for in this case. Full of mycorrhizal fungi and natural ingredients, it has grown some amazing pepper plants for us.
The best part is that it gets our plants to about 2 feet tall before we need to fertilize manually! It is not listed as organic, but FoxFarm told us that it contains all natural ingredients.
Note: It is almost always cheaper to buy potting mix locally to avoid shipping fees. Call your local nursery for availability before buying soil online.
For homemade potting mix, a great rule of thumb is to have about 1/3 compost or other organic material, 1/3 drainage and aeration material (like perlite or vermiculite), and 1/3 water retaining material (like peat moss or coco coir).
Making your own soil is usually cheapest, but just make sure you get high quality ingredients.
What About Compost?
If you are growing in the ground, you may not need to fertilize at all. We always recommend getting a professional soil test done to analyze your soil’s nutrient content and pH.
If you have a place to produce your own kitchen-waste compost, get started on it ASAP! Compost is great for in-ground beds and even making your own potting soil. Natural compost is full of nutrients and beneficial bacteria that form symbiotic relationships with pepper plant roots.
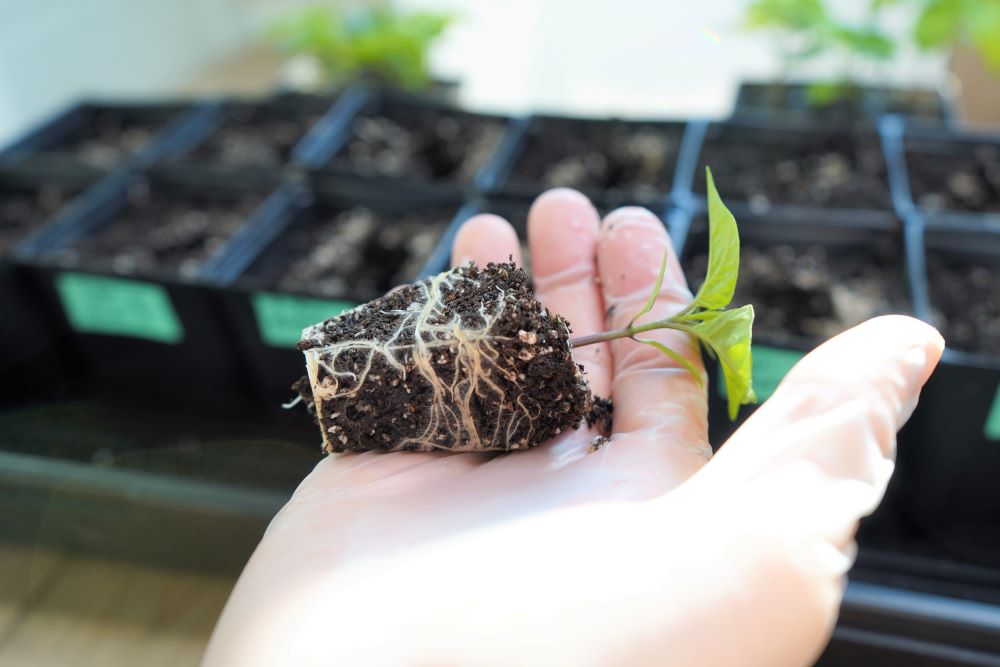
Transplanting
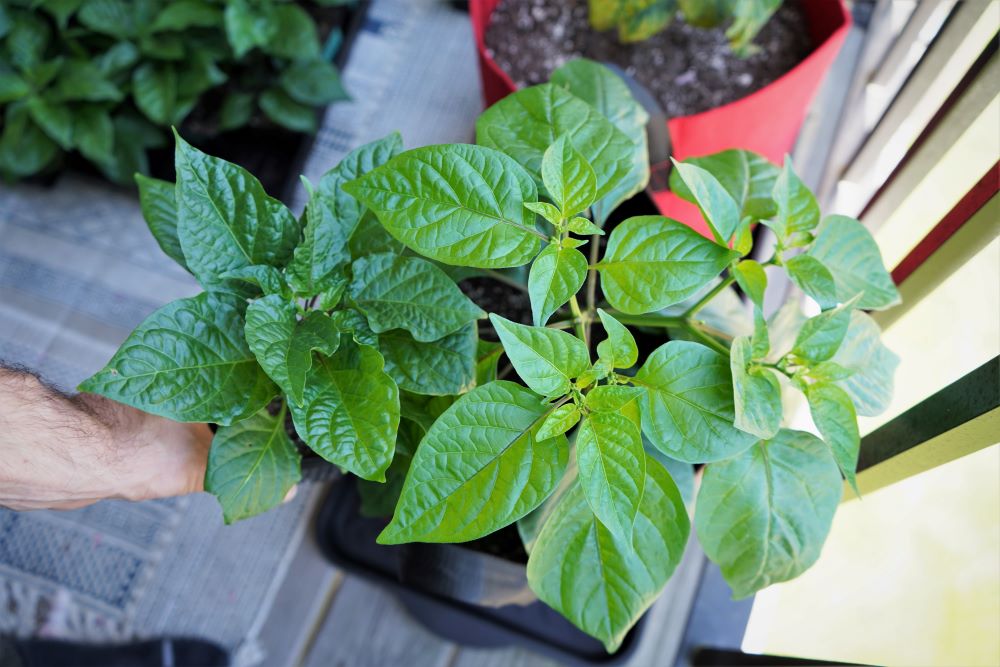
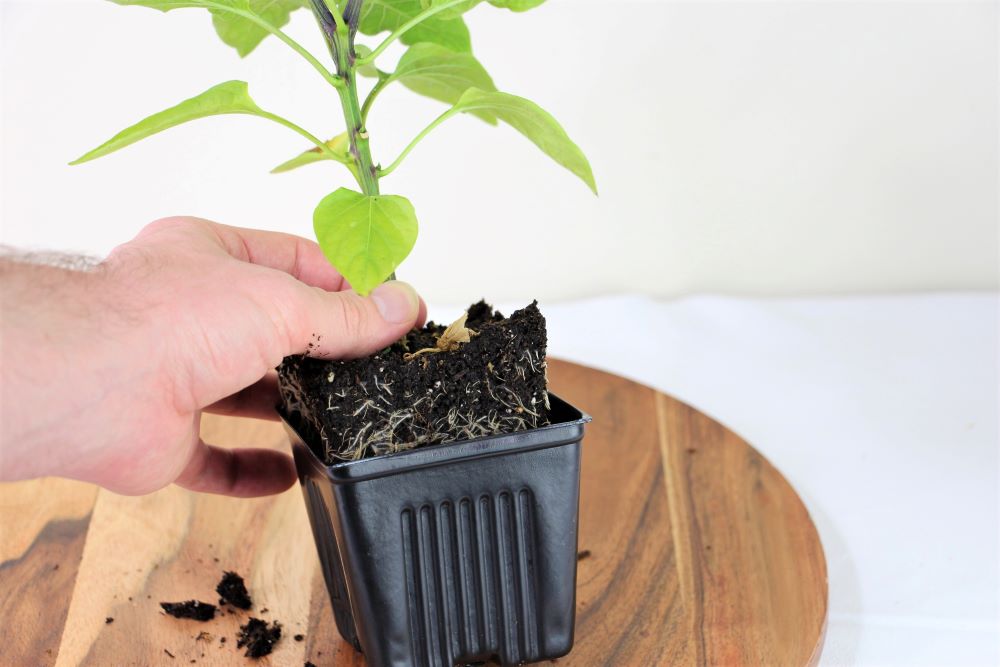
As your seedlings grow, they will quickly outgrow their seed cell trays. At this point, we like to transplant up to larger, 3-4″ pots to continue growing for a few more weeks. Then, the plants are moved one more time to a final location.
When should I transplant pepper seedlings? Peppers seedlings should be moved into larger containers after about 2-3 weeks of growth, or when the roots have reached the bottom of the seed cells. The plants usually have 2-3 sets of ‘true leaves’ at this stage.
How to Transplant Pepper Seedlings
1. Pre-moisten potting mix. Most bagged potting mix is dry. Pour enough soil into a mixing bowl and slowly add water while you mix. The soil should stick together when squeezed, but should not drop water. This is the same process for sowing seeds.
2. Label and fill larger pots. Label your new pots with the plant variety that is being transplanted. Then, fill each pot about 3/4″ full with the prepared potting mix. Compress lightly until you feel resistance, adding more as you go.
3. Dig a small hole in soil. Dig a hole large enough to fit the seedling root system.
4. Move plant into new pot. Gently remove your pepper plants from the seed cells by massaging the plastic pots to loosen the roots. Place the root system in the new pots, surrounding with additional soil until the stem is at the same level as before. Do not bury the stem, as this can lead to rot.
5. Compress and water thoroughly. Compress lightly and water the plants thoroughly to encourage quicker integration.
With the transplanting complete, you can move your plants back into their original growing location. At this point, your peppers will take up much more room, so make sure you have the space.
After the plants outgrow their larger pots (about 4 more weeks), they will be transplanted a final time. When it is time to move your plants into the ground or into their final pots, come back to this section and simply repeat the process.
For in-ground planting, you may wish to amend the soil to add nutrients. Bone meal, blood meal, bat guano, Epsom salt, and all-purpose fertilizers are all common garden amendments at the time of transplanting. Only amend if you need to add nutrients to the soil.
Hardening Off
As your plants grow larger, the weather outside will be warming up. Once the weather is above 70°F (21°C), we will begin to harden off our plants.
Hardening off peppers is the process of gradually transitioning indoor plants to the outdoor elements. This includes direct sunlight, wind, and precipitation. The process usually takes between 2-3 weeks depending on how much sun you get.
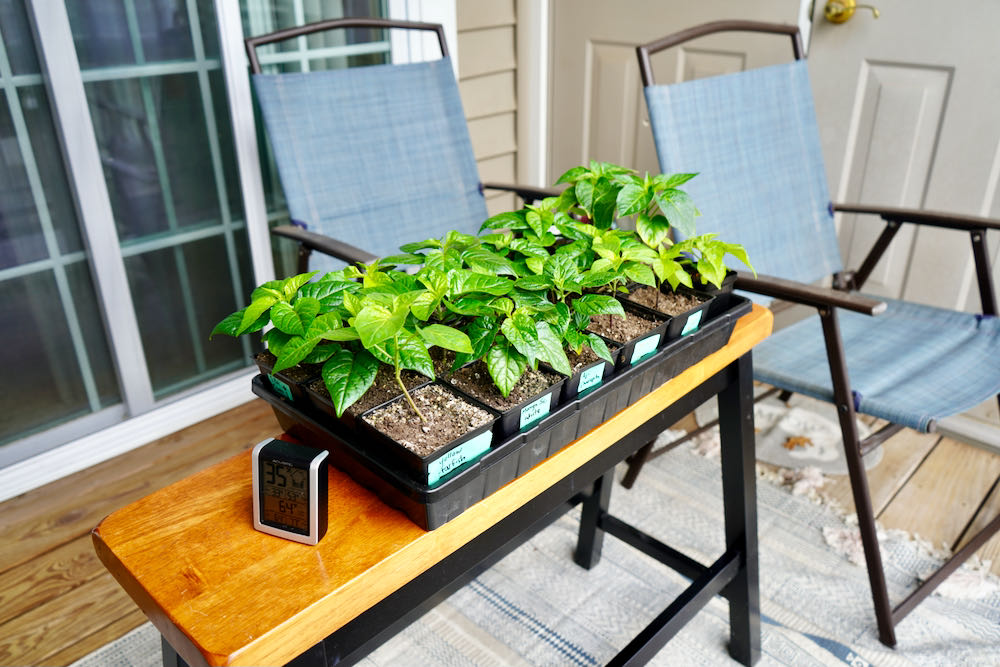
We like to begin hardening off on an overcast day. This prevents sun scald, allowing the plants to experience natural wind and filtered sunlight. After a few days of cloudy (or shaded) weather, the plants can be introduced to sunlight.
Signs of a stressed plant:
- Wilted leaves
- Sun scald
- Bending main stem
If any of these symptoms arise, move the plants out of the sun right away and allow them to recover. Rushing the process of hardening off can lead to dying leaves, seriously setting back your plant’s progress!
How cold is too cold for peppers? Most pepper varieties do not do well in temperatures below 55°F (13°C). While your plants are hardening off, you will need to bring them back indoors to avoid cold overnight temperatures.
After about 2-3 weeks of gradually increased amounts of sunlight, the plants should be able to tolerate direct sunlight, all day.
Pepper Problems
Unfortunately, growing peppers isn’t always fun an games. There are a variety of common issues that you may have to deal with, from pests to disease and more. We have an in-depth article all about pepper plant problems – Read more here.
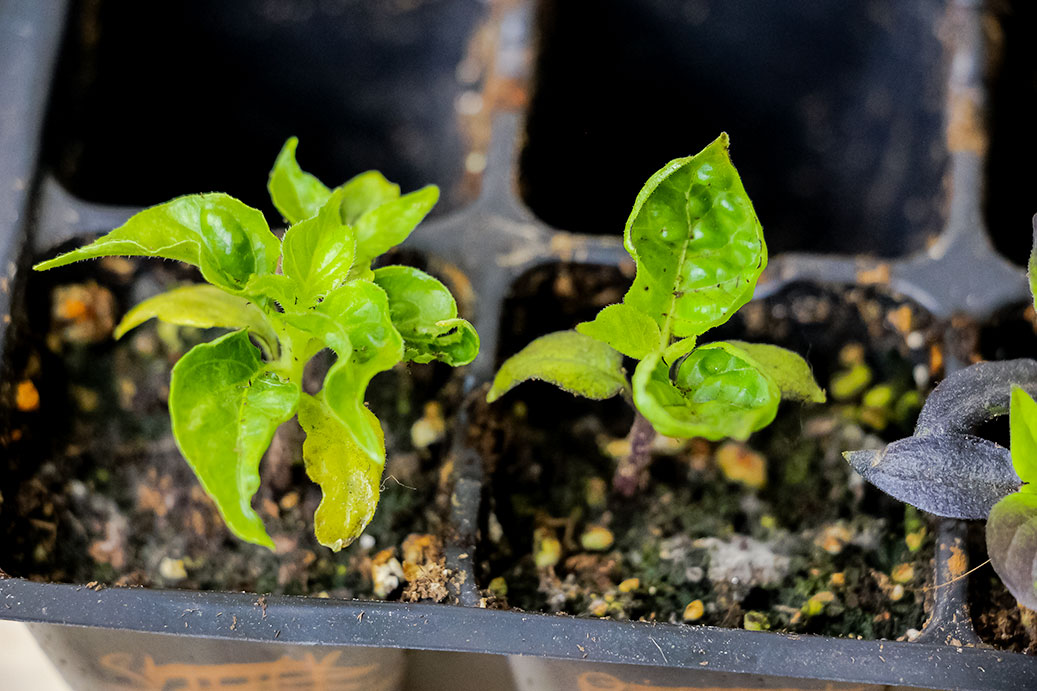
Curling Leaves
Curling leaves is the most common issue people have with pepper plants. It is most common on young, indoor plants. There are a variety of causes, which is why we made a YouTube video about it here:
In short, don’t over-water, keep your lights an appropriate distance from the plants, and prevent your peppers from becoming root bound. Also, provide some air flow to help prevent plant edema. Read more on curling leaves here.
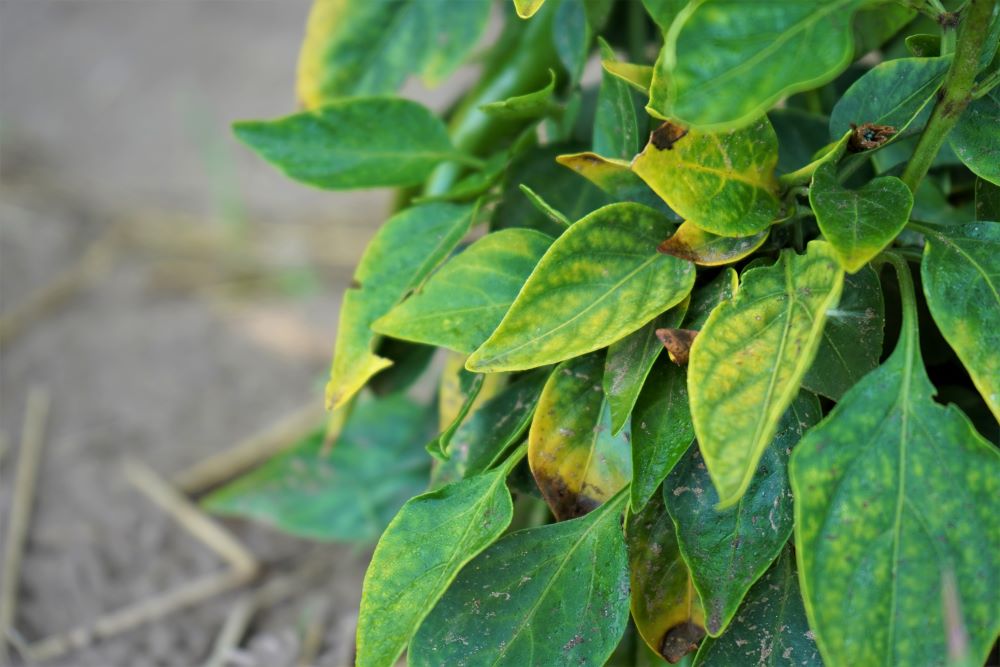
Yellowing Leaves
Another common leaf issue is the yellowing of pepper leaves. Again, there are a wide range of possible causes, like a nutrient deficiency or over-watering.
In general, yellow pepper leaves is usually caused by a nitrogen deficiency, over-watering, sunscald, or cold weather. Read more on yellowing leaves here.
Pests
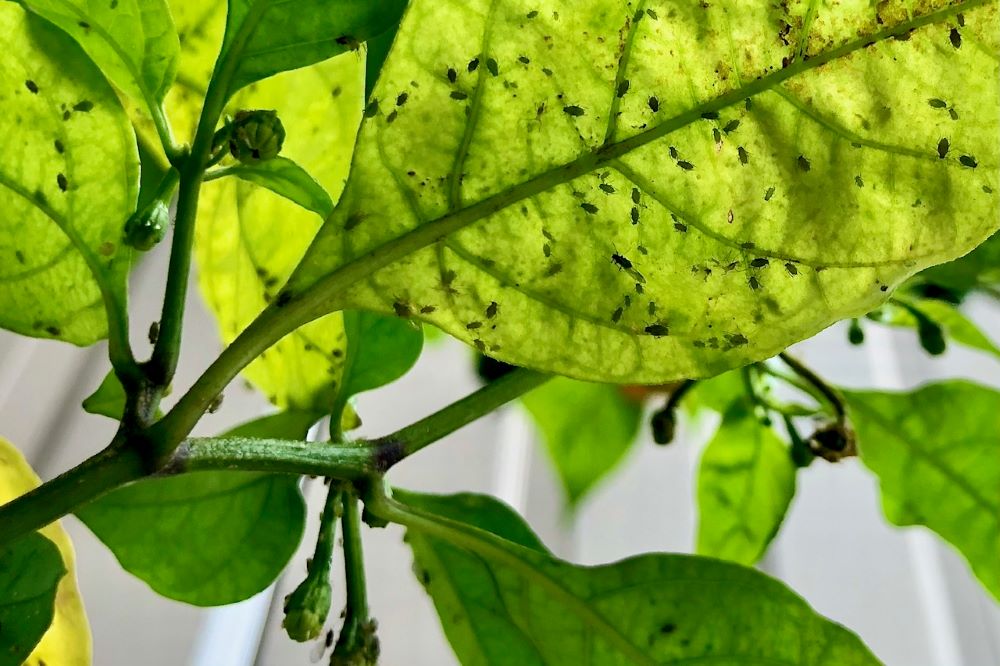
Any garden plant has at least one nemesis. Peppers have many. From rabbits eating young foliage, to aphids sucking sap from the plant’s leaves, and many more.
There are a variety of easy measures you can take to reduce pest problems. For example, plant other plants that attract beneficial insects. These include yarrow, marigolds, tansies and more.
If you have an active infestation of aphids or thrips, try our neem oil spray recipe. In 1 gallon of water, add 1 tbsp of 100% neem oil and 1-2 tbsp of Dr. Bronner’s Castile soap and mix thoroughly.
Using a spray bottle, wet the leaves, top and bottom, every day to help control the problem. This solution kills aphids, but most likely not completely eradicate the pests.
Read more about dealing with aphids here.
Disease
One of the most dreaded issues that can plague a pepper plant is disease. There are a wide variety of diseases that affect peppers, from Bacterial Leaf Wilt, to Leaf Spot, to Mosaic.
Some diseases are spread by pests, like TMV, while others are soil-borne. Keeping pests at bay is a great way to prevent disease. For soil-borne disease, we recommend mulching and bottom pruning.
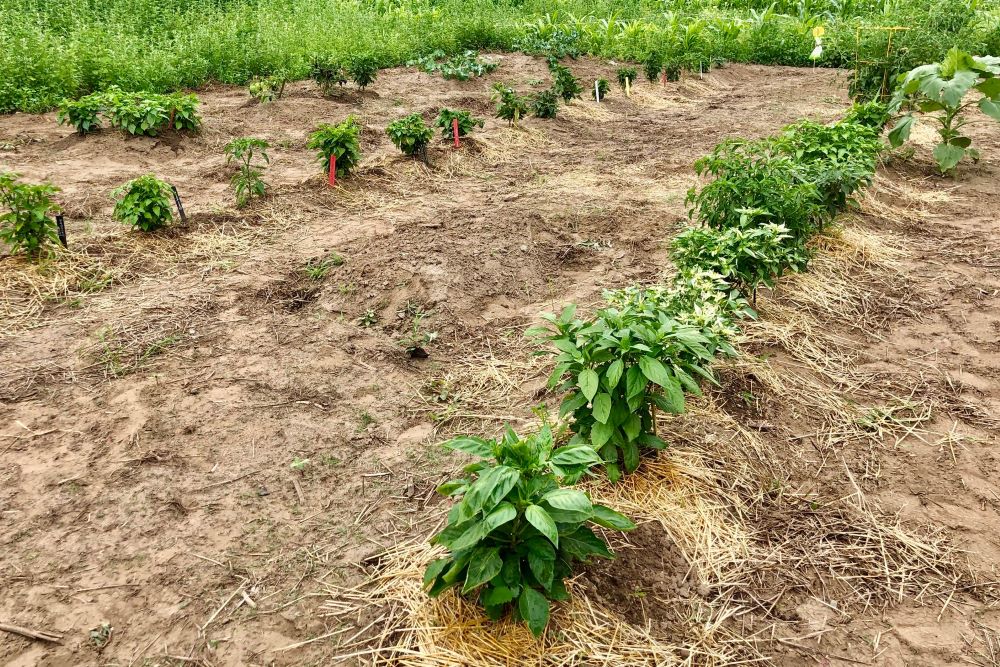
To prevent soil from splashing onto a pepper’s leaves, we like to bottom-prune low leaves. This keeps the foliage up and away from the soil’s surface. Additionally, we always mulch around the base of our plants.
Rainfall splashes soil particles up onto low leaves. To dampen the fall, use straw, fabric weed barrier, or grass clippings to mulch your peppers.
Tip: Don’t use hay as a mulch as it can contain seeds which may germinate.
Not only does mulching help prevent disease, but it also keeps weeds to a minimum and protects the root system from cold weather. Mulching is highly recommended for making your garden easier to manage!
Read more about pepper plant diseases here.
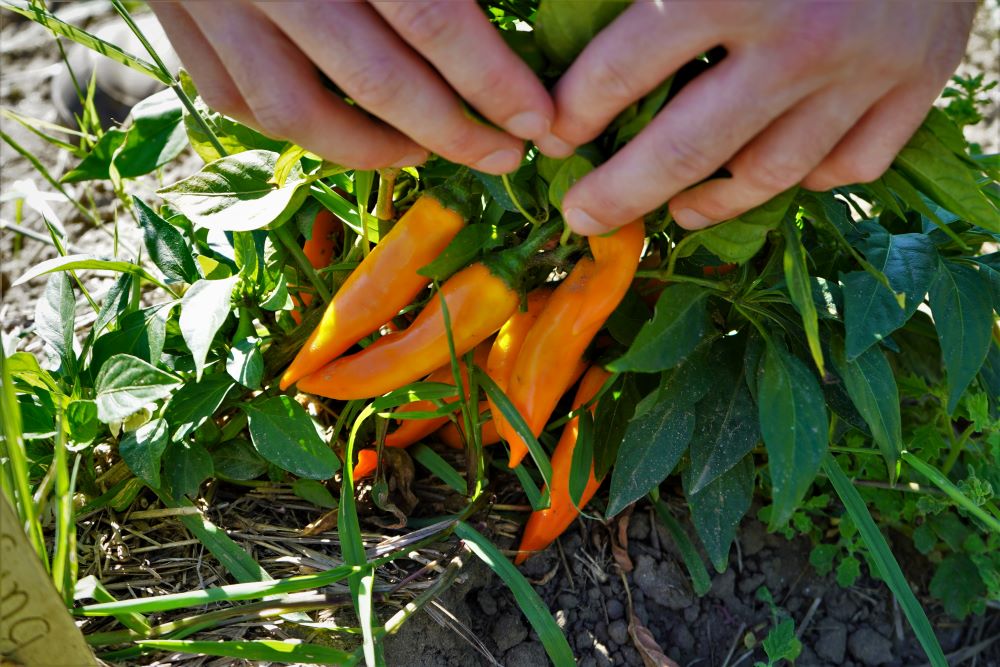
Harvesting Peppers
After a season of pepper plant care, your plants will begin to reward you with harvests! We recommend allowing most pepper varieties to fully ripen before harvesting, though it is not always necessary.
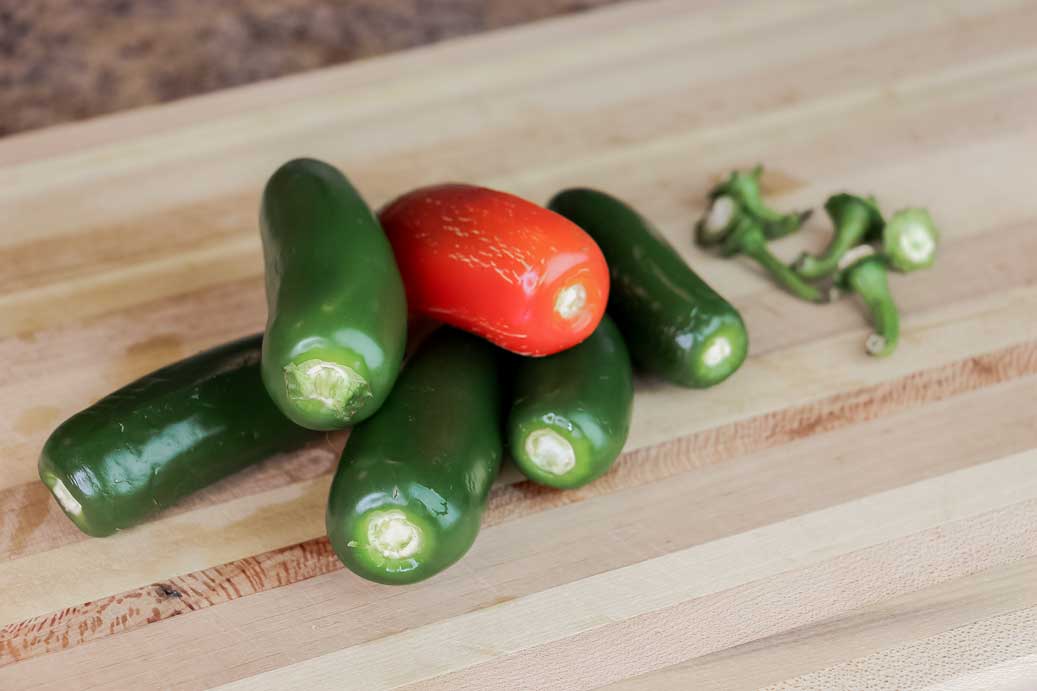
When should I pick jalapenos? Jalapenos are often picked before fully ripening, while they are still green. If allowed to mature on the plant, jalapenos will turn a bright red color and will have a sweeter taste and softer skin.
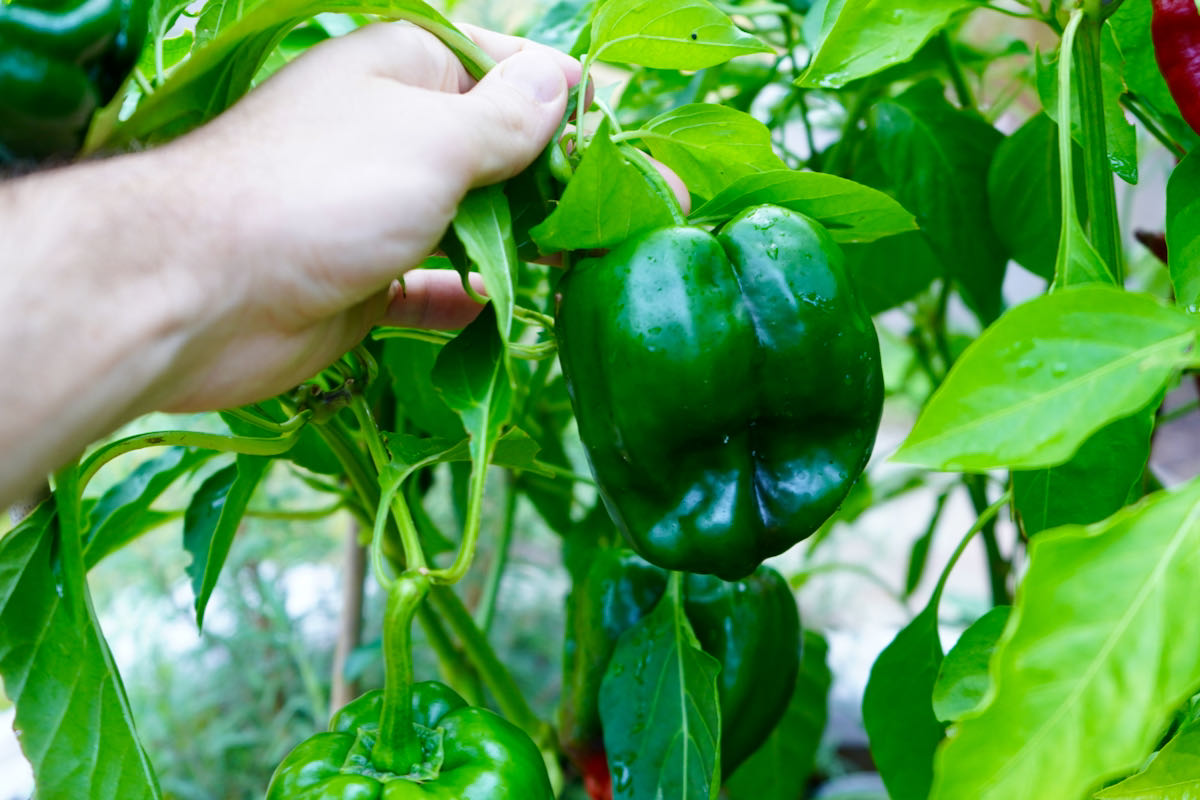
The same is true for green bell peppers. Pick either variety at the stage you prefer, just be sure to allow the peppers to reach a mature size first!
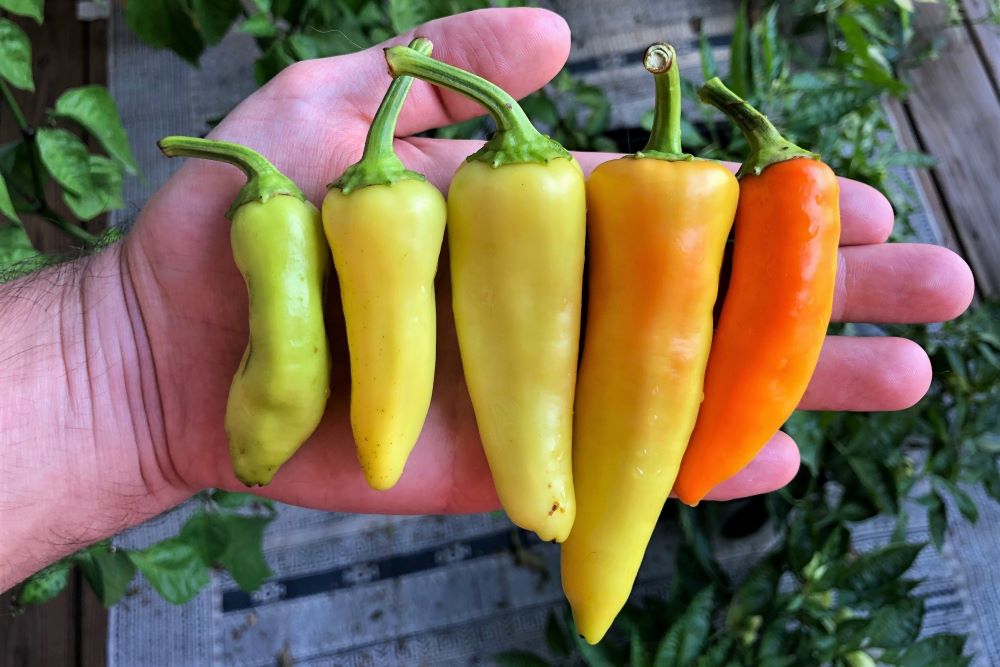
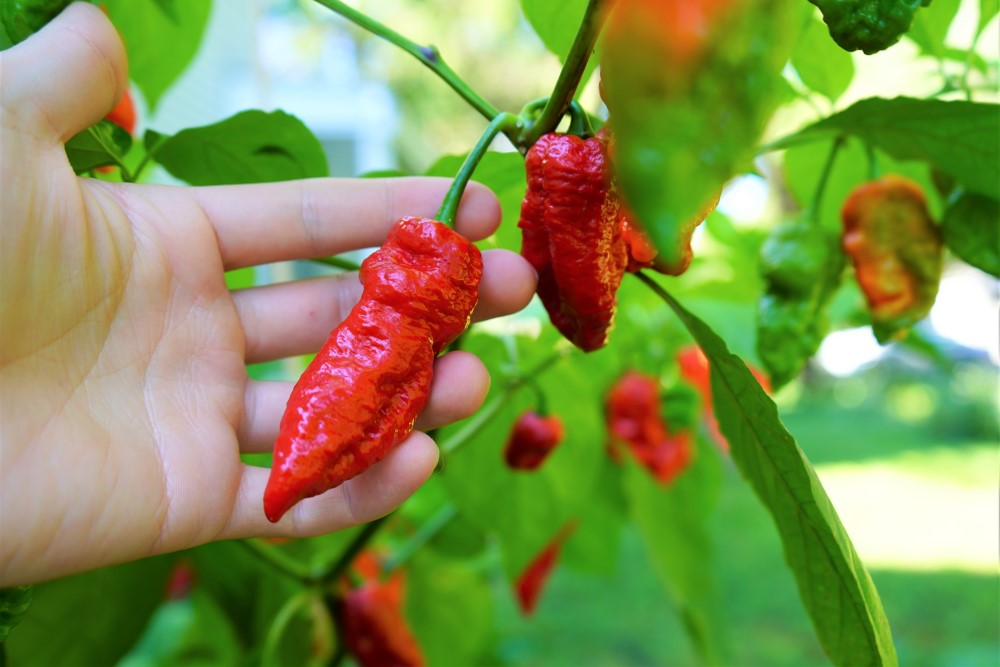
When should I pick peppers (generally)? Almost all pepper varieties will make a drastic change in color when they are fully ripe. This is the best indicator for when to pick most pepper types. If the color has changed, the pepper is ripe and the seeds are likely viable for saving as well. For the hottest peppers, it is best to pick as the peppers are just turning ripe.
What To Do With Peppers?
Now is the real fun part – eating your fresh peppers! The best way to enjoy peppers is fresh, so we always encourage you to eat them on salads, pickle them, or cook them the same day. If you can’t eat them all, share with friends and family.
Using Fresh Peppers
- Spicy guacamole
- Jalapeno poppers
- Stir-fry
- Stuffed peppers
- Roasted peppers
- Replace tortilla chips with crunchy sweet peppers
Preserving
The sky is the limit, and when you have a bountiful harvest, you can get creative in the kitchen and experiment. Let us know your favorite ways to use peppers from the garden – we know you have something we’ve never tried!
Pepper Growing Tips!
With all of the basics covered above, we’ll share some quick tips and tricks to make your pepper growing experience smoother.
Use a Fan Indoors
As your young plants are growing indoors, it is beneficial to mimic the outdoors. We run an oscillating fans to imitate wind, and we also expose young plants to cooler temperatures (~60-65°F) by cracking a window at night.
Don’t Over-Water!
Over-watering is one of the #1 killers of pepper plants. If water becomes trapped in your pots with nowhere to drain, it could suffocate the roots. This leads to root rot, curling leaves, and eventually death. Allow for drainage and check soil for dryness before each watering.
Use Garden Fabric
Garden fabric is a great tool to have in the shed. It can be used to help harden off plants, or it can also protect plants from cold and frost to extend the season a few weeks. We have even used it to create a makeshift hoop-house over our garden bed, keeping out animals and protecting from cold and intense sunlight.
Fencing
If you are growing in your yard, there are animals that like to feast on exposed pepper plants. This is especially true when the plants are young. Rabbits and mice love fresh foliage and can devour an entire plant in a single day. Use metal fencing or similar to keep out the bunnies. You can also hang a fake owl or hawk to scare away many harmful critters.
Mulch
Use straw or grass clippings as a cheap way to mulch around the base of plants. Make a nice, thick layer of mulch (2-3″ thick) to suppress weeds, prevent soil splashing, and improve water retention.
Whew! I know this article is massive, but it should be useful if you are relatively new to gardening. Come back to it as your pepper plants progress, and sign up for our newsletter to receive free pepper tips and advice every Sunday!
Read Next:

Calvin
One of the original Pepper Geeks! When Calvin isn’t gardening or learning more about peppers and botany, he might be traveling new places or playing some music.


What is the ideal pH for each phase: growing and blooming ?
pH should be slightly acidic, between 6-7
Hello Pepper Geek. Thank you fro such an informative site that I’m using as a guide growing red Bell Peppers on our deck this year. I have some questions I’m hoping you can help with:
1) Is it best to plant companion plants to help repel insects &aphids) in the pot with the pepper plant or are they as effective planted in the own pots next to the pepper plant? It seems that by planting them together the companion plants would deplete the water & nutrients vs having it’s own pot.
2) Should a layer of mulch be added when growing peppers in pots?
Thank, in advance, for your reply & suggestions. CathyAnn
For 1, you can plant smaller companions in the same pot (we use alyssum frequently), but nearby in a separate pot works too. As for 2, mulch is helpful in pots too, but isn’t required. It won’t provide as many benefits as it does to true in-ground soil, so it’s up to you. You may have to pluck a few weeds without mulch, but it isn’t as much of a hassle in pots. Best of luck with the bell peppers!
Hello Pepper geek I was wondering if you have any advice on growing quick bottle rocket peppers, I have followed the proper instructions on a packet that I brought from Johnny’s (https://www.johnnyseeds.com/) and I have your lighting, plotting, water, etc. advice I am just asking if there is any more advice. -Malik
I need a few different packs of your pepper seeds. How do I order…thanks
We do not sell seeds
Do the pepper plants have to stay under grow lights the entire time till transplantation outdoors? My pepper plants are growing well under grow lights. They are about 4-6 inches tall. However, I will be away a week or so and don’t have grow lights that set on a timer so am planning to put them in front of a bright window. We still have 2-3 weeks before they can be transplanted outside.
Thank you for all your useful info and for answering a gazillion questions.
Absolutely, you can place them in a sunny window. Growth may slow down a bit, and they might stretch slightly towards the light, but they’ll live! Probably for the best while you are away anyways so they don’t drink as much water.
Is it ok to top off pepper plants more than once?
Yes, you can prune as needed to keep the plant shaped how you like, it will simply put out more growth from lower nodes as long as the conditions are favorable
What depth do you transplant your peppers at? Seeing mixed reviews that you should transplant them deeper than root ball because like tomatoes they will grow adventitious roots but I also am reading that you should just transplant at the level of the root ball?
They can grow adventitious roots, but it takes them a bit longer. I have tried both methods and it does work planting deep, but I haven’t seen it to be worth it (yet). Maybe if your plants are tall and spindly, planting deep would help support it in an upright position. Otherwise, we always plant at the same depth as the original pot.
It seems like each year after I plant my peppers (I cheat and buy them) they just sit for weeks with no growth. By the time they start to grow, it’s hot as hell outside and that stresses them. What am I doing wrong?
It’s best to buy starts that are younger and are still in vigorous growth mode. That makes the transplanting process less stressful and they are more likely to get established more quickly. You can try transplanting outside earlier with row cover for cold protection as well. We have the same thing happen though, so youre not really doing anything wrong in my book!
I’m not sure if I have a problem or not.
I followed all the instructions and all my peppers are doing fantastic. I’m fertilizing with Miracle Gro Organics as prescribed, half strength, for “Stage 1″ growth.
As I said, everything is going great, I have some peppers that are 12″ and others that are 8” – the issue is that flower buds are popping up everywhere and I keep pinching them off. I was hoping for more plant growth before flowering. I mean there are A LOT of flowers.
Is it normal to have a profusion of flowers this early?
I’m growing three different kinds of Cayenne and a couple of Habaneros.
One more question: The Cayennes are getting tall but the Habaneros as little shrimps – barely four inches tall – it that normal as well?
Thanks.
If they are in their final container size, then I would just allow them to flower. They should continue to grow larger while flowering/fruiting as long as they have adequate lighting, etc. Habaneros usually have a shorter/wider size, but I’d expect a bit more than 4″ if the cayennes are already a foot tall.
After the 2-3 weeks of hardening off, what is the time period to flowering with potted habanero peppers? Central Florida environment.
After the plants are growing vigorously, and in their final pot, you can let them flower. This is usually around 2-4 weeks after the plants go outside permanently, or around 10-12 weeks after sowing seeds
I am also growing my Aji Amarillo chiles in a raised bed (S. California). The plants look healthy and some of the chiles are starting to turn orange (the plants are still blossoming too). But – quite a few of the chiles are falling off before they are ripe. They are watered with a drip system. Any suggestions as to why the fruit is falling off?
I’m growing peppers in raised beds this year. My pepper plants are large and healthy, with loads of peppers. However all the varieties are lacking in heat and flavour, even the super-hots. They all taste like sweet bell peppers. Any tips on why my hot peppers may not be developing heat?
Love your videos, by the way! Please keep them coming.
Can I apply solid fertilizer to young seedlings
Great information!
Do you reuse the soil when using a 5 gallon smart pot or do you always start with fresh soil?
We definitely reuse soil, though it is best to use it for another crop family if possible (ex. go from peppers to a flower pot, or another food crop in a different species).
Hi, I bought a batch of mixed super hots on line and decided to plant the seeds from the peppers. Now I have these peppers and do not know what they are. If I send pictures can you help me identify them.
Try posting the pictures on our subreddit: https://reddit.com/r/peppergeek
The black panther and ghost peppers are ready to move into their new 5 Gallon homes . How many peppers can be / should be planted in each bucket for the best yield.
Perfect for my need thanks
Great informational page. I just found you guys on YouTube and you’ve been very helpful.
I actually live in Colombia, S. America, and I’m growing Jalapenos, Habaneros and a local pepper that the locals just have a nickname for…and I’ve already forgetten it, but I don’t know what type it is. It looks like a Thai pepper and is very hot.
Anyway, I was hoping for information on growth seasons. We have a 12 month growth season, so I can’t find any information of what to do with our plants. We don’t need to overwinter them. They are already in the ground, and we’ll probably be planting around 10 more of the Habanero and Jalapenos.
Do they continue to grow? Do we cut them down only if they seem to stop producing? The local peppers seems to just keep growing (we can see our neighbor’s plants and they are huge…but we dont’ know how old they are). Do we need to prune the bush?
Wow that is amazing! Would love to see pictures of your plants and neighbor’s plants (post some on our reddit here if you want: https://reddit.com/r/peppergeek). I know peppers can live for many, many years in tropical climates. As for pruning, I can’t really say, but I imagine it would be beneficial to trim the plants back maybe once per year to encourage fresh growth and new budding points. However, in our experience, we’ve had plants alive for a couple years and they seem to just produce continually.
Hope to see some pictures of those big plants soon!
Love your info on growing peppers!! I ordered your ebook, and was so excited when it came that I forgot to save the download! now what do I do? My order ID is 0103835800