
How To Grow Scotch Bonnet Peppers – Seed to Harvest
Disclaimer: As an Amazon Associate, I earn from qualifying purchases. Pepper Geek takes part in various affiliate programs. This means that purchases through our links may result in a commission for us.
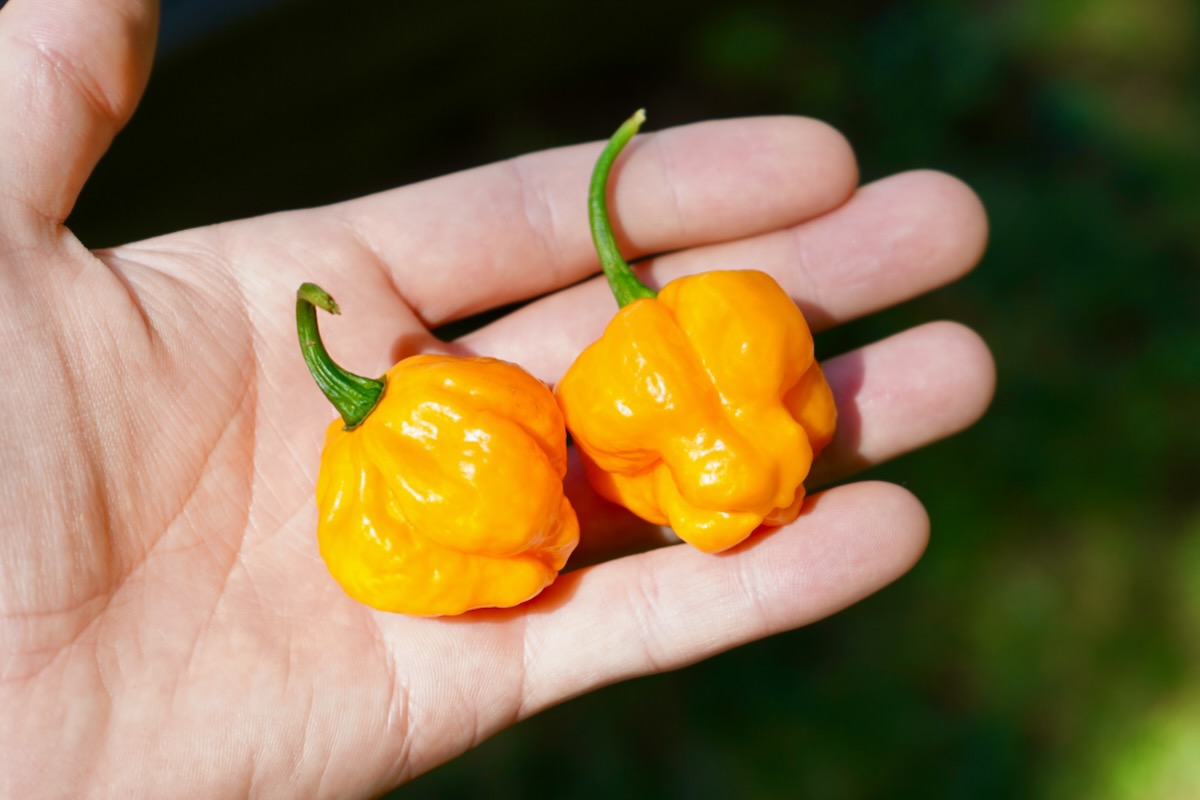
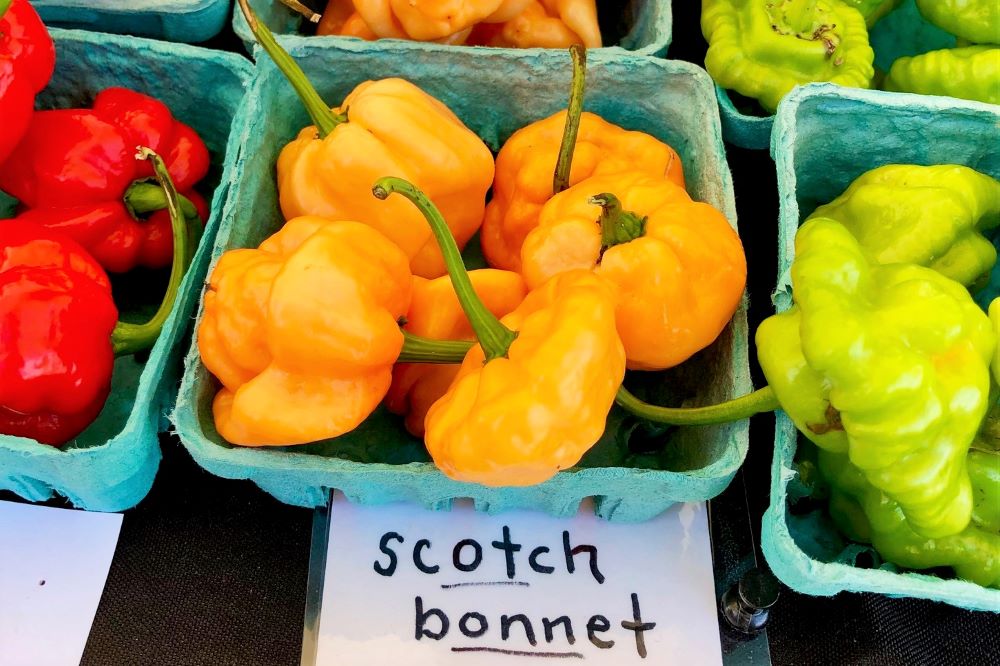
The notorious scotch bonnet pepper is an essential ingredient in authentic Caribbean dishes. It is a versatile pepper variety, often used to make Jamaican Jerk seasoning and to spice up soups and stews.
The name ‘scotch bonnet’ comes from the pepper’s resemblance to the “Tam o’ shanter” hat, a Scottish bonnet. The pepper has a rich history, making it a special plant to grow in your home garden (if you like things spicy, that is).

In this article, I share my detailed process on how to grow scotch bonnet peppers. This will include everything you need to know, including where to buy seeds, how to germinate them, watering, fertilizing, and harvesting your fresh peppers.
Planting Scotch Bonnets from Seed
Scotch bonnets come in several varieties, each with a different flavor:
- Yellow scotch bonnet (our personal favorite)
- Red scotch bonnet (amazing flavor and perfect heat)
- Brown chocolate bonnet (unique color option)
However, the process of growing scotch bonnets will be the same, whether they are a more rare cultivar or the classic land variety. Pick the type that interests you most, and know that each plant can produce tons of peppers!
When to plant scotch bonnet seeds
Before you get planting, be sure you are timing things right. Scotch bonnets should be planted from seed indoors to extend their growing season.
As a rule, plant scotch bonnet seeds indoors about 6 weeks before the last frost date in your location. This indoor growth period is critical in preparing the plants for moving outdoors when the weather warms up. Or, grow your scotch bonnets indoors year round.
Note: If you are growing in a warmer climate where the temperatures remain above 55°F (13°C) year round, you can plant scotch bonnets any time, and even sow directly outdoors.
Supplies
When planting from seed, you’ll need a few extra supplies to get the seeds started. Scotch bonnets come from a warm climate, and like any pepper seed, germinates best between 80-90°F.
- Seeds (see our recommended suppliers here)
- Seed cell trays (w/humidity dome)
- Seed heating mat (optional)
- Seed starting mix (or potting mix)
- Grow light (optional, but recommended)
- Spray bottle and water
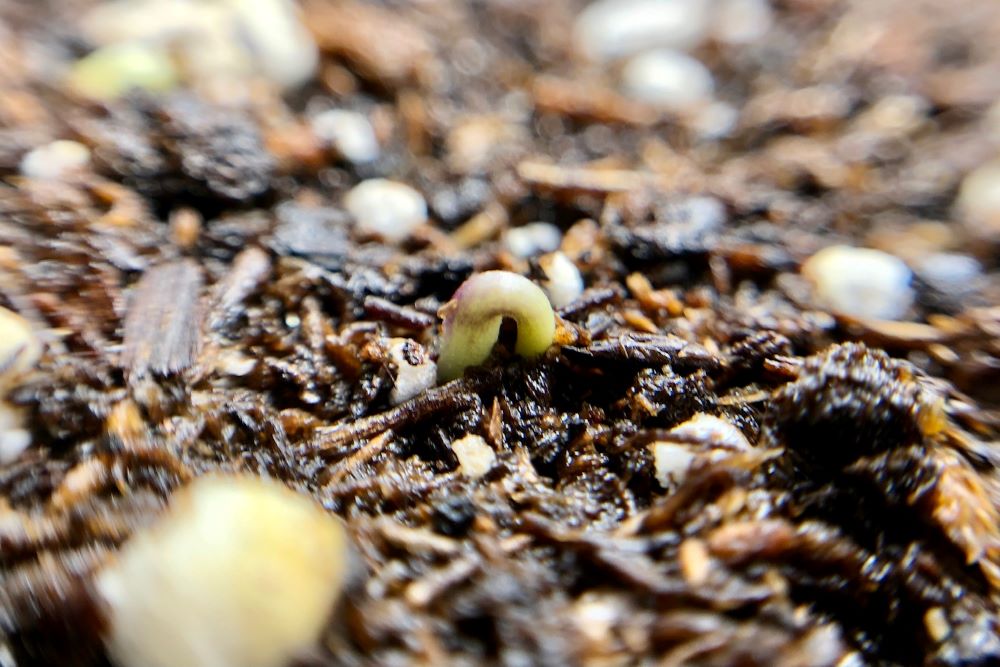
These are the essential items that I always use to get excellent germination rates, even from stubborn seeds. Scotch bonnets can take 2 weeks or longer to sprout after planting, so be patient!
How to plant scotch bonnet seeds
- Prepare soil.
Start by pouring the required amount of potting soil or seed starter mix into a mixing bowl (or similar container). Add water slowly, mixing as you go to evenly moisten the mix. The soil should stick together when squeezed, but should not drip water.

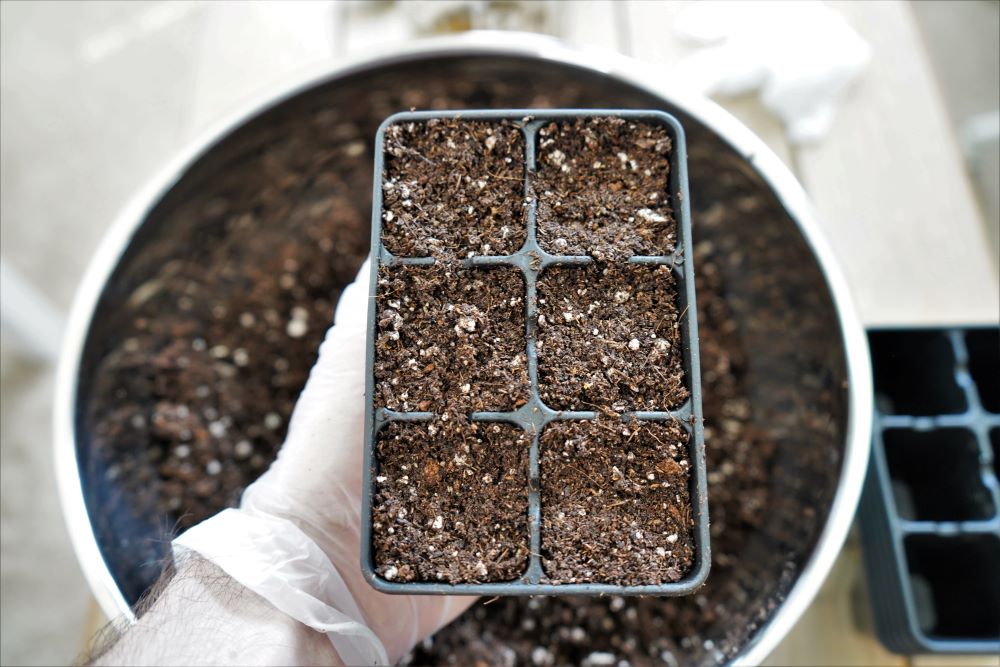
- Fill seed cells with mix.
Using the pre-moistened seed starter mix, fill your seed cell trays. Compress the mix lightly with your fingers until you feel some resistance. Don’t pack too tightly, but don’t under-compress either (otherwise the soil will collapse the first time you water).
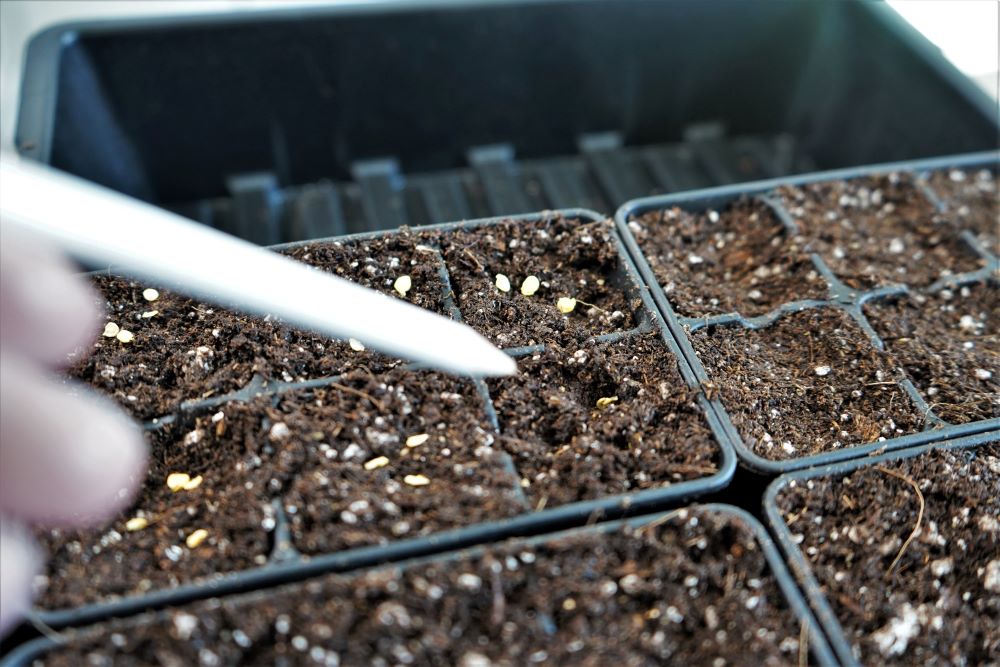
- Add 1-2 seeds per cell.
If you are growing multiple varieties, label the seedling cells before planting to stay organized. Place 1-2 seeds in the center of the soil of each cell. I usually plant multiple seeds to ensure that at least one of them germinates in every cell. If multiple plants sprout in one cell, you can pluck them early on, leaving one plant per cell.
- Press seeds 1/8-1/4 inch into soil and cover.
Press each seed about 1/8-1/4 inch into the soil’s surface. I like using a pencil or pen tip to gently press the seeds in. Then, cover the seeds with surrounding soil and tamp down the mix.
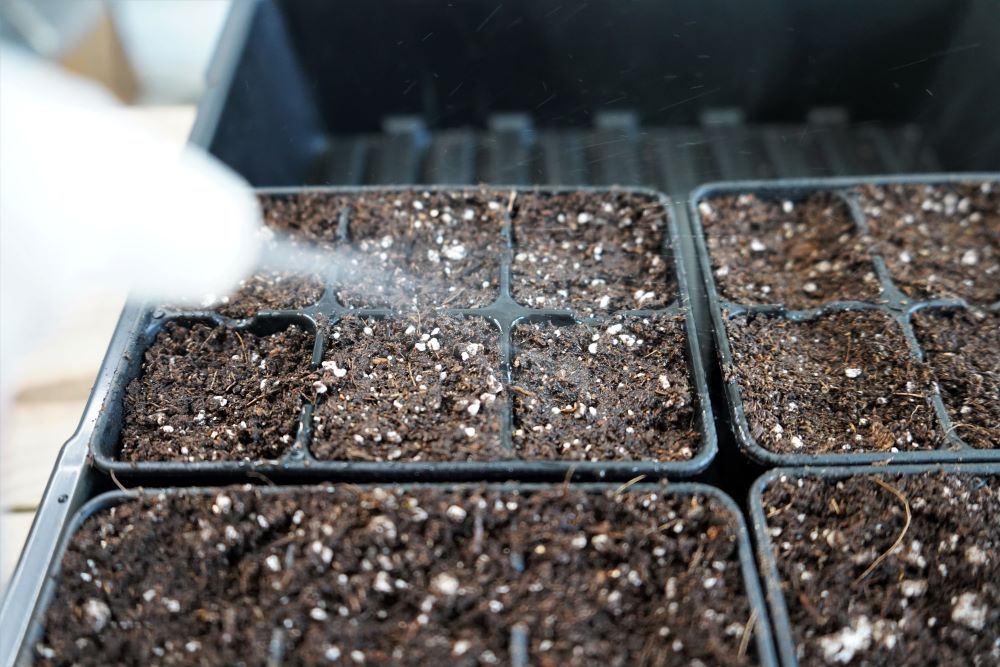
- Spritz with water to moisten the seeds.
Once the seeds are covered, spray the surface of the soil with water. I like to give each cell about 6-8 sprays to make sure the seeds are moist below the surface.
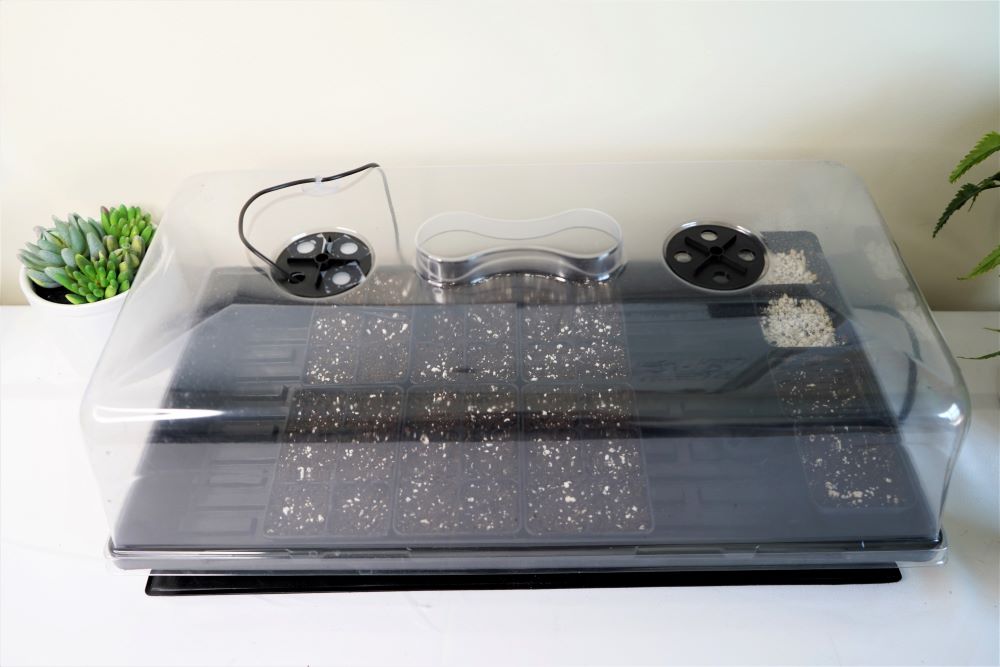
- Cover with humidity dome.
With the seeds planted, cover the trays with a humidity dome. If you are using makeshift seed cells, you can use a reusable plastic lid from a food storage container or similar to get the same effect. This will help prevent the seeds from drying out.
- Place in a warm location.
Place the entire setup in a warm location. Scotch bonnets germinate best in very warm temperatures (80-90°F). I use a seed heating mat to control temperature throughout germination, but above the refrigerator or in an upstairs room can work, too.
Tip: Seeds don’t need light to germinate, just warmth, moisture, and oxygen. Only after the seeds sprout will they require lighting. - Fan out trays daily and keep seeds moist.
While you wait for your scotch bonnets to sprout, fan out the trays daily to provide some fresh air. While you do this, check the surface of the soil to see if they need a spritz of water to keep the seeds moist – never let them dry out!
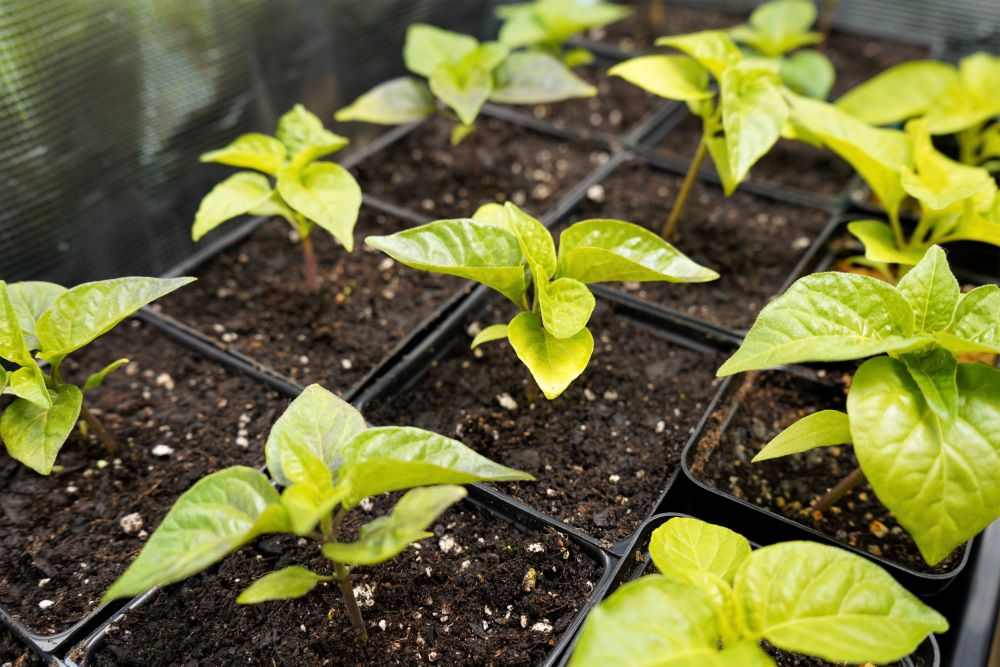
Once your scotch bonnet seeds sprout, they must immediately be placed in a bright location. Ideally, you should use a grow light, but a sunny window will work if you don’t want to purchase a light.
Using a grow light
Grow lights make a big difference in the growth rate of young pepper plants. In early spring, the amount of daily sunlight is less than in mid summer, and seedlings need around 16 hours of light for ideal growth.
So, with an affordable LED panel, you can help your plants get off to a strong start. These lights are efficient, quiet, and easy to set up. They also last a long time and will work great for other crops like tomatoes, greens, and herbs.

For scotch bonnets, place the seedlings under LED grow lights at about 15-24″ above the leaves (depending on the light’s power). I keep my 150W light at half power about 15″ above the young peppers, increasing intensity by about 5% every week or so.
Read more about our recommended grow lights here.
If you see signs of leaf curl (taco shell shaped leaves), then your lights may be too close to the plants. If the plants grow tall and skinny, then the lights may be too far away. Adjust the height accordingly.
Using a sunny window
If you don’t plan on getting a grow light, then your next best option is going to be a sunny window. Here in the US, a South-facing window is your best option, as it will receive the most sunlight. For those down under, use a North-facing window.
Try to choose a window that has no obstructions, indoor or out, like trees or other shade-casting objects. Any reduction in daily light will impact the young plant’s ability to grow quickly.
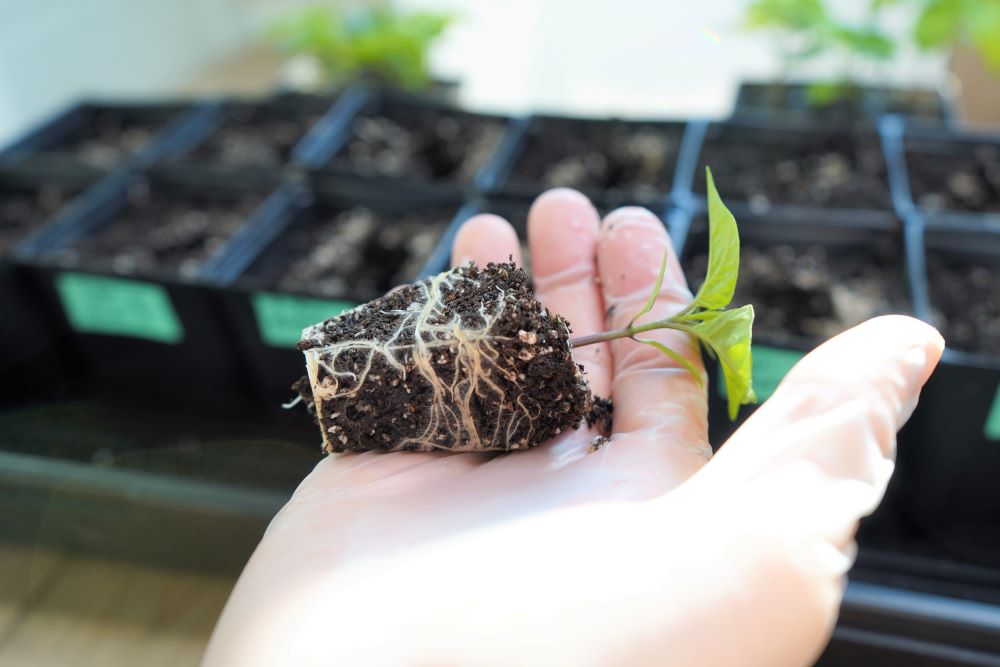
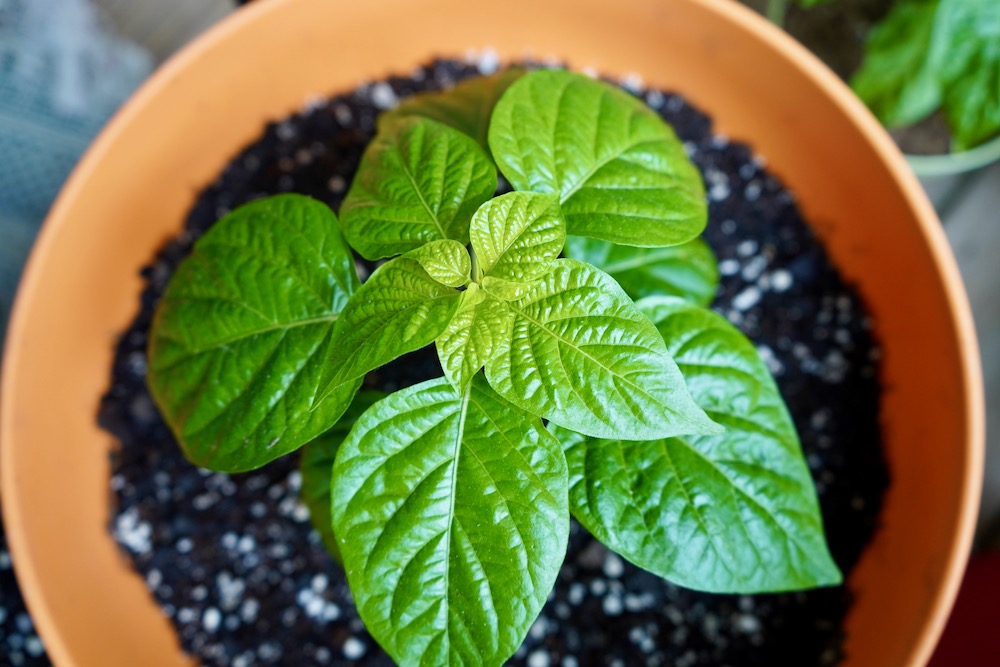
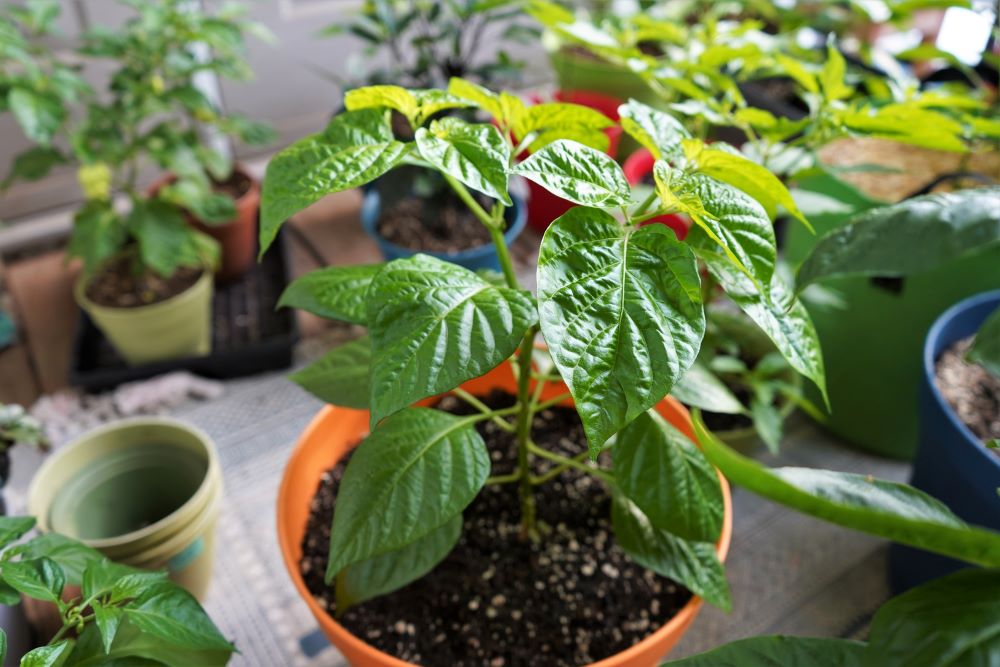
Once your plants are about 2-3 weeks old, they will be ready to move out of seed cells and into a mid-sized container. This process is known as transplanting.
Fertilizing Scotch Bonnets
All plants require nutrients to grow strong, healthy plants. Fertilizing from a young age helps your peppers grow fast and strong, and can help avoid disease and pests by keeping your plants healthy.
Fertilizing seedlings
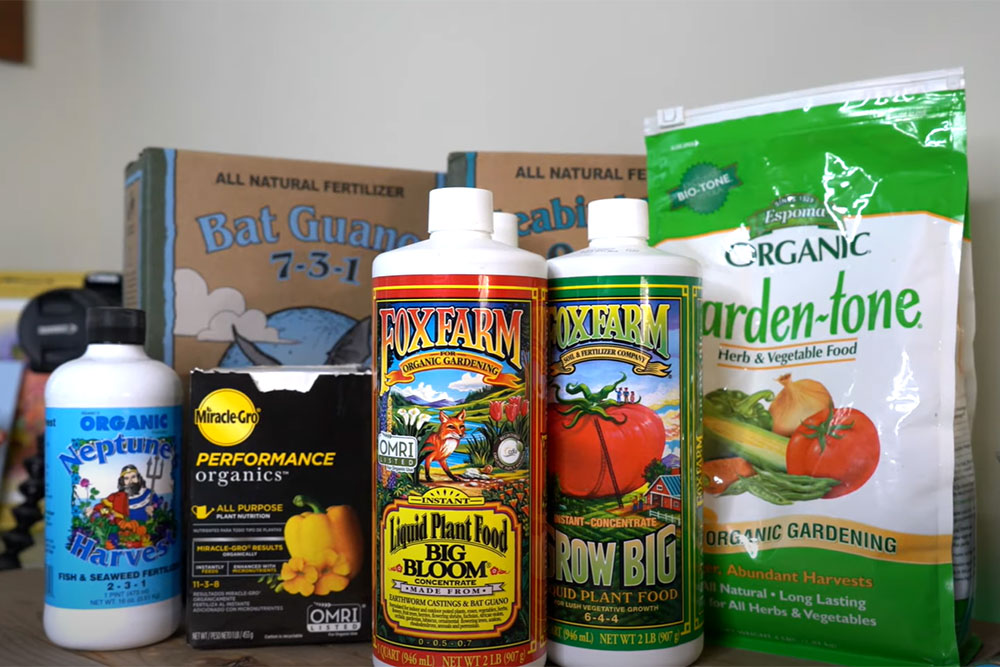
Seed starter mix does not contain nutrients, so the plants need to be fed. If using seed starter mix, provide a light fertilizing when the plants are about 1 week old. This will give the plants what they need to grow strong early roots and foliage. I use these organic nutrients for pepper seedlings:
- 1/4-1/2 strength nitrogen-rich nutrients
Fertilizing young scotch bonnets
After transplanting your scotch bonnets, switch to using regular potting mix. These bagged mixes usually contain added nutrients, so fertilizing can be put on hold for a few weeks. After the soil’s nutrients run out, provide normal-strength fertilizer on a regular basis.
- Normal strength nitrogen-rich nutrients
- Hold off for a few weeks if using nutrient-rich potting soil
Fertilizing established scotch bonnets
After your plants have grown to a mature size, you want them to switch from vegetative growth to the blooming and fruiting stage. This requires a shift in nutrients from nitrogen-rich to higher potassium and phosphorus. Too much nitrogen at this stage can doom your plants to produce very little fruit!
- Reduce nitrogen (or just fertilize less overall)
- Normal strength bloom-stage fertilizer
Organic fertilizers are generally safer to use than chemical types as they are less likely to burn your plants. Too much available nitrogen will lead to chemical burns on your plants leaves, causing brown spots at the edges of the leaves.
I have never had this issue when using Miracle-Gro Organics or Neptune’s Harvest Fish & Seaweed fertilizers at the recommended strength.

Learn more about fertilizing peppers here.
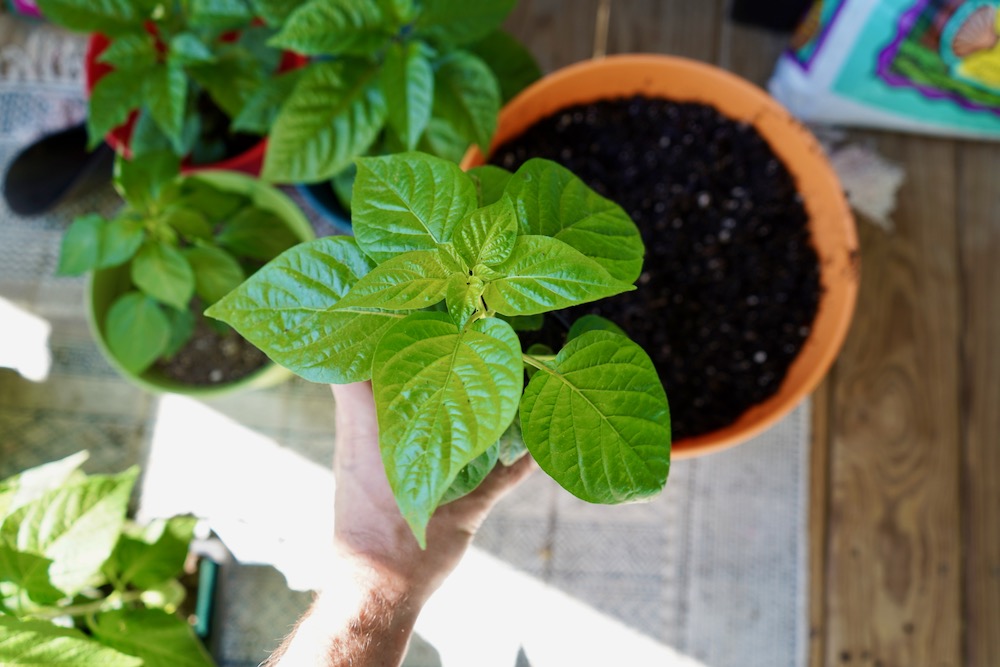
Transplanting and Container Types
Since we grow a lot of peppers each year, we like to transplant twice. It saves indoor space and allows the plants to continue growing efficiently before going outside. Regardless of where you move your plants, scotch bonnet seedlings should be moved into a larger container about 2-3 weeks after sprouting. We use 3.5″ plastic pots for the first transplanting.
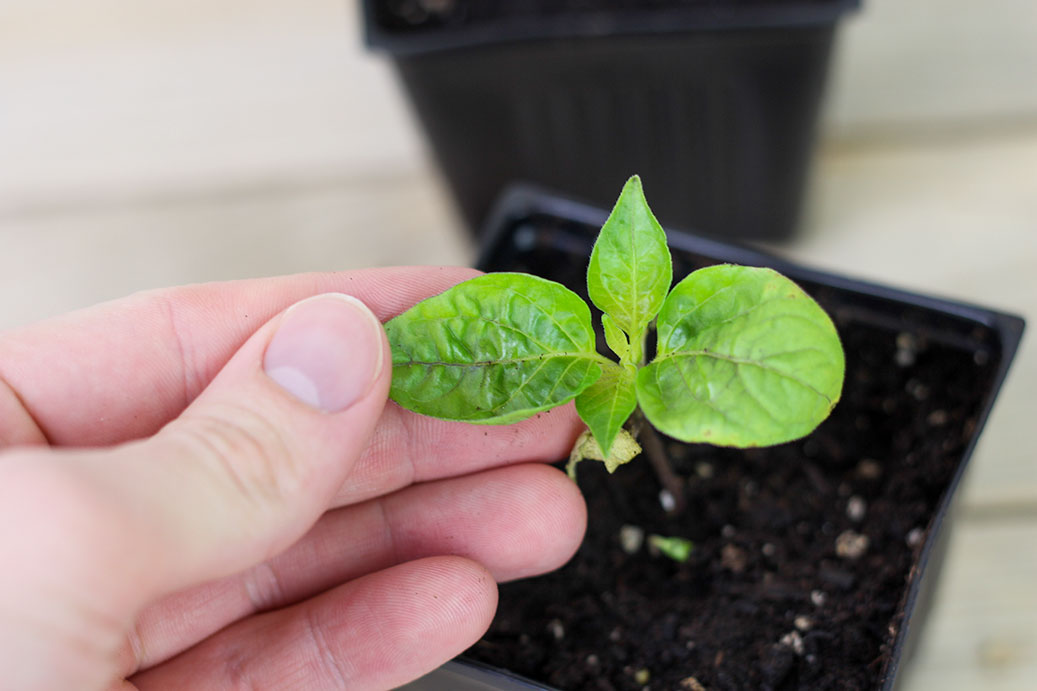
When should I transplant scotch bonnet seedlings? Timing is key. Around 2-3 weeks after sprouting, your peppers should be ready to move up in pot size. The plants should have 2-3 sets of true leaves, and should be around 2-3 inches tall.

Transplanting scotch bonnet plants
Once scotch bonnets outgrow their seedling cells, I recommend switching to normal potting mix. The transplanting process is similar to planting seeds, only you’re putting a plant (and it’s roots) into the soil instead of a seed.
Supplies:
- Soil (our scotch bonnets love this potting mix)
- Mid-sized pots (these work well)
- Water
Steps:
- Prepare potting mix. Pre-moisten the potting mix with water, mixing thoroughly as you go. The mix should stick together when squeezed, but should not drip water.
- Fill new pots with soil. Add the moistened potting soil to the larger pots, compressing lightly. Leave about 1/2 inch of room at the top of each pot. Dig a hole in the center of the soil big enough to fit the seedling’s root system.
- Loosen soil around seedlings and remove plant. Pepper seedlings are still delicate, so carefully loosen the root ball by squeezing the seed cells from the outside. This helps the roots slide out of the containers. Once they are loose, turn the tray sideways or upside down and gently pull out the plant.
- Place plant roots into prepared pot. Move the plant into the prepared hole in the potting mix in the larger container.
- Add soil to the same height (don’t bury stems). Surround the plant with more soil, filling the pot up to the base of the plant’s stem. Do not bury the stem, as this can lead to stem rot.
- Compress lightly and water. Compress until you feel light resistance, and water right away to ensure the roots are well-moistened.
Once the scotch bonnets have been transplanted, they should be returned to their growing location. The plants will continue to grow larger over the course of the next several weeks.
Note: Many potting mixes have soil amendments with plant nutrients. If this is the case (as with FoxFarm and Miracle-Gro soils), you can skip fertilizing for a few weeks until the nutrients run low.
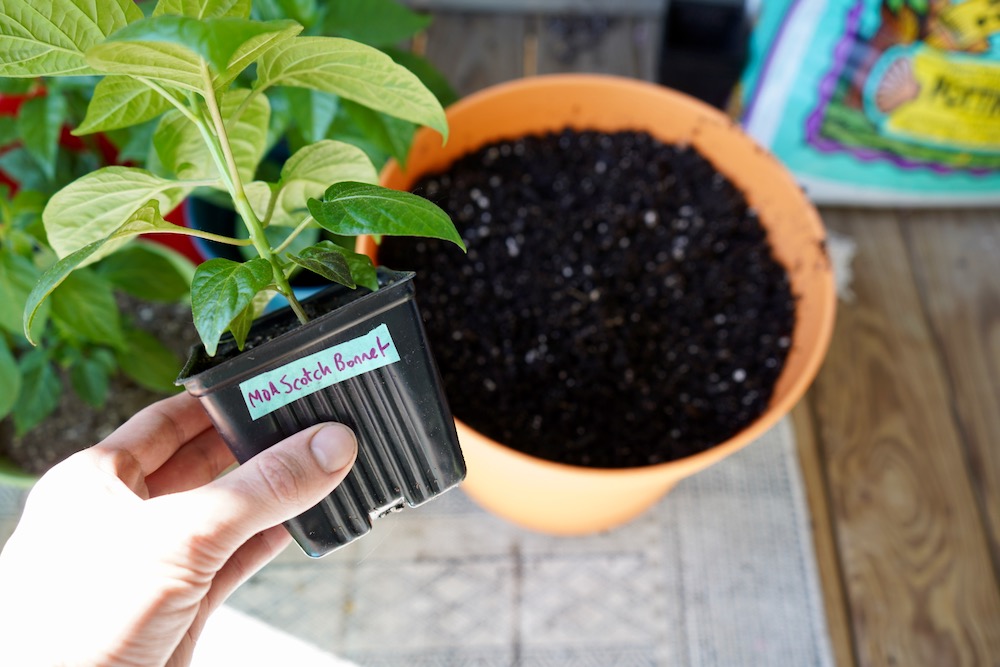
Container size for scotch bonnets
Once your scotch bonnets are ready to move into a final planting location, you should pick a large enough pot for them. If you are planting in the ground or in a raised-bed, then you only have to worry about pepper plant spacing.
Since they are from the Capsicum chinense species, plant scotch bonnets in a fairly large pot for ideal harvests, between 5-10 gallons (minimum 10-12″ diameter at the top). You can go larger if you’d like, but SB peppers do very well in this size container.
Try these 7 gallon fabric grow bags for an easy storage solution!
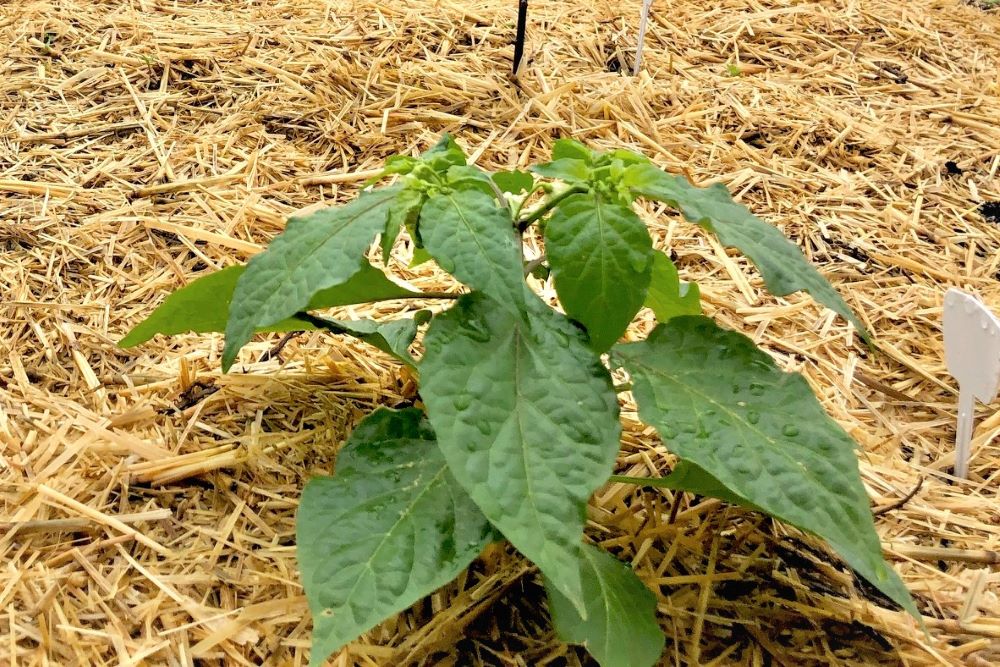
Staking, mulching, and bottom pruning
Once your plants are in their final location, I recommend preparing the pots or garden beds with a few simple methods. These include staking, bottom pruning, and mulching.
- Staking helps keep your scotch bonnets upright in heavy winds or inclement weather. This can be as simple as a 1/2″ piece of bamboo, driven 6-10″ deep near the main stem of your plants. Then, use garden ties to attach the plant to the stake at various points on the stem and branches.
- Bottom pruning is the process of removing leaves from the bottom 4-6″ of the main stem. This helps avoid soil pathogens from entering the plant, and makes it easier to water at the bottom of the plants. Wait for the plants to reach 12 inches or taller before bottom pruning.
- Mulching around the bottom of each plant helps avoid soil from splashing onto your plant’s leaves when it rains. Again, soil-borne diseases are common, and this is a great way to avoid them infecting your scotch bonnets. Also, it keeps the plants cleaner and more aesthetically pleasing.
Hardening Off
Once the outdoor temperatures are creeping into the upper 60s and low 70s Fahrenheit, you can begin bringing your plants outdoors to harden off. Instead of suddenly moving your plants outside into full-sun, it is best to adjust them gradually.
I recommend starting this process on a cloudy day, or in the shade. The plants are tender and the leaves are relatively weak, so they won’t handle direct sunlight very well (yet).
After a few days of outdoor shade, move the plants into the sun for 20-30 minutes. Over the course of 2 weeks or so, increase sun exposure until the plants can handle full sun.
Tip: Avoid mid-day sun for the first week of hardening off. Morning or evening sunlight is less intense and will help adjust the plants more gradually.

If your plants show signs of sun stress, like sun scald or drooping leaves, move the plants out of the sun to recover. Try again the next day.
Watering Scotch Bonnet Peppers
Watering your scotch bonnets will be a regular chore, especially for potted plants. As the plants are growing quickly, they will use a lot of water. However, over-watering can be a major issue for peppers.
Pepper plant roots require drainage so that excess water can escape, allowing the roots to breathe. If water gets trapped in the root system, the roots can rot and die, causing serious damage to the plant.

Watering tips:
- Mulch plants to help retain soil moisture for longer
- For potted plants, place rocks above the drainage holes before filling with soil – this will make sure the holes never become plugged by compacted soil
- Always check the soil for dryness before watering – dig a finger 2-3 inches into the soil’s surface to check for dampness
- Keep an eye on the plants during very hot weather – peppers use much more water when it is hot!
Over-watering can cause curling leaves, yellow leaves, and can encourage disease. Under-watering, on the other hand, will lead to wilted leaves.
Learn more about properly watering peppers here.
When To Pick Scotch Bonnet Peppers
As your plants begin to produce peppers, you should start getting excited for harvesting! All of your energy and hard work will pay off with fresh-picked scotch bonnet peppers. But how do you know when they should be picked?
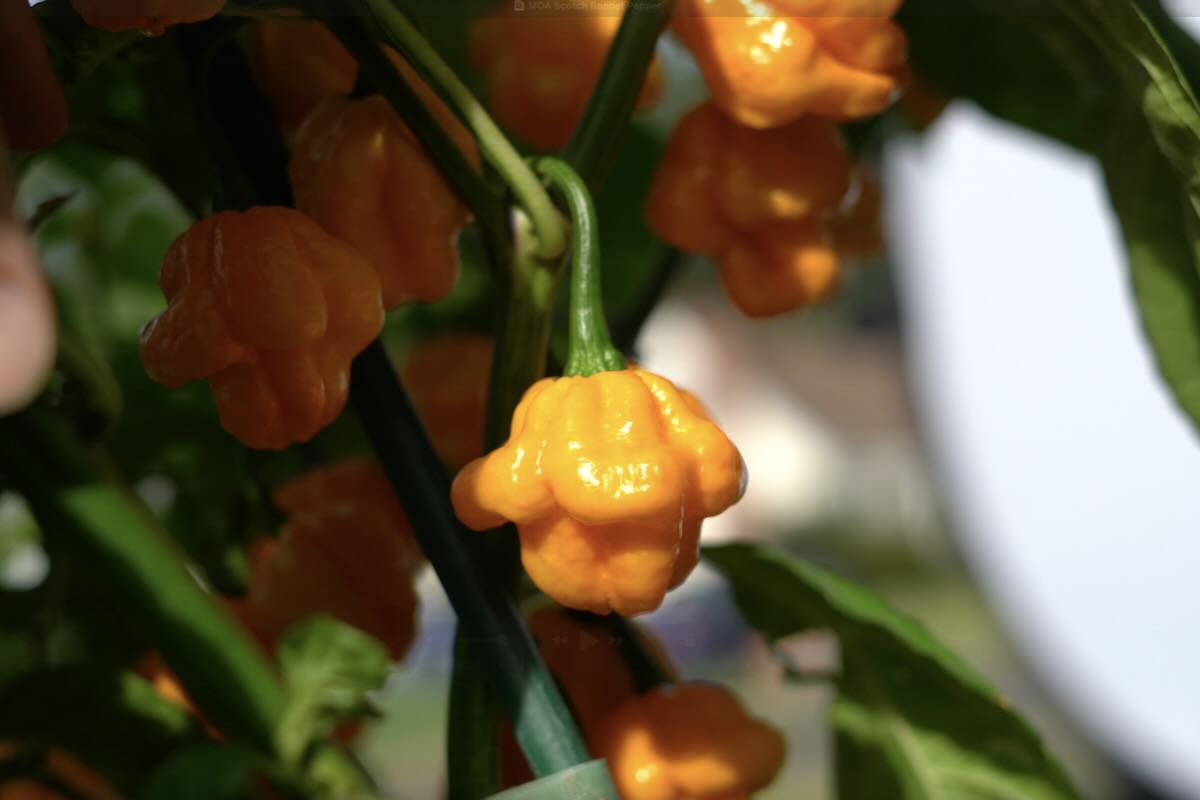
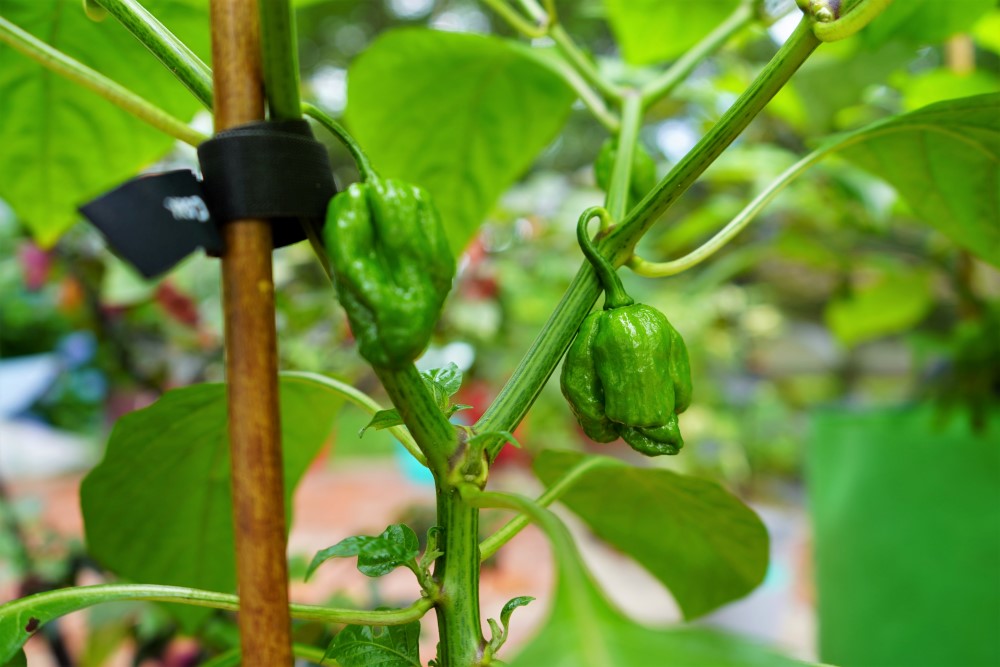
Generally speaking, scotch bonnets should be picked when they have fully changed color. Typically, scotch bonnet peppers turn from green to red, orange, yellow, or brown.
With any C. chinense species pepper, I like to allow the pods to completely change color before picking them from the plant. This differs from jalapeños and bell peppers, which are often plucked early for more crunch.
As a scotch bonnet ripens, it will continue to develop better flavor (changing from slightly bitter to sweet and fruity). For peak heat level, pluck your scotch bonnets just as they begin ripening.
Scotch Bonnet Scoville (Heat Level)
If you’re growing scotch bonnets, then I hope you like your food spicy! After all, these Jamaican peppers are seriously hot.
How how is a scotch bonnet? Scotch bonnets come in around 100,000-300,000 SHUs on the Scoville Scale, putting them in a similar heat range as the habanero pepper. This is serious heat, as each pepper is roughly 10-30x hotter than a jalapeño.
I always find that home-grown peppers are hotter than those bought at the store. If you are used to buying scotch bonnets at the grocery store, be prepared for some added heat with your harvests.
How To Use Scotch Bonnets
Once you start to harvest your ripe scotch bonnets, you’ll need a plan for how to use them. The harvests can often be overwhelming, especially with such spicy peppers. Here are some ideas:
- Make hot sauce. Scotch bonnets pair well with other sweet, tropical flavors. Get creative and play with fruits like mangoes, pineapple, coconut, papaya and lime. This is a great way to store peppers for a long time!
- Make salsa. Salsa is a wonderful snack – delicious on chips or laid over a fried egg for breakfast. Scotch bonnets will kick up the heat a notch, so just be sure you know your spice limits!
- Make chicken stew. Scotch bonnets are used in the Caribbean to make spicy and flavorful stews, such as brown stew chicken. Easy to make, delightfully flavorful, and spicy – just the way we like our food.
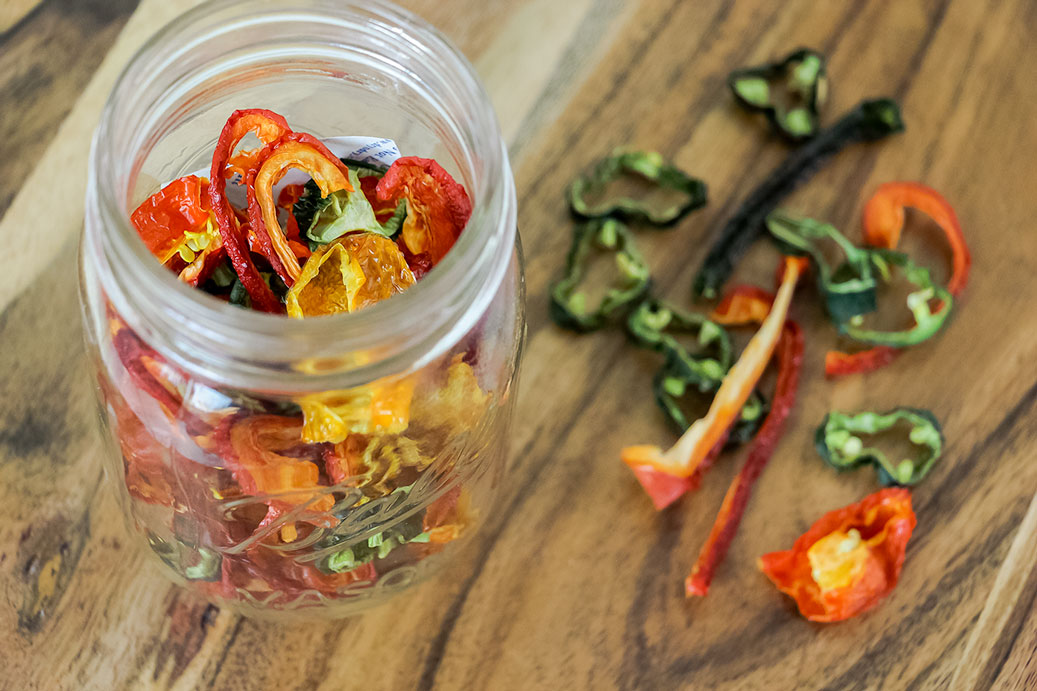
- Make jerk seasoning. Another common use for these hot peppers is to dry them and make a classic jerk seasoning or marinade. Look up an authentic recipe, get your gloves on, and get grillin’!
- Freeze them whole. Have some extra scotch bonnets that you don’t currently have a use for? Freeze them! It is the easiest way to preserve fresh peppers for later use.
There are many other ways to use your home-grown scotch bonnets. Basically any Caribbean dishes can utilize the peppers in some way, so be creative and find something that sounds tasty to you.
Scotch Bonnet Questions
Lastly, I want to cover some miscellaneous questions about scotch bonnet peppers. These relate to the general process of growing scotch bonnet plants.
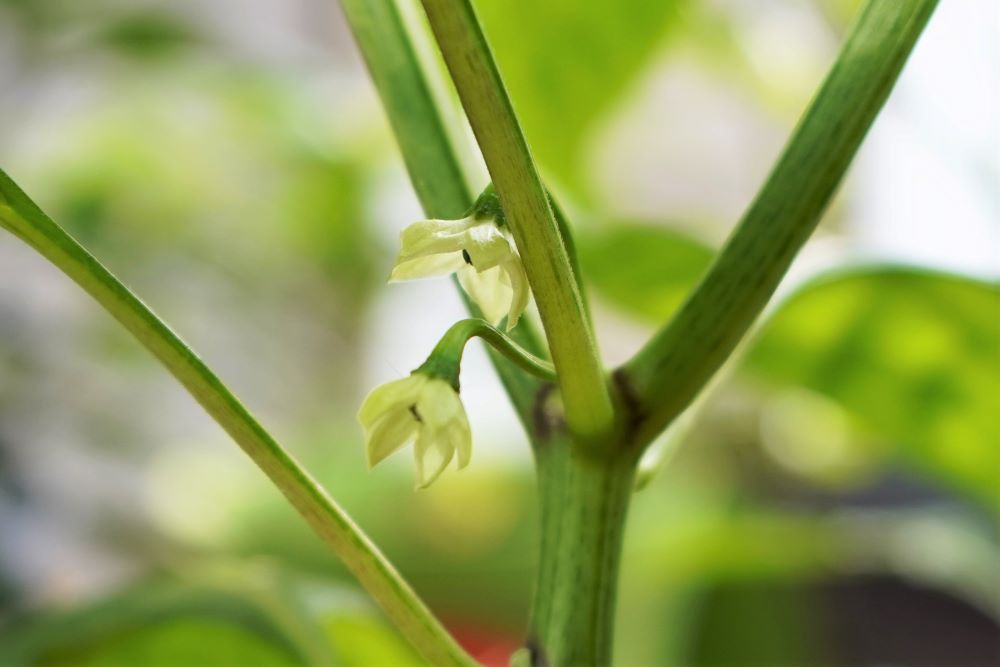
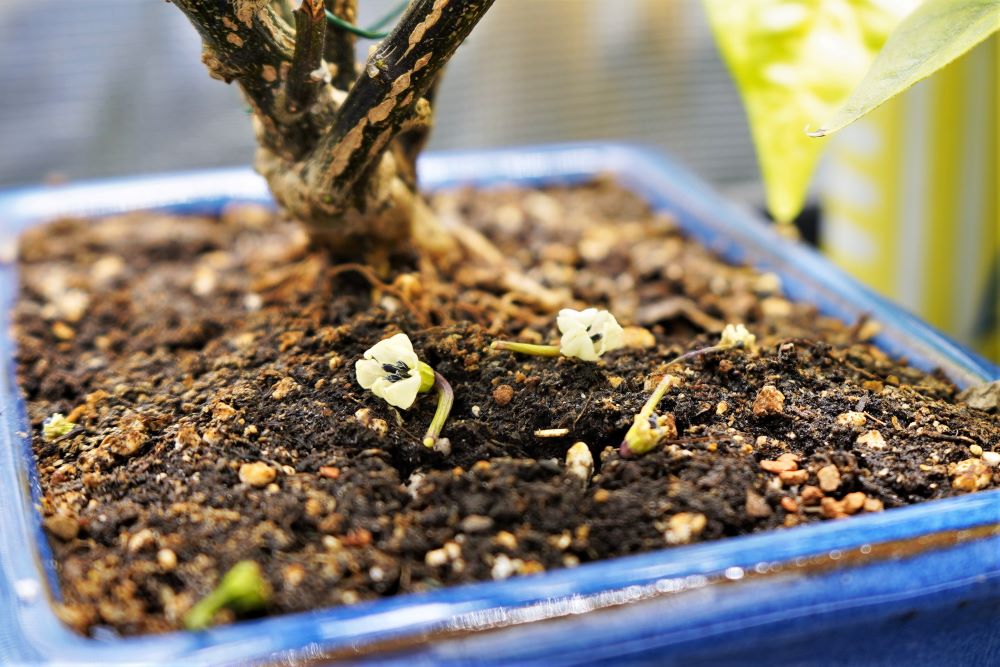
Should I pick off early flowers?
When your scotch bonnets are still indoors, I recommend picking early flower buds. Be careful not to damage leaves when you do this by allowing the flowers to grow large. Stop picking flowers after the plants move outdoors permanently and have been outside for 2-3 weeks.
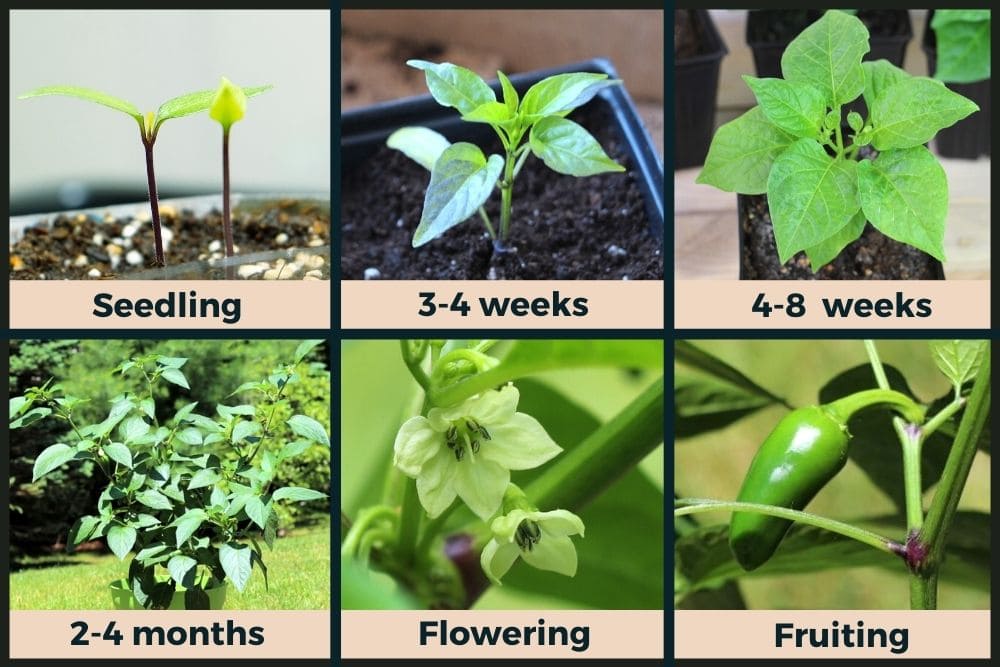
How long do scotch bonnets take to grow?
Typically, you will start to see fruits developing about 3 months after transplanting. Then, the pods may take another full month or so to fully ripen. It is a slow journey, but the end result is well worth it!
How long do scotch bonnet plants live?
Natively, scotch bonnets can live for years! In colder climates, peppers are grown as annual plants, dying in the early winter to the cold weather. However, in their native tropical climate, plants can live many years, often growing larger and more productive in their 2nd and 3rd years of life.
How many scotch bonnets per plant?
The size of your scotch bonnet yields will depend largely on two things: the size of the pot and the duration of your growing season. In short, the longer the season is and the larger the pot, the better your harvests will be. Generally, one scotch bonnet plant can easily produce 20 to 50+ ripe peppers!
What does an ideal scotch bonnet pepper look like?
Scotch bonnets are a prized pepper in Caribbean countries, and so the perfect pepper has been defined. Peppers from a single plant will produce many different looking peppers (phenotypes), but the ‘ideal’ shape has 4 lobes.
The pods should also be at least 1.5″ in width and have the “classic bonnet shape.” Don’t be discouraged if your fruits don’t have have a Grade A appearance, they should still taste fantastic!

Read Next:
I hope this article helps you learn how to grow scotch bonnet peppers from seed like a pro! Here at Pepper Geek, we love scotch bonnets. They offer the perfect balance of fruity flavor and heat. Let us know if you have additional questions below.

Calvin
One of the original Pepper Geeks! When Calvin isn’t gardening or learning more about peppers and botany, he might be traveling new places or playing some music.

This is my first attempt at growing scotch bonnets. I have been growing them for about five months, however they are not yielding any fruit. Can anyone help?
Hi I’m growing my first Scotch bonnets and they are growing very tall and have no side shots forming. Is this normal? and also how do I get them to put more energy into growing fruit
i’m growing my first plants from seed. There is one particlar flavour that I love and I struggle to identify them by sight. So I saved some seeds and only planted them a couple of weeks ago. I should still be fine right?
Should be fine, it is definitely a bit late for planting but you should eek out at least a small harvest before the frost arrives
I grew up with Scotch Bonnets in the Caribbean. This past summer I grew two plants and they gave me a lot of fruit.
At first, they tasted good, but the later fruit had an odd taste, like a burned or tarred taste. Could this be from the fertilizer I used? Or maybe too much fertilizer?
I used Miracle Grow Organics.
The climate (temperature, humidity, soil fertility) can all impact flavor. Later in the season here we notice a more bitter flavor, but that is most likely from the colder overnight temps.
Hi I am British but live in the Costa Blanca Spain we sometimes get a frost in winter should I put the pots inside on colder nights
Regards
Brian Broughton
The fridge top worked when the compressor was mounted in the top of the unit… about 50 years ago. The fridge apparatus is in the back on any modern unit. Top of the fridge is no different in temp than a counter top in the same room.
Quality article. My plant is only a tiddler at the moment. I am hoping for some lovely chillis. Harder to grow here in the UK
Hi, I’m having problems with my sb pepper tree. It used to be happy and healthy but then was neglected for several weeks, dried up and nearly died. I managed to bring it back somewhat and it gave me 3 peppers. Since then, it’s been struggling. It’s leaves are not as dark green as they used to be and many have little brown dots, mostly on the bottom edges, those leaves eventually dry and fall off. Some leaves turn yellow or white with no dots and fall off. Some days the leaves look wilted, other days they seem stronger. Please help me fix my plant.
Hi I want to grow them in Lahore Pakistan. Hottest it gets here is 50 C at the peak of summer and coldest is 1 C in deep winter. We also have monsoon season with lots of rain. What precautions should I take and can a fully grown plant within outside environment?
I would probably grow in the ground to allow the roots to grow deeply, and perform a drainage test in your in-ground soil to make sure the heavy rains can drain freely through your soil. If it is heavy with clay, you may need to amend the soil with compost or sand, or maybe grow in a raised bed.
Why are my 2 foot tall plants not putting off flowers?
Just wrote an article about plants not flowering: https://peppergeek.com/pepper-plant-not-flowering
I’ve got three healthy, happy scotch bonnet plants but most the peppers are green and it’s early october here in the uk average temp 12-20 degrees celcius. Can i ripen them off the plant? some have half-turned red and i’ve picked them. Also taken all the growing tips off, hung banana skins around the plant, topped with home compost and kept watered. Just don’t know what else to do. Oh and they’re in my greenhouse now so keeping around 20 degrees celcius during the day but light and temp are dropping fast!.
One option is to remove an entire stem and put it in some water as you would flowers. It won’t last very long, but you can bring it inside for at least a week and try to get a few more pods to ripen inside out of the cold.
I’m on the south coast in the uk l have some fantastic scotch bonnets plants growing in my poly tunnel, with very large fruit on them we are approaching October and they are still green! Will they turn red or should l pick them now
I would think about picking some now, but leave some to try to ripen. Things really go downhill fast when the temps drop into the 40sF
They like to germinate in high heat and germination can take months. Good luck!
I plant 300 seed at home i get none what have I doing wrong
@Harold Burrowes, it’s hard to say what’s wrong. Could be seed age, germination conditions not ideal, so many factors. Part of the joy of gardening is the trial and error. Do more research, watch vids and try again.
@Harold Burrowes, Mine failed several times,and I became frustrated.
I threw a new set of seeds in the pot that I bought with poinsettia for Christmas 2021.They have been growing since then,but very tiny.
I don’t know what else to do.
My neighbor even baby sit them while I was away for one month.
Still tiny 😢.
But the leaves 🍃 are green.
A friend gave me three fresh scotch bonnets to use for seeds for planting and harvest in 2022. How do I properly harvest the seeds? I live in North Texas and I’m writing this in November 2021. Thanks!
Can you leave scotch bonnets on a tray or in the fridge for a week or two until you can get to them?
Yep, that is usually what we do with fresh peppers that we don’t want to preserve and can’t use right away 👍🏻
@Richard Wilkinson,
When I lived in NYC, I could only get them at the farmers markets for a few weeks in the summer so I used to buy 40 or 50 of them and put them whole in the freezer in a bag. You lose the integrity of the cells (i.e., they get mushy if defrosted) but I could easily cut the amount I needed off of the frozen pepper and the flavor never diminished, so I had Scotch Bonnets all winter and spring.
@Abby,