
How To Grow Poblano Peppers From Seed To Harvest
Disclaimer: As an Amazon Associate, I earn from qualifying purchases. Pepper Geek takes part in various affiliate programs. This means that purchases through our links may result in a commission for us.
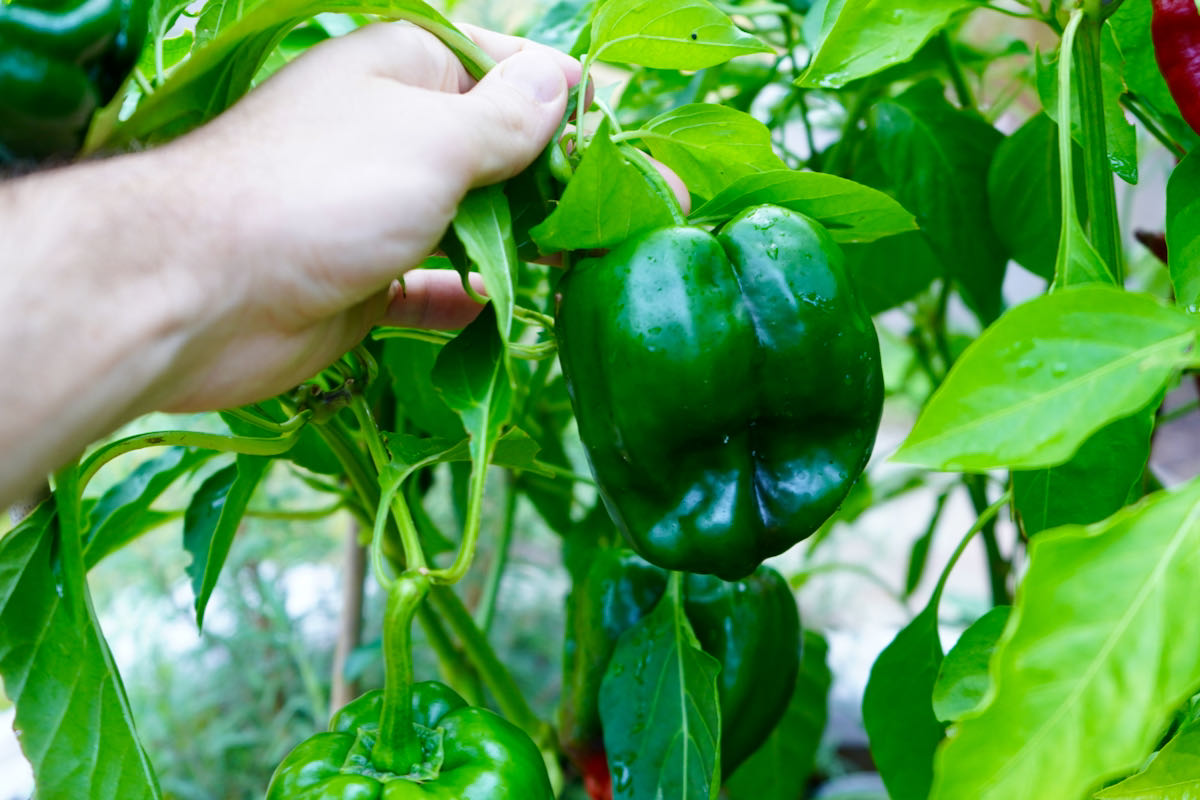
Poblano peppers are one of the most popular peppers in Mexican and Tex Mex cuisine. They are large, upside-down-pear-shaped chiles with mild heat and a deep green color.
To top it off, growing poblano peppers is as easy as growing any other variety! In this article, I’ll share how to grow your own poblanos in your backyard!
In this article (skip ahead):
- Planting seeds indoors
- Growing seedlings
- Moving outdoors
- Fertilizing poblanos
- Watering poblanos
- Harvesting poblanos
- Poblano pepper recipes and uses
Planting Poblano Seeds
I always prefer to grow peppers from seed rather than transplants. You have a wider selection of varieties and less risk of bringing pests home from the local nursery.
However, growing from seed requires a lot more work, so I totally understand if you prefer to buy pre-started plants. If you already have your seedlings, skip ahead to the hardening off section below.
Where To Buy Poblano Seeds
Like I said, planting from seed gives you a lot of choices. Even in the world of poblanos, you have options! Search some of our favorite pepper seed suppliers to see what is available.
Get poblano seeds:
When To Plant Poblano Seeds Indoors
Unless you live in a tropical climate, chances are that you’ll need to plant your poblano seeds indoors. This helps extend the growing time for your plants, increasing the overall yields.
As a rule, start poblano seeds about 6 weeks before your last frost date. The warmer your climate, the earlier you can start them indoors. Find your last frost date here.
As an example, here in zone 6a, our last frost date is around May 1st. As a result, we plant our poblano seeds indoors some time in mid-March.
Note: If you live in a very cold climate (zones 4 and lower), you may need to start your plants earlier (8-10 weeks before the last frost). This gives the plants a bigger head start to ensure they have enough time to produce pods.
Planting Seeds
As an easy rule of thumb, plant poblano seeds about ⅛-¼” deep in pre-moistened potting soil. You can plant in small seed cell containers to save space, or in medium sized containers such as 3.5″ nursery pots or solo cups.
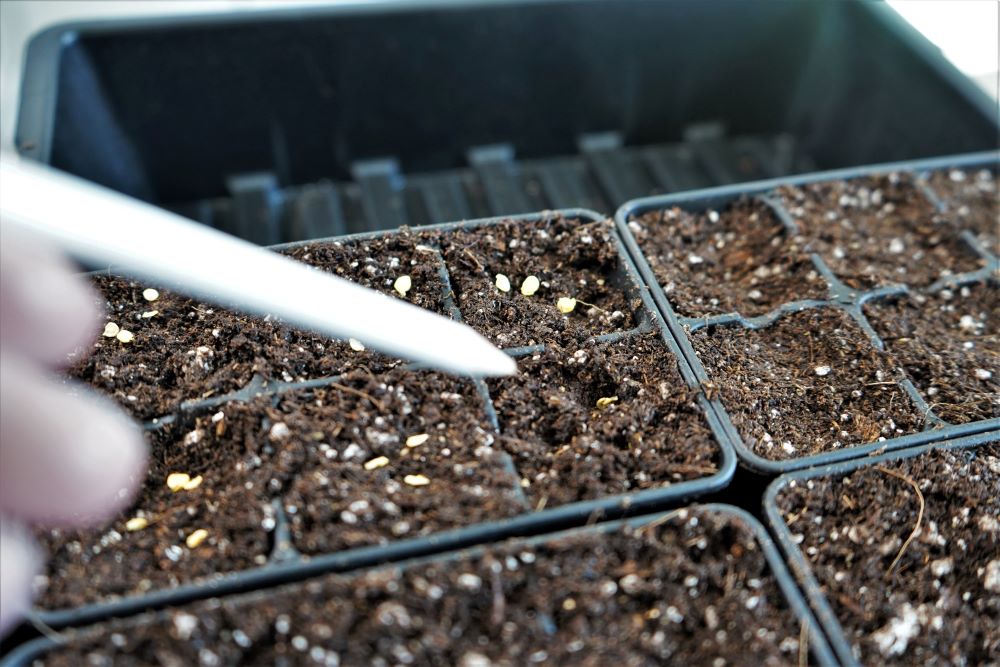
Keep in mind that you’ll need to provide light for your seedlings as they grow indoors. Since we grow dozens of pepper plants each year, I like to start in seed cells and transplant into larger pots after a few weeks.
Tips For Germination
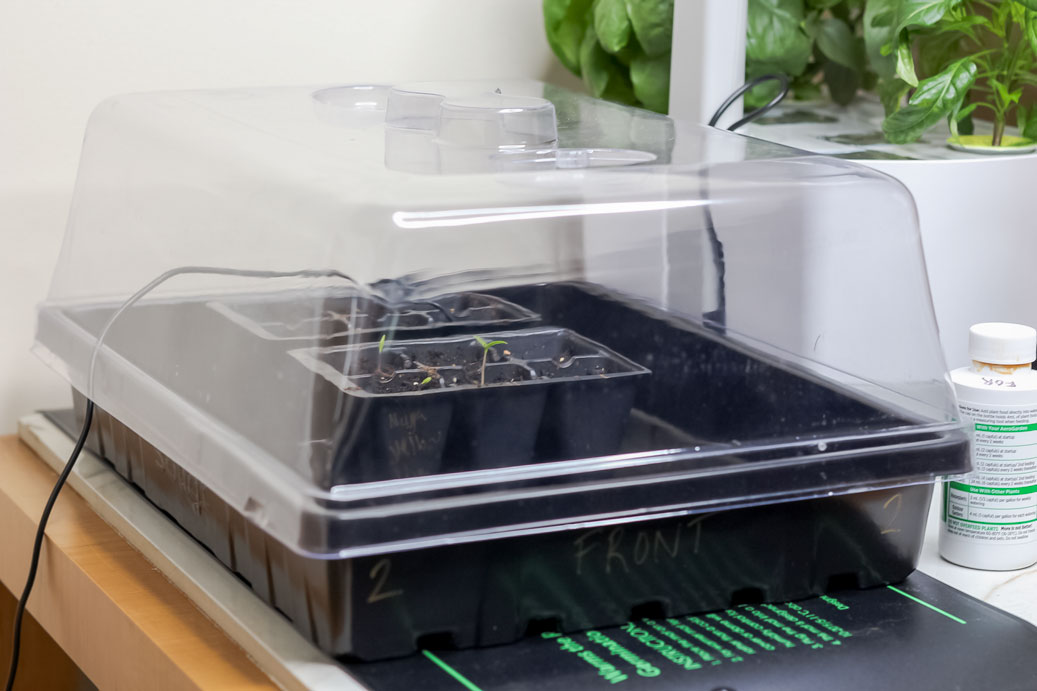
Pepper seeds need warmth and moisture to germinate well. For the best results, use a seed heating mat and a humidity dome to maintain the optimal environment.
- Use a seed heating mat to keep the seeds at 80-90°F during germination. These are great for all pepper types, along with tomato and eggplant seeds.
- Mist the soil surface to prevent it from drying out. Never let your seeds become dry while they are trying to sprout!
- Plant 2 seeds per container to guarantee at least one of your seeds sprouts. You never know when a seed may be a dud.
- Use a humidity dome to trap moisture. Fan out the trays once per day to refresh the air inside.
Poblano seeds can take anywhere from 3-14 days to sprout. The biggest factor is warmth, so do your best to keep the seeds in the ideal temperature zone (80-90°F) while they’re germinating.
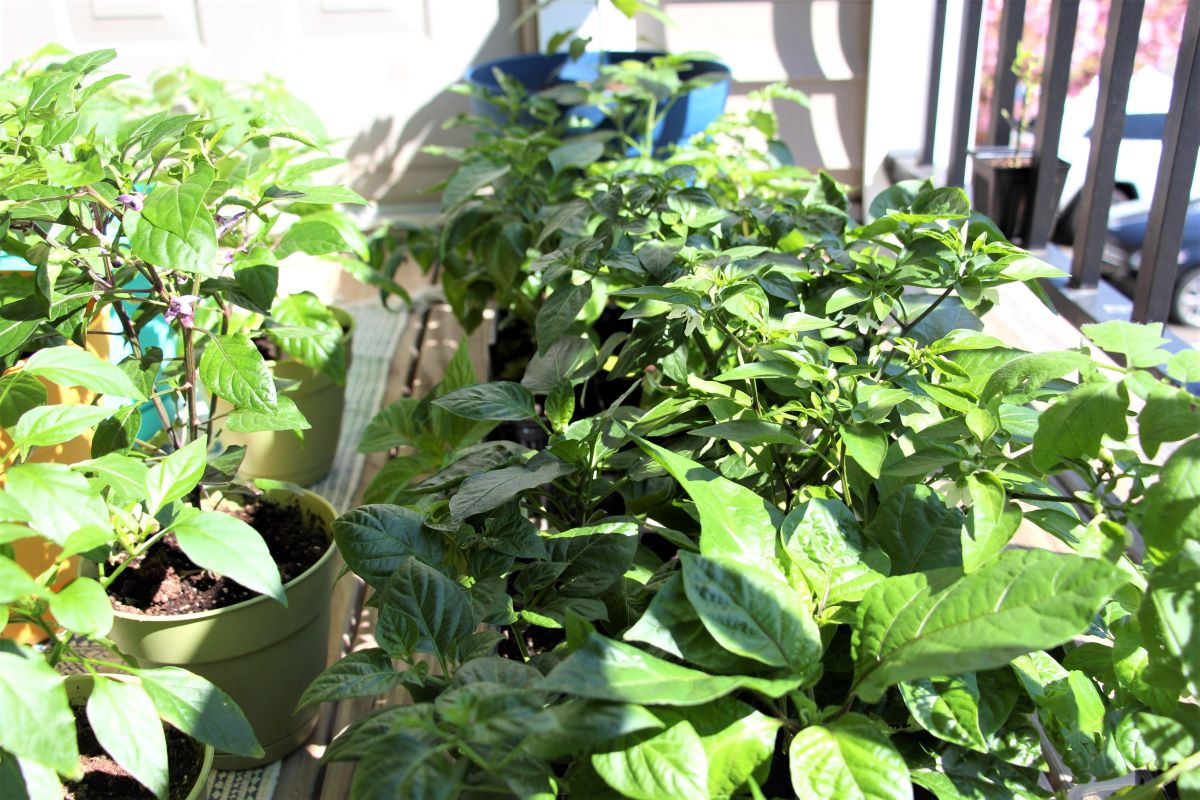
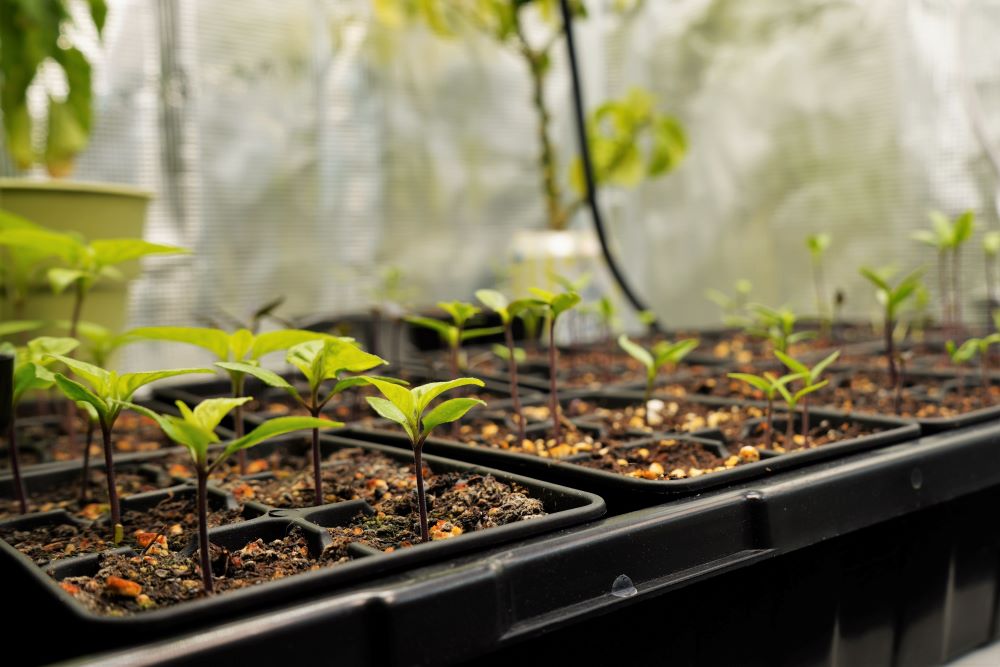
Growing The Seedlings
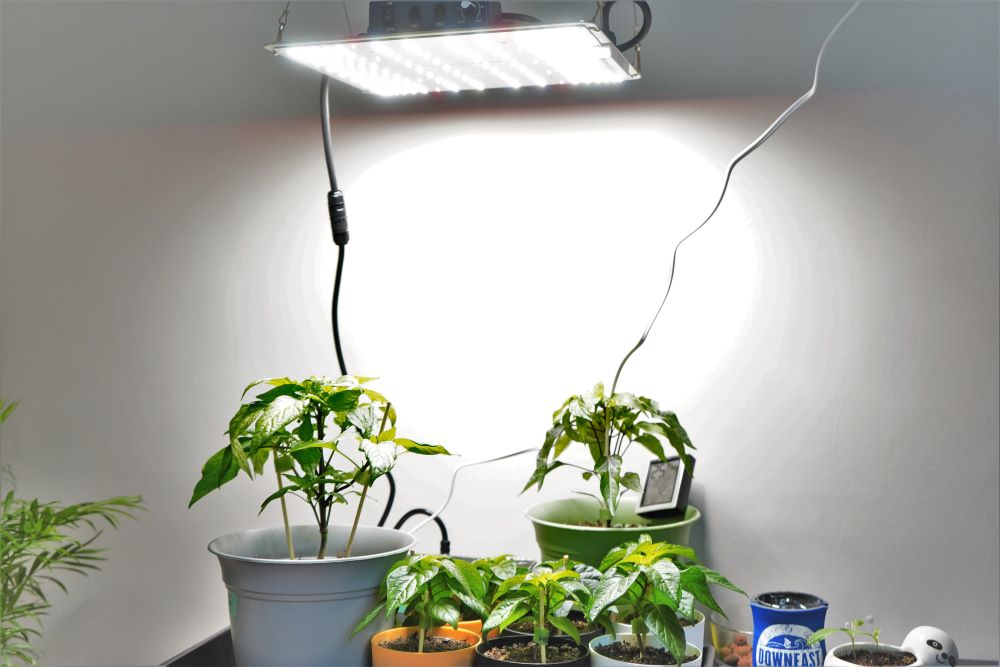
After your seeds sprout, they need light! For the best results, I highly recommend using a grow light. A sunny window is not ideal for fast plant growth. If you plan to use sunlight through a window, you should plant your seeds 1-2 weeks earlier to account for slower growth.
Recommended grow lights:
- Viparspectra P1000 – User-friendly, budget hanging grow light.
- Clip-on grow light – Easy to set up, but lower quality and less bright.
Once the seeds have sprouted, remove them from the heating mat, take off the humidity dome, and place them under lighting. The ideal distance from your grow lights will depend on the type of light and its power output. Look to the manufacturer’s recommended hanging height.
Keep the lights on for 14-16 hours per day, and off the rest of the day. If your seedlings appear stressed (curling leaves or burnt edges), move the lights farther from the plants. If they are tall and lanky, move the lights a bit closer.
Once your seedlings are under grow lights, provide a gentle breeze with a fan or an open window. This helps develop sturdy stems as the young plants begin to grow. Also, try to keep the ambient temperature between 70-80°F during the daytime.
Watering Seedlings
Watering poblano seedlings should be done whenever the soil becomes dry. Don’t wait for the plants to droop before watering, but rather do it when the first ½-1 inch of soil becomes dry.
The easiest method for watering seedlings is to bottom water. To do this, fill a tray with water and allow the soil to absorb it like a sponge from the bottom. Once the soil is wet, pour out any remaining water from the tray.
Tip: Avoid overwatering, as it can lead to root rot and other seedling issues. Always get rid of excess water after irrigating your seedlings!
Fertilizing Seedlings
Once your seedlings are about 1 week old, you can feed for the first time. This is especially important if you are growing in seed starter mix that does not contain any nutrients. If you planted in potting soil, there is no need to add more fertilizer.
To feed seedlings, use a reduced strength application of an all purpose fertilizer such as Miracle Gro Organics. In other words, use about ½ the recommended amount of fertilizer to avoid damaging the young plants. Over time, as the plants grow, you can switch to full-strength feeding.
Transplanting
If you planted in seed cells, you’ll need to transplant to larger pots while the plants are still inside. To learn how, use our simple guide to transplanting peppers here.
Moving Poblanos Outside
Once you are approaching your last frost date, you should begin to transition your poblano plants to the outdoors. Indoor pepper plants are not used to the elements, such as wind, rain, and direct sunlight.
One the temperatures are around 65°F, begin hardening off. Bring the plants out on a cloudy day for 30-60 minutes, then move them back inside. The next day, give them about 30 minutes longer.

Continue this process for about 2 weeks until the plants are fully adjusted to the outdoors.
Transplanting to a Final Location
For the best results, transplant your poblano seedlings at the right time. The plant roots should just be reaching the bottom of your pots. If they go too long before transplanting, the plants may become root bound, which can stunt growth.
Check the roots after the plants have been alive for 6-8 weeks. For containers, move the plants to a 5 gallon pot (or larger). For in-ground plants, wait for the overnight temperatures to be consistently above 55°F before transplanting. Any colder and the plants may become overly stressed.
Once the overnight temperatures are staying above 55°F, your plants can be left outdoors permanently. Don’t rush to get your plants outside before this, or you risk the plants being stunted or even killed by cold temperatures.
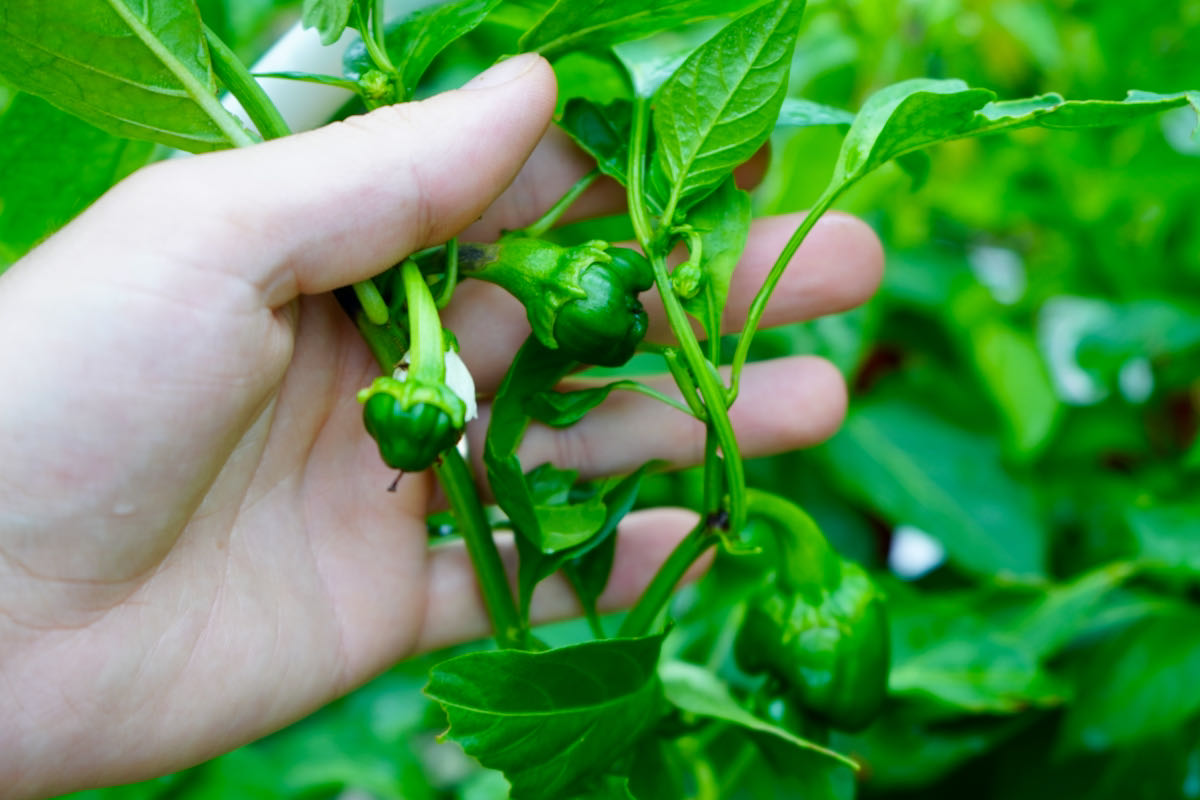
Early Flowers and Fruits
As your plants grow you will begin to see flower buds, and eventually small fruits beginning to form.
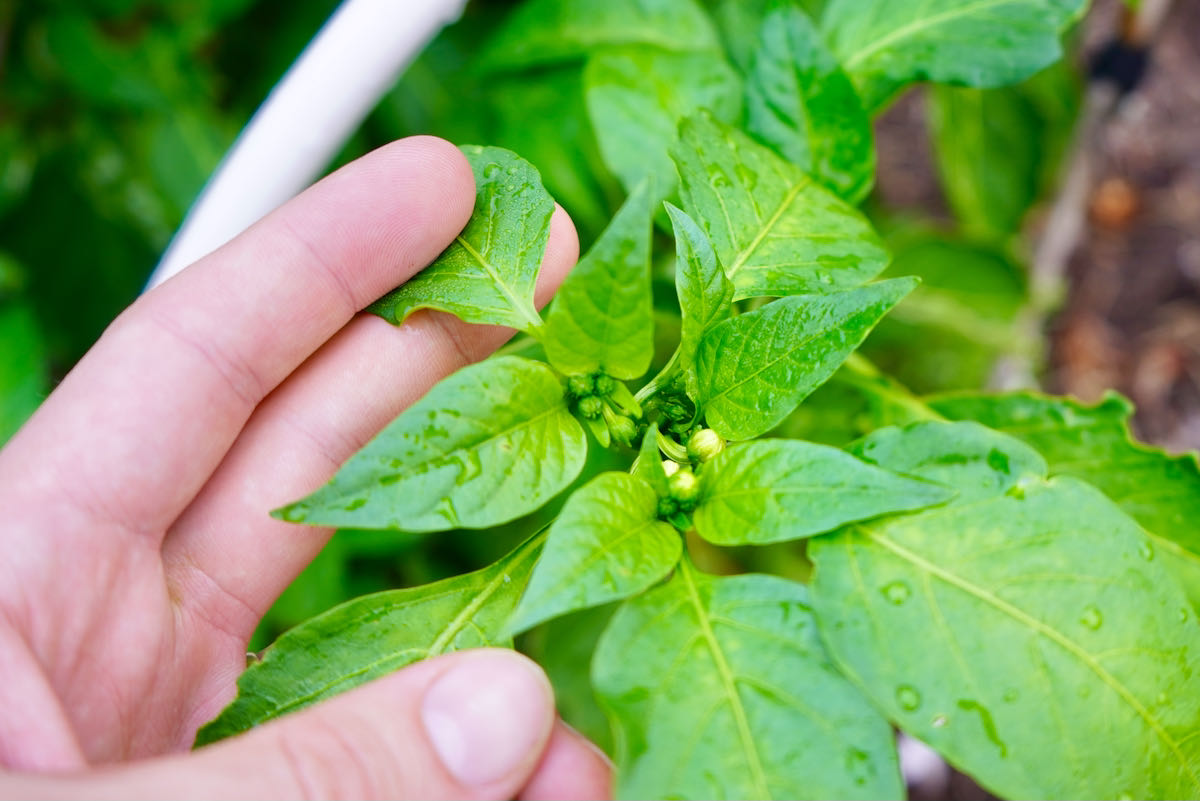
If your plant begins to produce flowers too soon, you may wish to pick off early flowers or fruits. As a rule, we recommend picking early fruits until the plants are established outdoors for at least 2-3 weeks. After that, leave the flowers to grow.
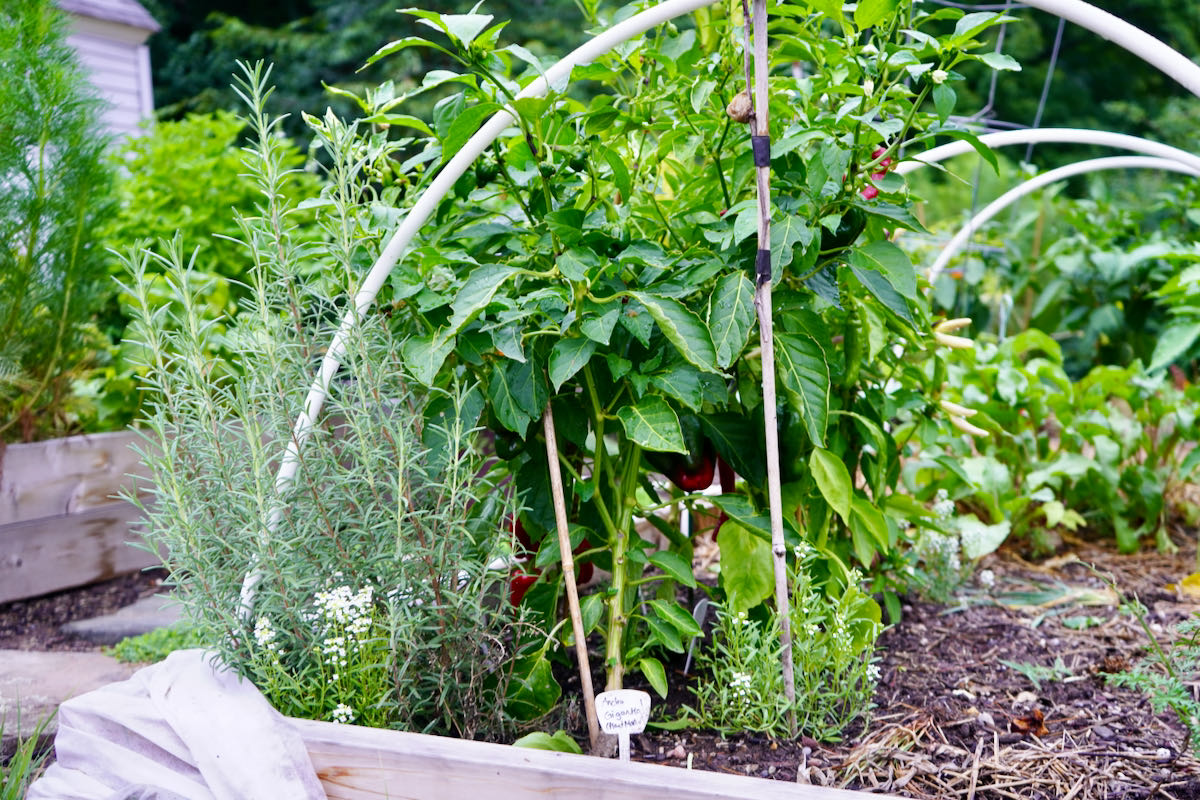
Staking or Using Cages
Poblanos are heavy peppers. For this reason, it is important to support your plants from an early age. Tomato cages work great for holding up heavy fruits, or use a sturdy, vertical stake along the main stem. Attach the plant to the stake every few weeks as it grows larger to keep it well-supported.
Fertilizing Poblano Pepper Plants
Pepper plants like fertile soil, so depending on how you plan to grow (in-ground or in containers), you may need to fertilize.
- In-ground beds should be amended with organic matter (such as compost) and/or an all purpose fertilizer like this one. Work these into the first 2-4″ of soil about 2 weeks before transplanting in the spring. This is usually enough to grow poblano plants through to harvest (super easy!)
- Potted plants require more frequent feeding (and watering). You can amend potting soil with an all purpose fertilizer, but the nutrients are often depleted more quickly. This means you’ll have to re-apply at least a few times during the growing season. Using a quality potting soil with nutrients helps give the plants a strong start.
Don’t over-feed your peppers and expect good things to happen! Too much fertilizer can do more harm than good, so stick to the recommended guidelines and watch your plants for signs of nutrient deficiency.
Watering Poblanos
As with fertilizing, watering frequency will depend on how your plants are grown. Potted plants often require daily watering during hot summer days, while in-ground plants are much more resilient.
However, even in-ground beds may need consistent watering, depending on rainfall and soil type. Generally, clay-rich soil will hold more moisture, while sandy soil dries out quicker.
Learn more about watering peppers here.
When To Pick Poblano Peppers
As your fruits begin to form, you may become tempted to pick them. Don’t pick your poblanos too soon! While they are edible at any stage, they will be bitter and thin-walled if picked too early.
Wait for the pods to be full-sized, and for the color to begin darkening to a deep green. Eventually the pods will ripen to a rich red color, which is ideal for making ancho chiles or powder.
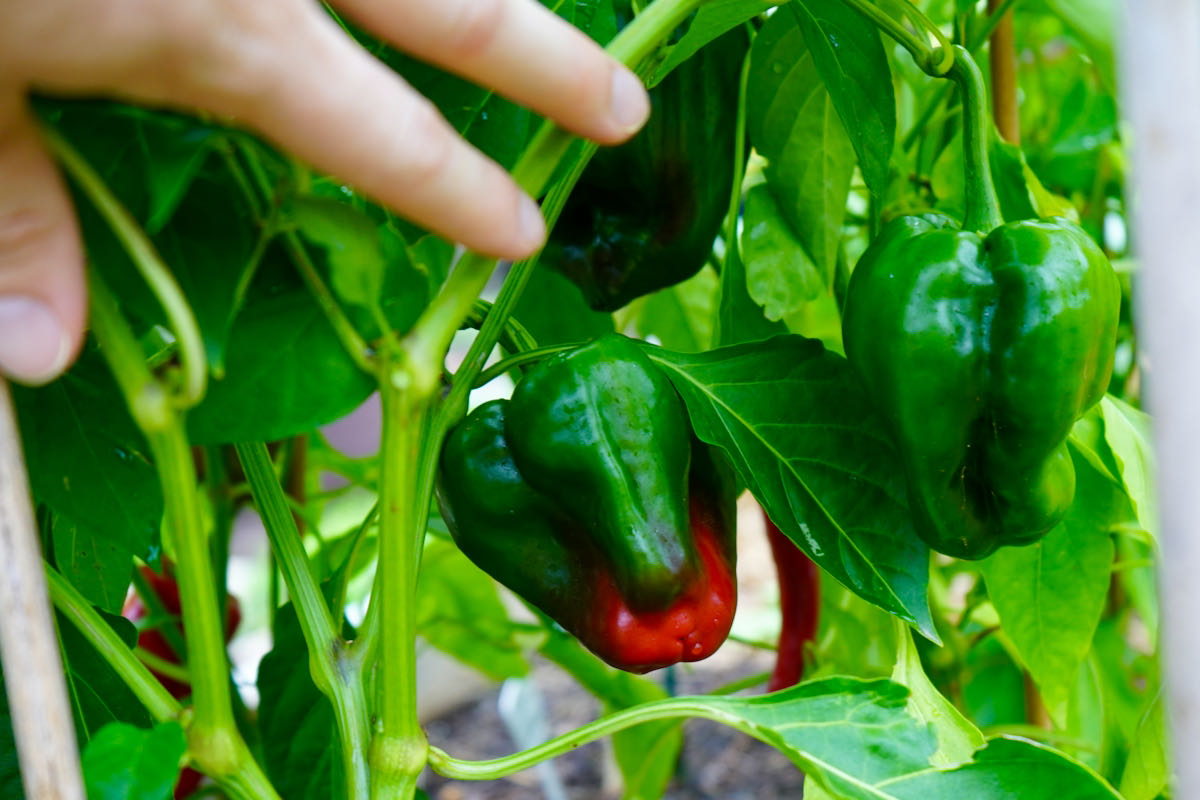
As soon as you’re ready to use your poblanos, pick them! When you pick off a pepper, it helps redirect the plant’s energy towards making more peppers. This means bigger overall yields from each plant.
What To Do With Poblanos
Fresh poblanos are so versatile and delicious! There are many ways to store them or use them fresh. When you’ve got your first harvest, here are a few ideas to use poblanos in the kitchen:
- Roast them. Simply roasting your poblanos is one of the tastiest ways to enjoy them. The heat makes it easy to remove the skin (which can be tough), and dice them up for adding to soup, stew, omelets, stir fry, or pretty much any other savory dish.
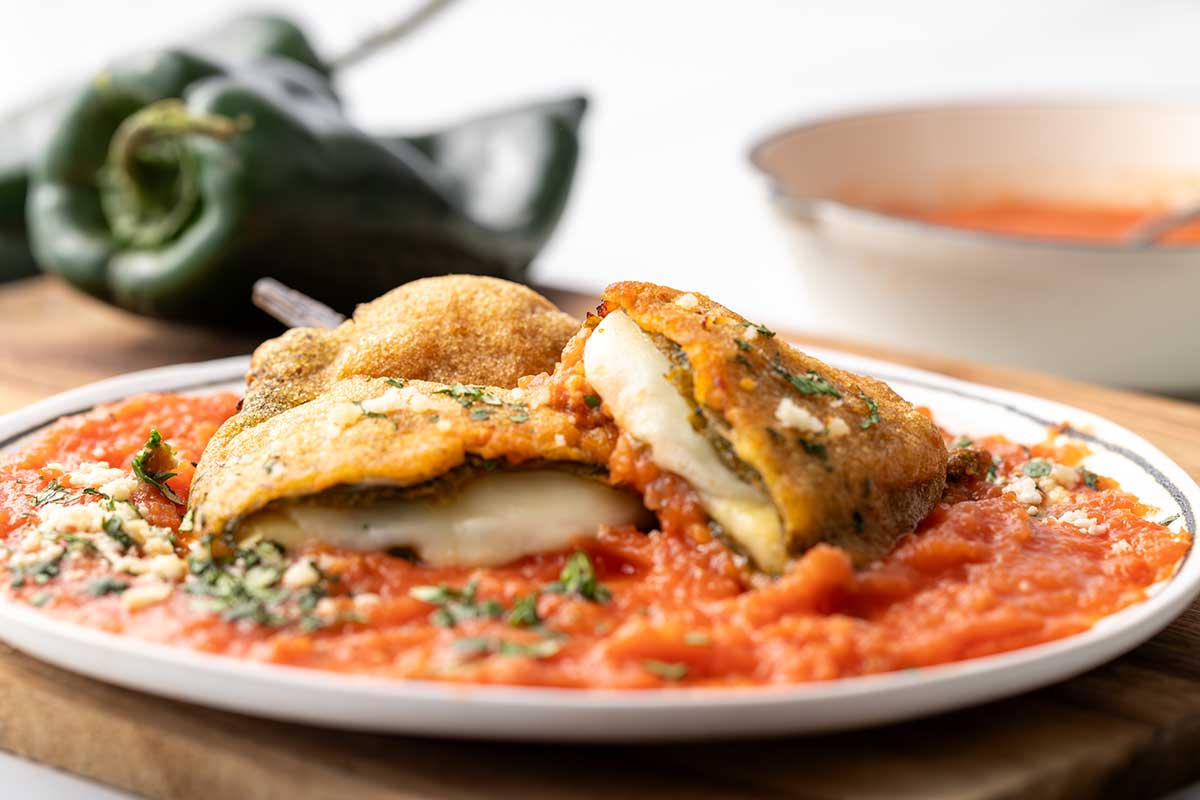
- Chiles rellenos. This is a staple dish in Mexican cuisine. Start by roasting and peeling your poblanos, then stuff them with a cheesy, potato-y mixture, and finally batter and deep fry them. Try our chiles rellenos recipe here.
- Mole sauce. Mole is a popular Mexican sauce that uses poblanos and other chile peppers and spices.
- Make ancho powder. Ancho chiles and powder are the dehydrated forms of poblanos. Wait for your peppers to begin ripening to red before picking, then dehydrate them by either hang drying, or using a dehydrator. These are great for making homemade enchilada sauce.
- Freeze for later. Not sure what to do right now? Poblanos can easily be stored in the freezer for later use. Use freezer bags and freeze them whole so that they can be still be stuffed, or pre-chop them to save space.
- For more recipes, read our poblano pepper recipes post.

More About Poblano Peppers
Looking to learn more about poblanos? Here are some common questions about ancho poblano chiles:
- Are poblano peppers hot? If you’re looking for a very spicy pepper, then poblanos won’t be your best option. Poblano peppers come in at just 1,000-2,000 SHUs on the Scoville scale, making them a slightly spicy pepper.
- Poblano vs jalapeño? While these two peppers are much different in shape and size, they often get compared. Poblanos are less spicy than jalapeños, but are much larger. Poblanos are commonly used to make stuffed peppers, roasted pepper, or ancho powder. Jalapeños are better for making pickle chips, hot sauce, or salsa.
I hope this article helps you grow bountiful, beautiful poblano plants. I love growing these big, gorgeous peppers for their versatility in cooking, and their amazing size. Growing poblano peppers is easy and rewarding, so I wish you a big harvest, every year!

Calvin
One of the original Pepper Geeks! When Calvin isn’t gardening or learning more about peppers and botany, he might be traveling new places or playing some music.
I’ve got poblano trees-3-4 ft tall with blooms but no fruit. The plants are very healthy with no insect problems. We live in souther Arkansas and it has been hot but watered frequently.
Do I need to do anything to the seeds after
I take them out of the fresh pepper?
You can plant fresh seeds right away. If you want to store them for any amount of time, they should be dried first
Recipe for pickeld Bell peppers??
How many peppers does a Poblano Plant usually produce?
@Scott, I’ve gotten anywhere from 6 wonderfully sized (5″+) peppers with stragglers to over 20 ranging from 3″ to 6″ish. I will say, watch the sun on the fruits, my experience is that they will scald easier than most other types so make sure you shade them or make sure they only get morning sun, especially if you live in a warmer, sunnier place. I have had issues in both Idaho and West Virginia. Morning sun only or shade cloth fixed this.