
How To Grow Carolina Reaper Peppers From Seed to Harvest
Disclaimer: As an Amazon Associate, I earn from qualifying purchases. Pepper Geek takes part in various affiliate programs. This means that purchases through our links may result in a commission for us.
If you happen to be a fan of eating scorching hot food, and the supermarket hot sauces just don’t cut it, you may want to grow your own hot peppers. In this article, I’ll share how to grow Carolina reapers in your own back yard.
It almost seems strange that you can grow the world’s hottest peppers yourself. After all, the compound that is spicy, capsaicin, is also the primary ingredient in pepper spray. So, if you like the sound of growing weapon’s grade produce in your home garden, you’re in the right place. Just be careful not to plant them next to grandma’s tomatoes…
In this article:
Where Do Carolina Reapers Come From?
Where exactly did these exotic superhot peppers come from? Are they grown in faraway lands and brought to the US via ships and planes? Well, no. In fact, the reaper was originally created in South Carolina by a pepper enthusiast named Ed Currie.
The story goes that Ed Currie, owner and operator of PuckerButt Pepper Company, was working on breeding a new superhot pepper variety in 2007. The cross was between a Pakistani Naga and a Caribbean hot pepper called La Soufrière.

In 2012, the cross was unveiled and was shortly thereafter crowned the hottest pepper in the world. Today, PuckerButt grows over 100,000 plants each year to meet the demand.
How Spicy Are Carolina Reapers?
The reaper has an average of 1.64 million Scoville heat units (compare that to 3,000-8,000 SHU for your average jalapeño). Carolina reapers have such a high concentration of capsaicin that they far surpass other superhots, such as the ghost pepper.
While the reaper held the world record for around 10 years, a new Guinness World Record has been set by Pepper X. This peppers trounces the reaper with an average Scoville rating of 2,693,000 SHUs, making it the hottest pepper in the world.
If you love spicy food, Carolina reaper peppers are some of the fieriest peppers you can get your hands on. Few other peppers can compare in terms of heat, but there are a few. These include the 7 pot Primo and the chocolate bhutlah.
How To Grow Carolina Reapers
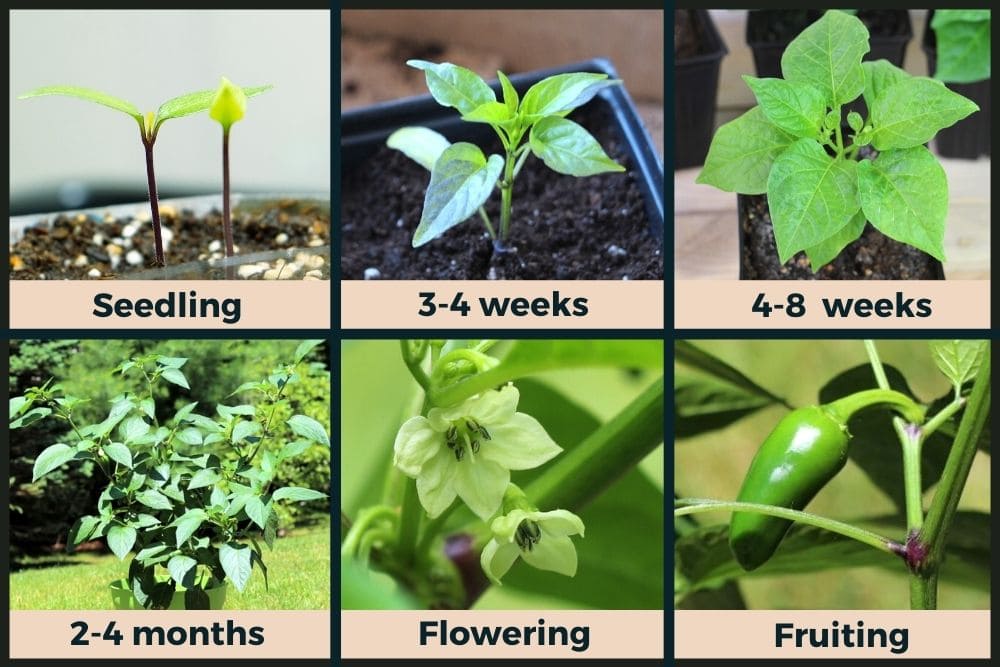
While most pepper varieties are fairly easy to grow, the Carolina reaper has a few unique requirements. For one, the plants can take up to 5 months to produce ripe peppers after transplanting outdoors. This long season means planting indoors to give the plants as much time as possible to mature.
Another consideration to make is the potential danger to those who don’t know about your mad scientist project in the backyard. Definitely keep these plants away from any youngsters that might find their way into your garden.
Lastly, reapers are fairly large plants. They come from the Capsicum chinense species, most of which are big and bushy with large yields. To keep them healthy and to maximize yield, we take a few extra steps during the season.

Planting Carolina Reaper Seeds
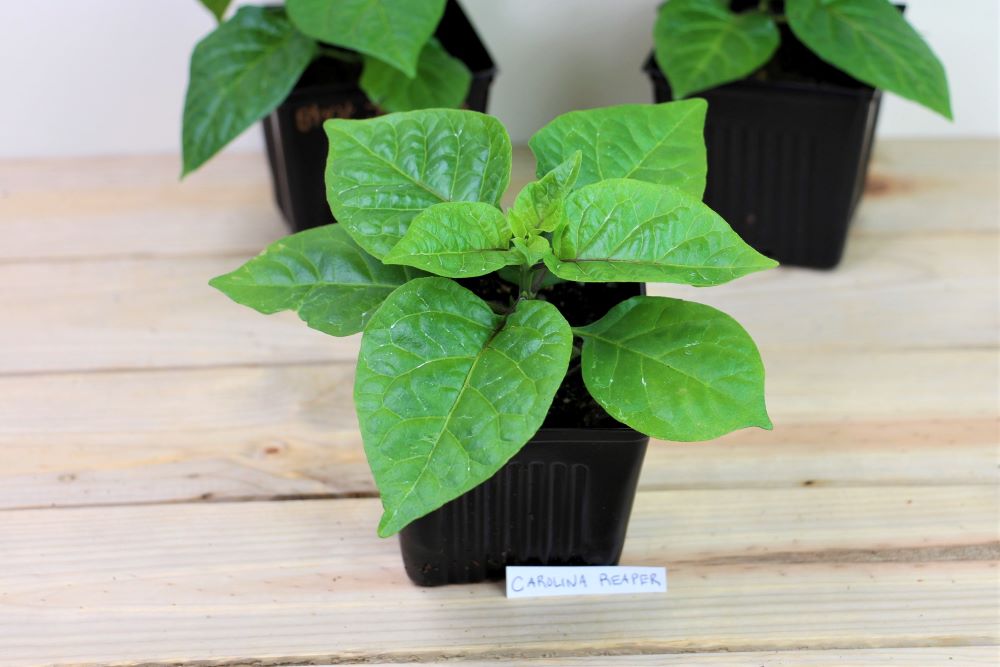
Since reapers are less popular than other garden peppers, you’ll likely have to grow your plants from seed. I recommend getting your seeds straight from the source at Puckerbutt. Or, try one of our other favorite seed suppliers here.
Next is to determine when to plant your Carolina reaper seeds. Like I said, reapers require a long growing season than say a jalapeño, so we start ours a few weeks earlier.
As a general rule, start your Carolina reaper seeds indoors about 8-10 weeks before your last frost date. If you live in a very cold climate (Zones 4 or lower), you may need to start even earlier to provide enough time.
How To Germinate Carolina Reapers
With your start date approaching, you’ll want to get together everything you’ll need to germinate your reaper seeds. If your seed supply is fresh, the seeds shouldn’t have issues germinating using our tried-and-true method.
Supplies:
- Seedling cells
- Trays
- Potting soil or seed starter mix
- Nitrile gloves
- Water
- Spray bottle
- Seed heating mat (optional but highly recommended)
These items make up the basic recipe for successful germination. The seedling heat mat is the only optional item, but warming the soil leads to drastically faster germination. As an alternative, you can simply find a warmer spot in your home to sprout the seeds.
With all your items in hand, start by putting on your nitrile gloves. Trust me, the capsaicin residue on the seeds can and will burn you if you aren’t careful!
Follow these steps to germinate Carolina reapers:
- Pre-moisten soil. Pour enough potting soil into a bowl and slowly add water, mixing as you go. The mix is at the right moisture when it sticks together when squeezed, but doesn’t drip water.
- Fill seed cells. Add the prepared mix to your seed cells, compressing with your fingers. Don’t over-compact, but don’t be too gentle. You should feel some resistance. The soil should be filled to the top of each cell.
- Add 1-2 seeds per cell. Drop 1-2 Carolina reaper seeds onto the surface of the soil in each cell. Planting multiple helps ensure at least one of the seeds sprouts (if both sprout, you will pluck the weaker one later).
- Push seeds 1/4″ deep. Using a pencil tip or similar, push each seed about 1/4″ into the soil. Cover the seed with surrounding soil and pat it down gently.
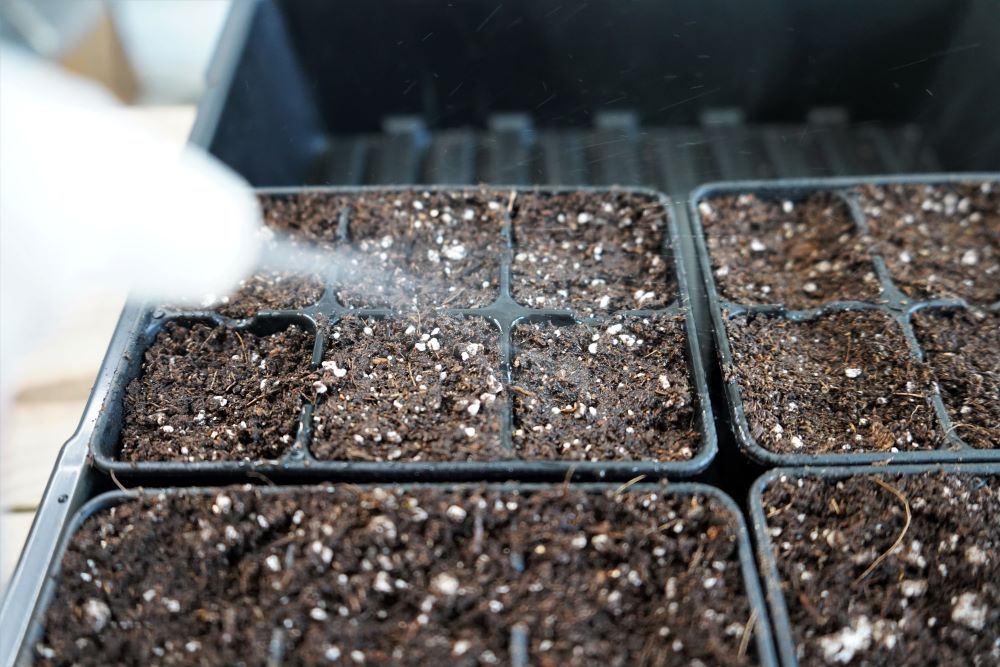
- Moisten the seed. Using a spray bottle, spritz the soil several times to ensure the seeds are all well-moistened. Keeping the seeds wet until they sprout is important!
- Cover the seed cells. Using a humidity dome (you can make your own or a plastic lid), cover the seed trays. This will prevent too much evaporation from happening, preventing the seeds from drying out.
- Place in a warm spot. Carolina reaper seeds germinate best at temperatures between 80-90°F. Since this is much warmer than most homes are kept, we use a seed heating mat beneath our seed trays. Set the mat to around 80°F.
- Fan out trays daily and watch for sprouts. Carolina reaper seeds should sprout in 7-10 days, but may take even longer depending on the seed’s age and environmental conditions. Check each day and fan out the trays to provide fresh air.
It can feel anti-climactic after planting seeds, but you’ll just have to trust in mother nature! The seeds want to grow, and if you are attentive and patient, they will.
Tip: Keep the seeds moist by spritzing the soil every 1-2 days. If your seeds dry out, it will halt the germination process.
After your seeds sprout, you’ll need to be ready to give them everything they need. While you wait, make sure you have the supplies and knowledge for the next phase of growth.
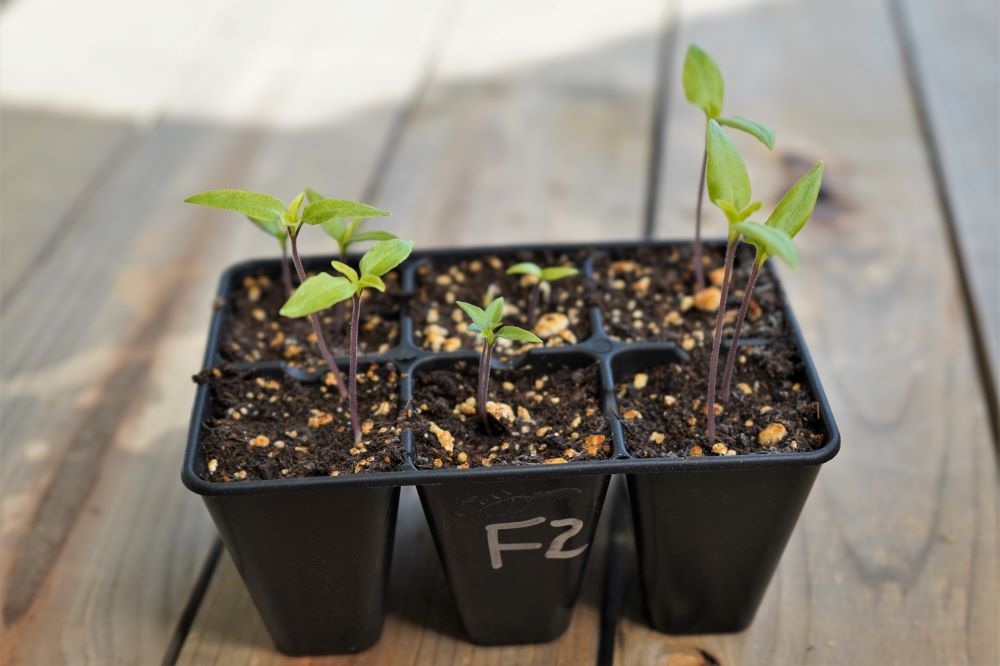
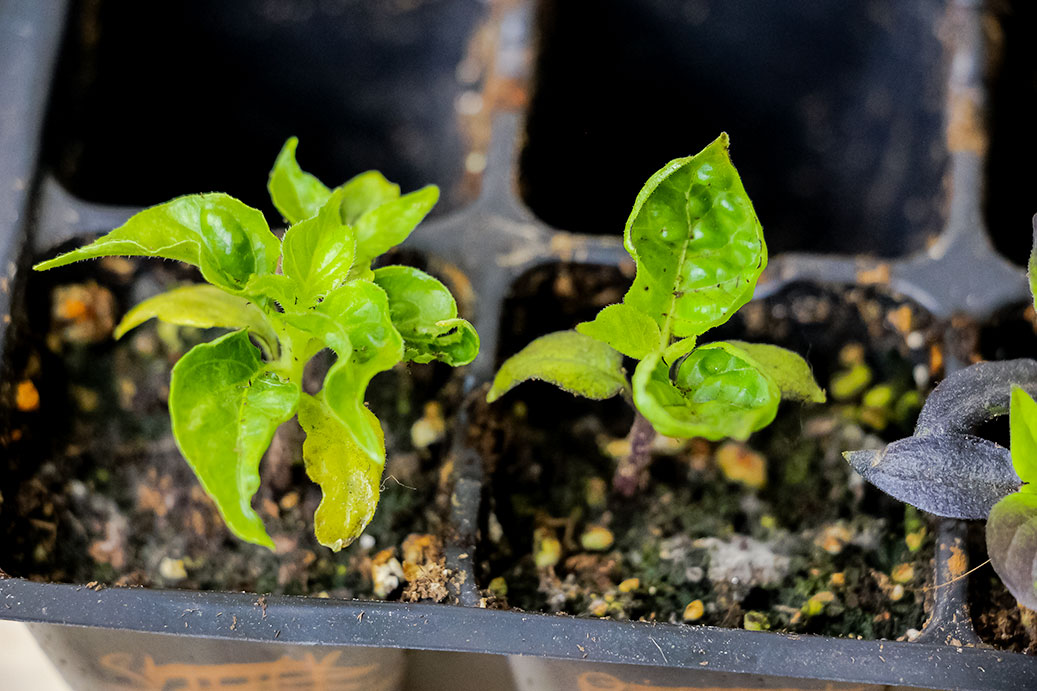
Seedlings
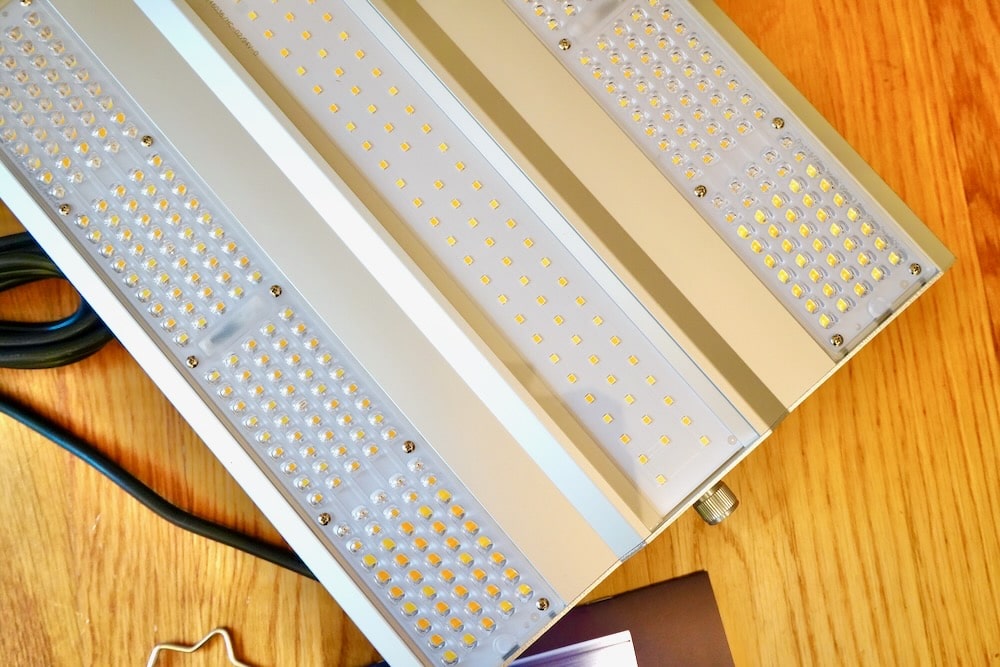
After your Carolina reaper seeds sprout, it is time to start providing light for the plants. They need light to produce energy and grow strong roots and foliage from a young age.
We use LED grow lights for all our hot peppers. They run cool, silent, and are becoming more and more affordable. This LED light is a great budget friendly option with a bunch of great features.
See more of our grow light recommendations here.
Carolina Reaper Light Settings
As soon as your plants sprout, provide them with 14-16 hours of light per day. A sunny window, even one that is South-facing, won’t be able to provide this. Instead, use a grow light and timer to schedule the lights to turn on and off automatically.
Many new LED lights will have a dimmer knob to adjust the brightness of the light. It is a good idea to start with reduced brightness and a higher hanging height for young pepper seedlings. The plants are tender and delicate at this stage, and overly-intense light can burn the foliage.
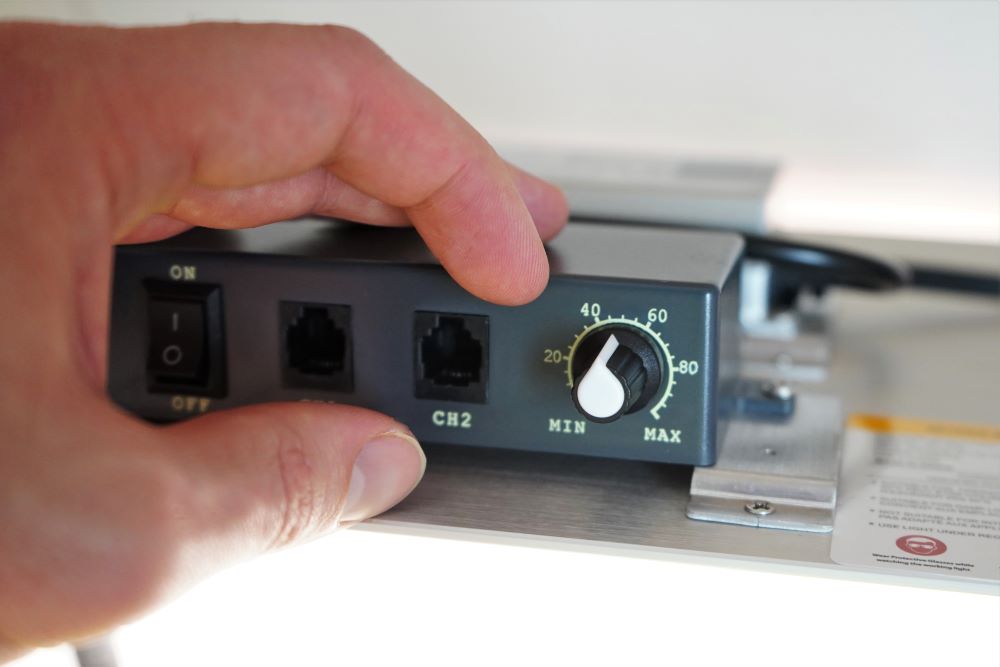
For the first 4 weeks of growth, we usually keep our 100W LED grow lights at about 15-18 inches above the leaves, and around 50% brightness. Read the manufacturer’s recommended hanging height for your specific light, but always stay on the cautious side with seedlings.
The important thing is the duration of light exposure, as the young reapers need all they can get to grow more quickly. Don’t expect rapid growth, but know that the light is helping form strong roots and stems.
Fertilizing Seedlings
If you planted directly in potting soil that has added nutrients, you don’t have to worry about fertilizing at this time. However, if you planted in seed starter mix, it is possible it doesn’t contain nutrients. If this is the case, you’ll have to begin fertilizing your seedlings about 1 week after sprouting.
For young plants, I recommend fertilizing at 1/4 of the manufacturer’s recommended strength. Going light is important, especially if you are using liquid fertilizer which may cause nutrient burn.
Use a water-soluble fertilizer like this organic option, and fertilize the plants at the recommended frequency (usually about once every 1-2 weeks). In a few weeks, the plants will move into potting soil with added nutrients. This type of soil slowly releases nutrients for months, reducing the need to fertilize yourself.
Watering Seedlings
While plants are young, I usually bottom water. This is the process of filling a tray with water and submerging the seed cells into the water. The soil absorbs the water through the small slits in the bottom, sucking up moisture to feed the plants.
You can also top-water, just be careful not to damage the delicate seedling stems. Always allow excess water to drain fully so that the roots have plenty of oxygen.
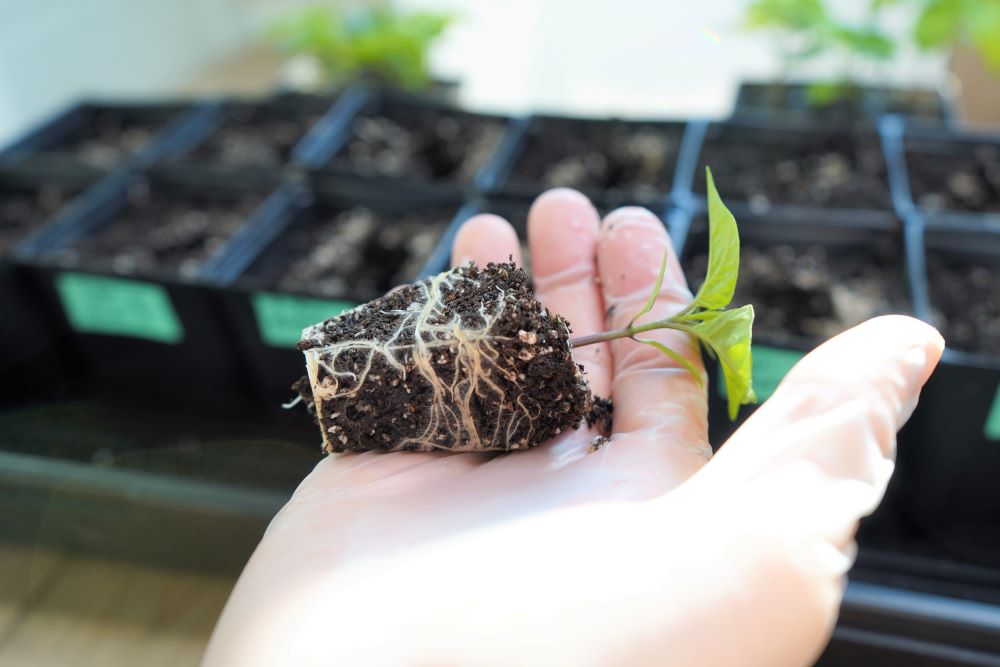
Transplanting & Moving Outside
Transplanting is the process of moving a plant from one container to another location. Once your Carolina reapers have outgrown their seedling cells, they must move into a larger pot.
We transplant our peppers twice. This means the seedlings move into 4″ pots, then eventually move again to their final growing place (a larger pot or into the ground).

The first move usually happens 2-3 weeks after the reapers sprout. If the plants have received plenty of light, water and nutrition, they should have a healthy root system by this time.
The most important factor of transplanting is timing. Never miss the window of opportunity to transplant your peppers, or you run the risk of them becoming root bound. This is when the roots become overgrown and entangled in the pot – not good!
Tips for transplanting:
- Use regular potting soil. Look for a high quality potting soil with a range of slow release fertilizers. If you want, you can make your own potting soil using basic ingredients.
- Pre-moisten the soil. Just like we did for planting seeds, it is helpful to pre-moisten your potting soil before filling the larger pots. It helps the soil absorb water better in the future and gives your plants plenty to drink.
- Don’t bury the stem. When you move the plants into more soil, it is tempting to plant them too deep. Keep the stem at the same height it was at in its seedling cell. Otherwise, it may rot.
Once your seedlings have been moved into larger pots, give them a good drink of water, and return them to under grow lights. If the timing was right, the plants should continue to grow more foliage and roots on their way to moving into larger pots or in-ground.
Moving Outside
As the plants grow, the outdoor weather should be warming up. If your plants outgrow their 4″ pots before the weather is warm enough, it is best to transplant again indoors into an even bigger pot. You should never interrupt the growth of your Carolina reapers by keeping them in a small pot for too long!
Hardening off is one of the most important steps for moving pepper plants outside. This is the process of gradually adjusting the plant to the outdoor elements: Direct sunlight, wind, and precipitation.
Begin on a cloudy day, bringing your plants outside for about an hour. After a day or two of this, increase time in the shade by about 30 minutes daily. A few days later, allow them to get some sunlight. After about 2-3 weeks of increasing sun exposure, the plants should be fully adjusted and ready to move out permanently.

Tip: If your plants seem weak, provide some support with a small wooden skewer. Then, attach the main stem to the skewer with string, keeping the plant upright. This will prevent the stems from snapping in a strong wind gust.
Hardening off can begin as soon as outdoor temperatures are in the mid to upper 60s F. Bring them back indoors overnight to avoid any temperatures below 55°F.
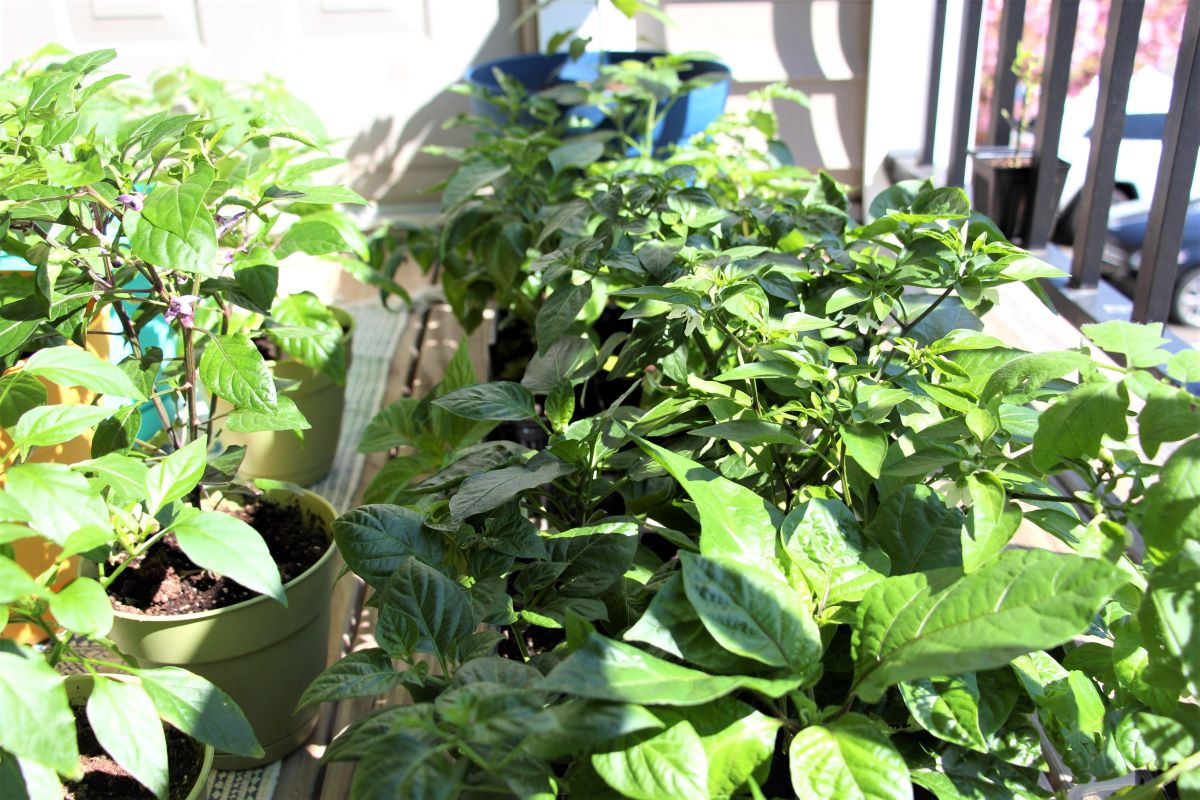
Container Size For Carolina Reapers
Since the reaper is part of the C. chinense species of peppers, the plants can grow quite large in a single season. We have seen reapers grow at least 5 feet tall in optimal conditions.
With that said, choose a container that is at least 5-7 gallons (about 1 cubic foot) for a good harvest of Carolina reaper peppers. You can use a smaller pot if you have limited space for plants, but it will likely impact your overall yields. For a huge yield, grow your reapers in 25 gallons of soil (or more)!
Choosing A Location
Peppers prefer full-sun conditions. If you have a South-facing spot without any obstructions, this is perfect! Carolina reapers can be grown in partial shade, but expect a smaller harvest.

Note: If you live is a very hot climate like Texas or Florida, your plants may benefit from shade cloth in mid-summer. If temperatures will be over 90°F, shade cloth can reduce the temperature and help the plants get through a heat wave.
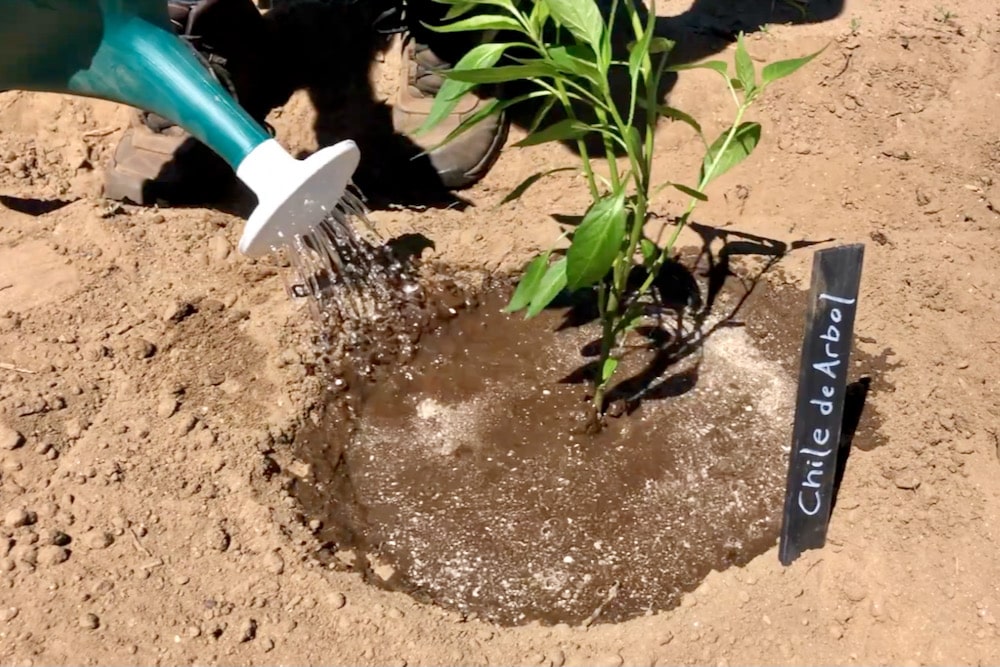
When To Move Outside Permanently
Once the outdoor temperatures remain above 55°F at night, your Carolina reapers can move outside permanently. This usually happens 2-3 weeks after the last frost date.

Again, you can begin introducing the plants outside a few weeks before this, but overnight temperatures may still be too cold. It is best to wait until you are sure that a cold night won’t happen.
During the first few weeks outside, you may not see much growth. This is because the plant will focus on growing a strong root system to support the plant throughout the season. After 3-4 weeks, the plants will establish and begin growing more branches and leaves.
Fertilizing and Watering Carolina Reapers
Once your plants are established, they should begin to flourish. More branches, more leaves, and eventually, lots of flowers.
To encourage healthy growth, the plants need plenty of light, oxygen in the root zone, water, and nutrients. The first two should be taken care of already by planting in the right place, in quality soil. This section will focus on watering and fertilizing properly.
Fertilizer
There are two basic methods of fertilizing: water soluble and slow release. Depending on how you are growing, you may choose one over the other, or a combination of both.
Slow release fertilizer is often included in potting soil, but it is unclear exactly how much. Most bagged soils claim to feed plants for 3-6 months. If you plan to use this type of fertilizer, I would recommend using an organic option to reduce the chances of burning the plants.
The first feeding can be mixed into your potting mix, or raked into the first 2-3 inches of garden soil. Each manufacturer recommends a different application rate, but it is typically around 1 cup of fertilizer per cubic foot of soil.
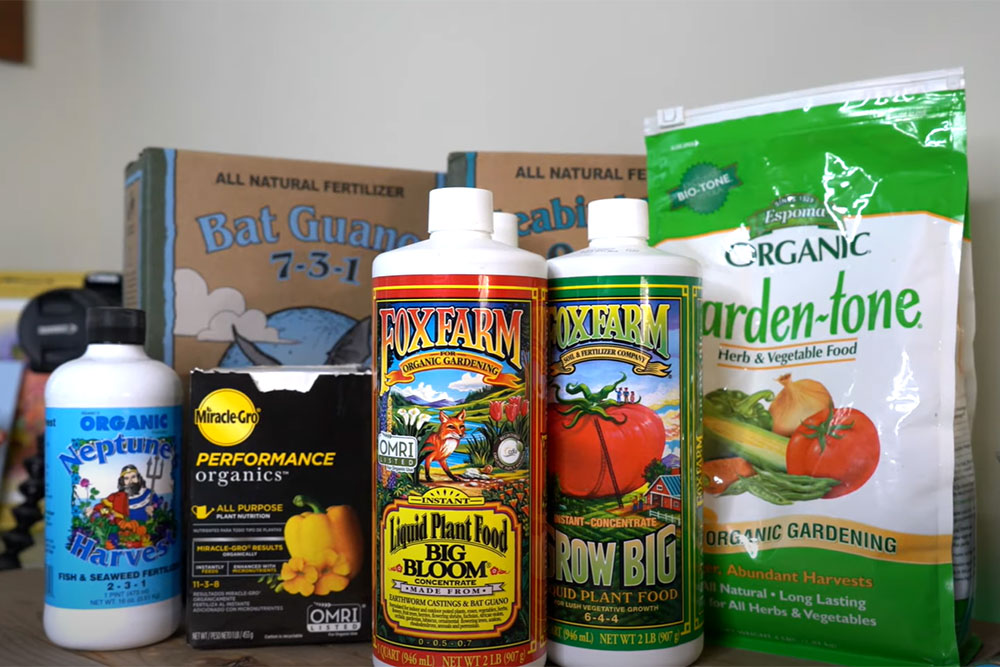
Slow release fertilizer: Espoma Garden-tone
Water soluble fertilizer is great for feeding plants that are showing signs of a nutrient deficiency. If you notice yellowing leaves on your pepper plant, applying a quick feed of liquid nutrients is the fastest way to correct the problem.
–> Liquid nutrients: Fox Farm Trio, Miracle-Gro organics
Watering
This is one of the most common questions we get about growing peppers: how often should I water? The answer is not as simple as “X number of times per week.” Instead, it will depend on several factors.
So, how should you water your Carolina reapers? Get used to checking your potted plants by weight, or by digging a few inches into the soil to feel for moisture. If the soil is moist, potted plants will be heavier, and you can hold off on watering.
A few things to keep in mind:
- Larger plants will drink more water. If your plants are tall and full of leaves, they will transpire (sweat) more water through the foliage. This means more watering.
- Hot weather will lead to more watering. Mid-summer here in New England, we water our superhot pepper plants daily. Even in large pots, the hot weather causes the plants to transpire more to cool down, thus more frequent watering.
- Wind can cause more water loss. Wind leads to quicker transpiration, which again leads to more watering.
Tip: Always allow water to drain freely from the soil. In potted plants and raised beds, this happens naturally through drainage holes. In-ground beds may need more work if drainage is poor.
Staking, Mulching and Pruning
You could simply transplant your Carolina reaper plants outdoors, water as needed, and wait. Or, if you’re more of a hands-on type, you can use some of these easy techniques to keep your plants healthy and happy.
Staking is highly recommended from an early age. Even strong indoor plants can be vulnerable to strong winds. This is especially true during the first few weeks outside, and later in the season when fruits are forming. Use anything from a piece of bamboo to a metal T post to keep your plants upright throughout the season. Use plant velcro to secure the plant’s stem to the vertical stake.
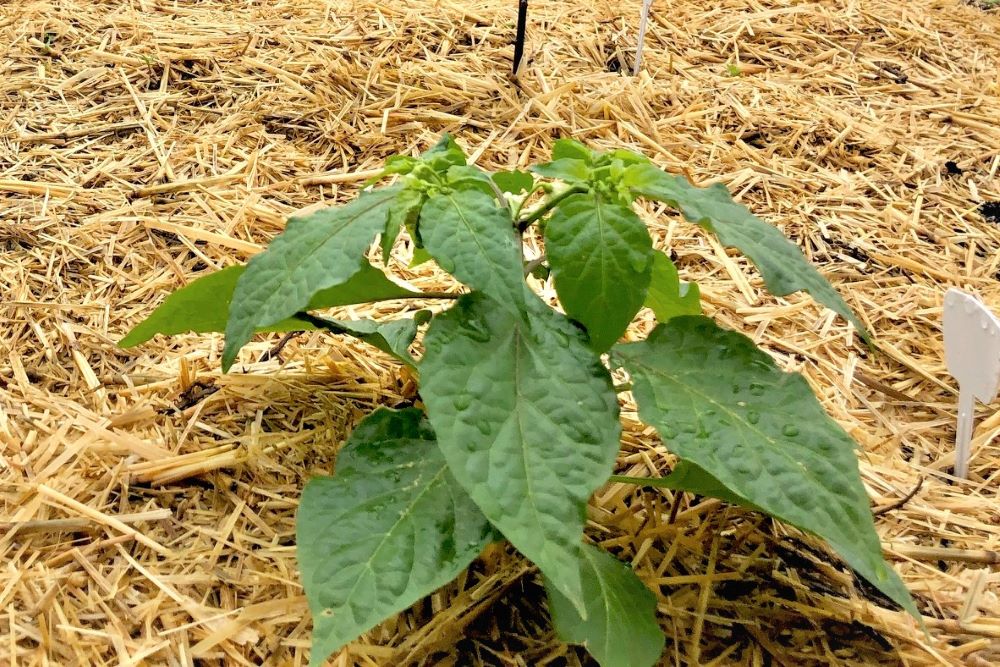
Mulching is a step I like to take to help reduce weeding and improve water retention. This is less effective in potted plants, but is a great idea in any raised bed or in-ground bed. I use straw or shredded leaf mulch, but you could also use woodchips or black plastic.
Bottom pruning is optional, but can help avoid splashing soil onto the lower leaves. There are several types of pruning pepper plants, but bottom pruning is highly recommended.
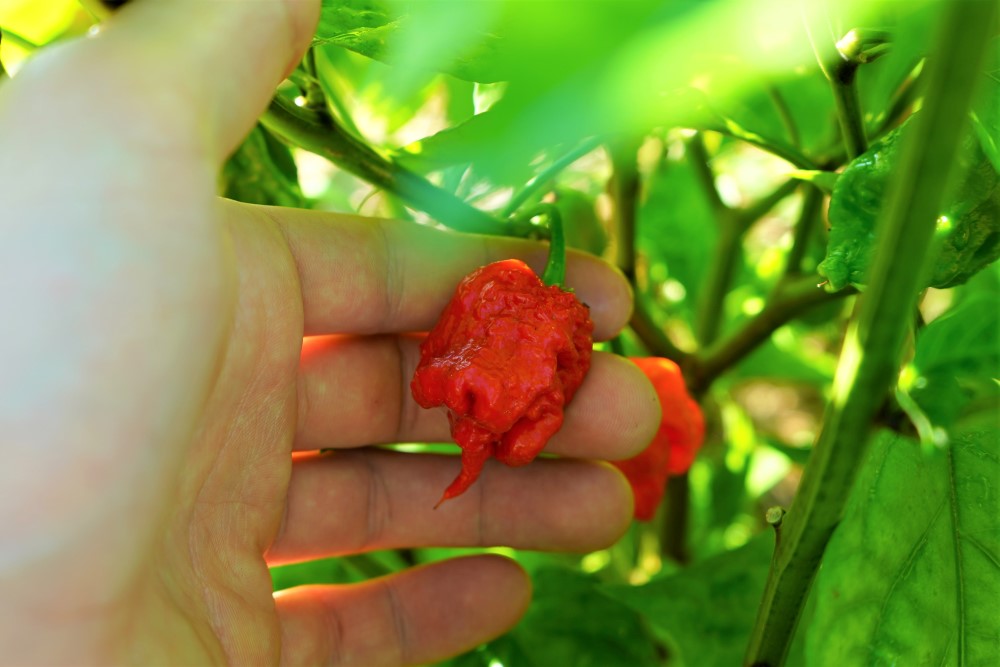
Harvesting Carolina Reapers
Finally, after months of care, your reapers are beginning to form and ripen. This is the most exciting time of the season, but be sure you’re doing it right! Carolina reapers will start off as a lime green color, and may stay green for 4-6 weeks before ripening. You’ll need some patience during the summer months!

When to Pick Carolina Reapers
As a general rule, harvest Carolina reapers after they have fully turned red. Unripe reapers are edible, but you’ll get the most heat and flavor from peppers that have just turned red.
While harvesting, be careful not to break the skin of the peppers. Any opening can lead to spicy juices getting on your hands, which can lead to a skin burn. You can wear gloves, or carefully harvest by the stem, not by the fruit.

What To Do With Carolina Reapers?
What, you didn’t think this part through? Now that you (hopefully) have dozens of fresh peppers, it’s time to put them to use! Here are a few ideas for using your homegrown Carolina reaper peppers:
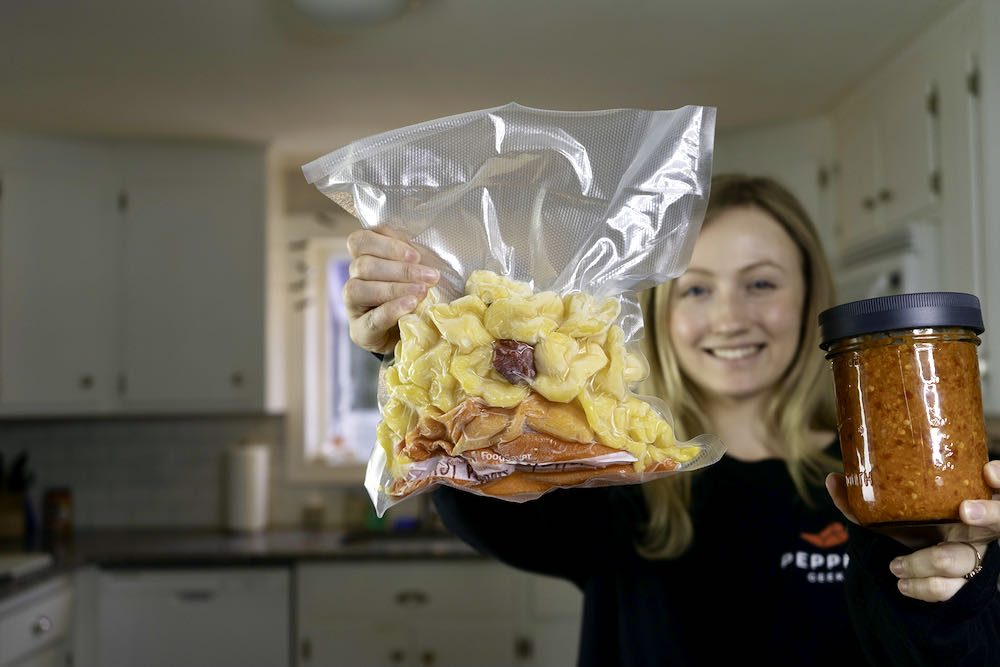
- Make hot sauce. One of our favorite uses for reapers is homemade hot sauce. If you want to make something truly special, start by fermenting your reapers into a flavorful and acidic mash. Then, add other ingredients to blend up your own special fire sauce. Warning: Wear a respirator and goggles if you plan to cook reapers indoors!
- Dehydrate them. A simpler method of using reapers is to dehydrate them and make a powder. Think of this as a super spicy substitute for cayenne pepper powder.
- Freeze them. If you don’t have any immediate use for your peppers, you can always throw them in a vacuum sealed bag and into the freezer. They can keep there for months, and can later be used for hot sauce without losing any heat or flavor.
I hope this article has inspired you and helped you learn how to grow Carolina reaper peppers from seed. Let me know how your plants turned out, and any additional growing tips you may have.

Calvin
One of the original Pepper Geeks! When Calvin isn’t gardening or learning more about peppers and botany, he might be traveling new places or playing some music.
When is the best time to harvest my reapers?
I read there the hottest around week 8?
Any tips on what week to harvest for maximum heat?
Thank you.
For reapers, harvest just as they change color. That’s when most hot peppers peak in terms of heat. Here’s our article on growing spicier peppers: https://peppergeek.com/grow-hotter-peppers/
Hi Calvin,
Very informative on growing CR. Thanks loads. Blessings.
Thank you so much for this article. This is the first year I’ve grown CRs and I was beginning to get discouraged that there weren’t any peppers yet (I transplanted them in mid-April). My jalapenos have produced peppers for over a month now. However, on the CR, I’ve barely seen a blossom! I also didn’t realize how tall they got! I found your website and now understand my plants are right on schedule. I didn’t know they took so long to fruit. Anyway, in checking them today (early August), there are tons of pee-wees on the vine. Thanks again for this great advice.
Same thing as Deva wrote about. Have 1plant and as of today 8/4/24 many tiny peppers with 6 near the plant bottom that are larger and light green. Guess maybe end of Sept? We live in eastern NC
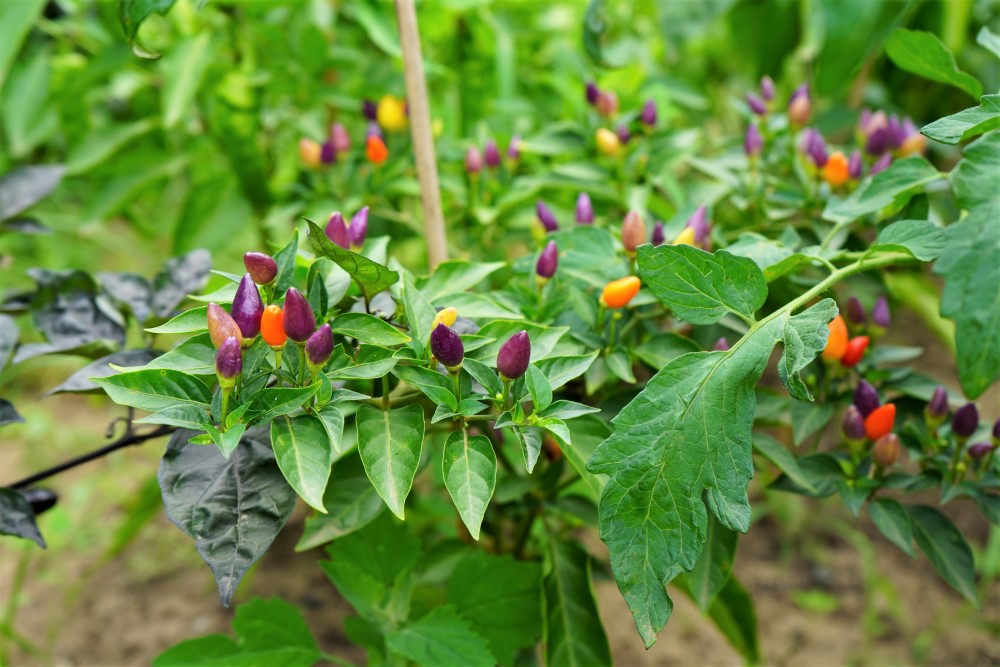
This is my first season growing chillies and Carolina Reaper specifically. I have many plants, around 15 starting to produce fruit which is great. I have noticed a couple of the larger ones have started to adopt a purple(ish) area on them, is this normal and part of the process or is this a sign of something else? Thanks.
The stems often have purpling, especially near the nodes. Totally normal!
@peppergeek, Phew! Thank you! Roughly how long do the peppers take to turn red when they are green?
Reapers can take a month or more 😁
@peppergeek, Sorry, I meant on the actual fruit, not the stems. I have noticed the colour on the stems but a couple of the larger peppers have some very light purple patching.
Oh, so in this case it’s most likely due to direct sun exposure on the fruits. Again, it’s pretty normal to see on most pepper varieties. As long as it doesn’t seem rotten or moldy, most likely due to natural causes
@Dan, Calvin has a whole article on purple reapers. https://peppergeek.com/purple-reaper-peppers/
Just wanted to say how helpful this article has been helping me grow my first batch of CRs. I planted in early February 2023, it took about 5 months for them to start growing the flower stems which felt really long – I was getting a bit nervous. I moved them outside about 6 weeks ago, but have had to bring them back in as it is raining so much in the UK right now.
Wouldn’t they be best outside for the flowers to pollinate by insects, or will they pollinate themselves inside? I kept my naga viper’s indoors last year and the yield was really disappointing.
If they are indoors, my recommendation would be to give the plants a shake once or twice a day while they are flowering. Also, a fan can help jostle the flowers and release the pollen for better flower fertilization. Outside has been best for us historically. Plus, some flowers produce more pollen than others, so you’ll have to gauge how much your reapers are producing when they are in full bloom.
I have two plants that have grown together in a pot, do I need to separate them when I put in the ground or can I just plant it the way it is.. with roots entwined?
I would probably just snip one of the plants if they are reapers. However, you can also just give it a shot having two plants side-by-side. Up to you!
can you grow carolina reapers indoors and still get the chilis
Absolutely, you’ll probably want to have some artificial light to help the plants produce a good crop. Otherwise, your yields are likely to be low
I came to this article looking for optimal plant spacing but seem to have missed it. What would you suggest?
24″ between plants is ideal – they’ll bush out well in good conditions!
I tried planting reapers, and the first two leaves came from the seeds, but the next leaves have not grown out. What is the reason for this, and what can I do to remedy this? I am using ts-3. Should I mix it with normal soil? I am in the Philippines.
I am about a month into your site and really love it. I agree with Douglas, I would really love to see you do something on overwintering them. Not really sure how much to prune before taking them out of the ground and repotting to go inside. I am in zone 8 so it’s too cold to leave them outside the entire winter. This was my first year ever doing Ghost or Reapers and had no clue peppers could be overwintered until I stumbled upon something a few weeks ago. Please, Please do one on overwintering!!! Thanks much.
Here is our article on overwintering peppers. I usually only recommend it if you have something really special you’d like to preserve, as we normally grow from seed each season to avoid bringing pests inside. Best of luck!
You need to add a bit about overwinter these peppers. Both full plant under light {seldom read} to pruning {everyone copies the same advice}.
My Cuz turned me onto your site, because I make Hot Sauce’s and Hot Jellies. I also grow my own peppers.