
AeroGarden Harvest Review – Setup and Grow Results
Disclaimer: As an Amazon Associate, I earn from qualifying purchases. Pepper Geek takes part in various affiliate programs. This means that purchases through our links may result in a commission for us.
AeroGarden was one of the very first companies to make a hydroponic grow system accessible to casual gardeners. With their lineup of attractive, affordable systems, anyone can easily grow fresh basil right next to the kitchen spice rack.
We have used our AeroGarden Harvest model for over a year, and have had enough time to write our full AeroGarden review. We’ll cover everything from setup, to maintenance, to cleaning, and of course how well the plants grew.
We grew various basils, and we also grew a small hot pepper (in true Pepper Geek fashion). There are definite pros and cons to the AeroGarden, and we hope this article will help you make an informed buying decision!
Where To Buy AeroGarden:
In This Article:
- About the AeroGarden
- Setup guide
- Different models (pros and cons)
- What can you grow in an AeroGarden?
- Can I grow fruit in an AeroGarden?
- Can I grow my own seeds?
- AeroGarden issues
- Cleaning the AeroGarden
- Review Conclusion
What Is The AeroGarden?
AeroGarden makes compact, all-in-one hydroponic (soil-free) grow units for casual home gardeners and chefs. The various units are capable of growing herbs, fruits, vegetables and other plants with just a single electrical outlet. They are perfect for easy, hands-off gardening, and also add an attractive countertop piece to the kitchen or office.
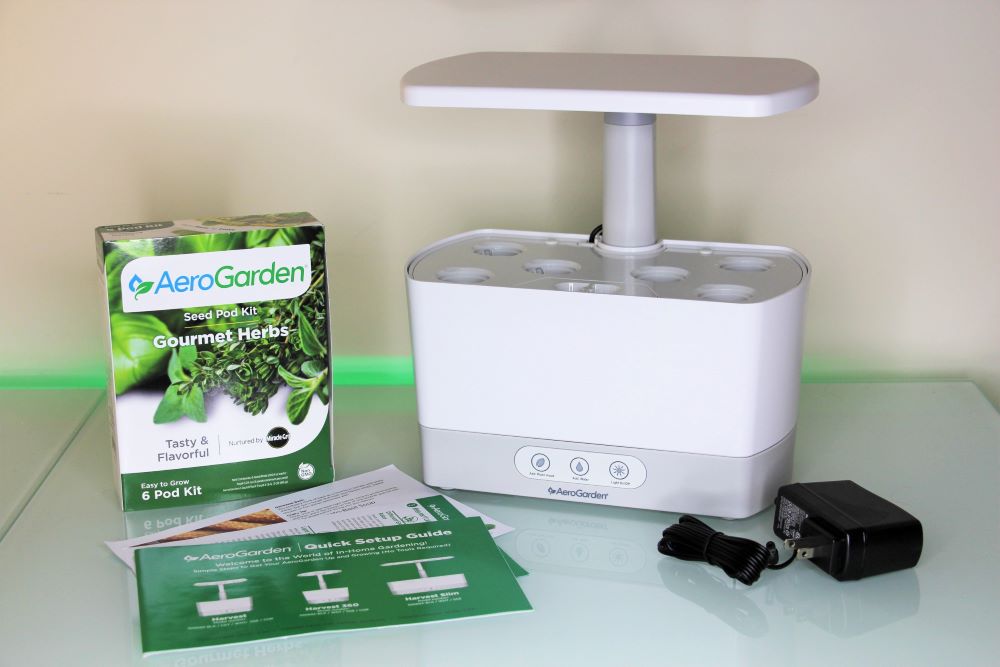
Included In The Box:
- Light unit (various wattage)
- Water bowl
- Seed pods (various plant options)
- Humidity domes
- Plant food (hydroponic nutrients)
- Pump
- Power cable
- Setup guide
The benefits of hydroponic growing are huge. AeroGarden says that plants grow 5X faster, and we agree! Seed germination happened in just a few days, and the plants grew insanely fast once they got going.
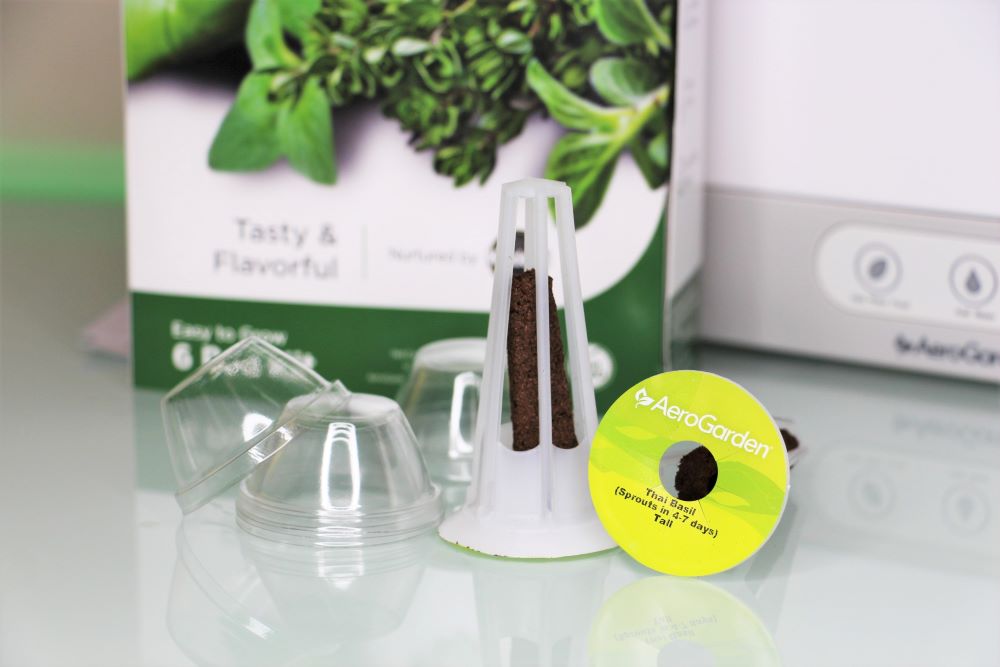
You start with seed pods that are loaded with your selection of seeds. You might choose herbs, lettuces, flowers, or vegetables, though veggies tend to take up more space (more on this later). The pods are lowered into a nutrient-rich water solution (using the provided plant food), and the seeds germinate. The plant’s root system then grows directly into the pool of water where nutrients are absorbed.
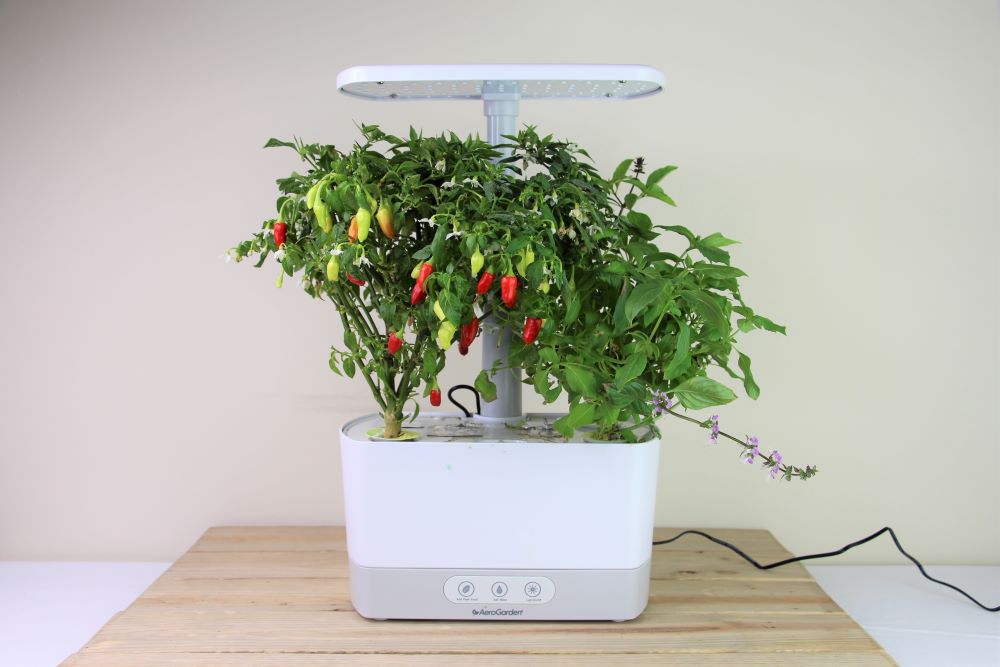
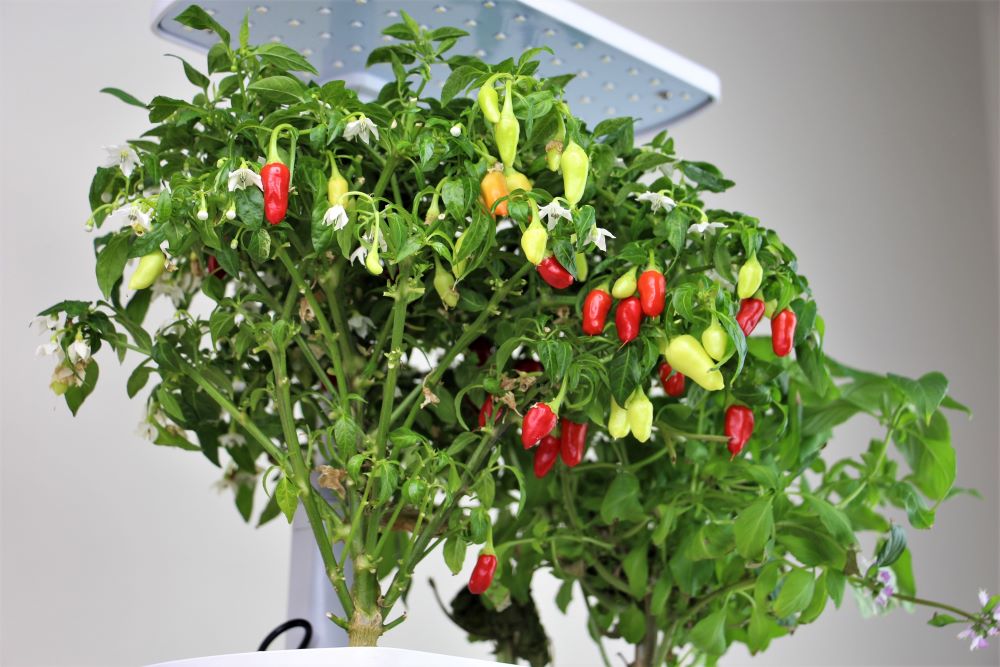
Each unit comes with a height-adjustable LED light. Since the light only goes so high, this was one limitation of our Harvest unit (12″ max height). The peppers we grew definitely could have grown taller with more space. Instead, we ended up pruning the plants to avoid the foliage coming in contact with the LEDs. However, this didn’t change the fact that we got a sizeable harvest of peppers!
If you are just growing herbs, the idea is that you will be harvesting the plants as they grow anyway. In other words, the light’s height shouldn’t be a problem for frequently used plants.
The water reservoir needs to be topped off regularly as the plants use up water. As they grow larger, the amount of water they use increases (a lot!).
Our AeroGarden experience was almost perfect, though we did run into a few small issues in our first grow. Generally, our overall feelings about this grow setup have been positive.
AeroGarden Setup (with Steps)
Setting up the AeroGarden is really, really simple. If you have a raised garden bed, you know that gardening is not exactly easy. In fact, it’s hard work. With the AeroGarden, you follow the simple steps in the provided setup guide, and you’re on your way to healthy plants.
The unit comes with almost everything already assembled. You just have to choose which plants you’d like to grow, add water and nutrients, and plug in a few wires.
Setting up the AeroGarden:
To set up your unit for the first time, first choose a location for it, then seat the water bowl securely in the lighting unit. Then, plug in the pump cable (behind the unit) and the power adapter.
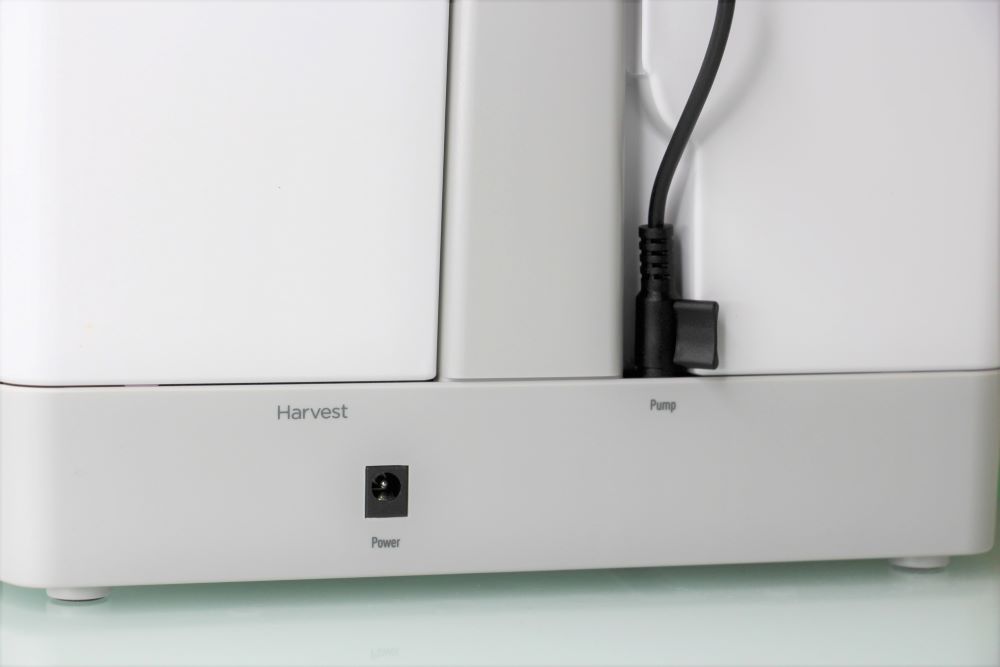
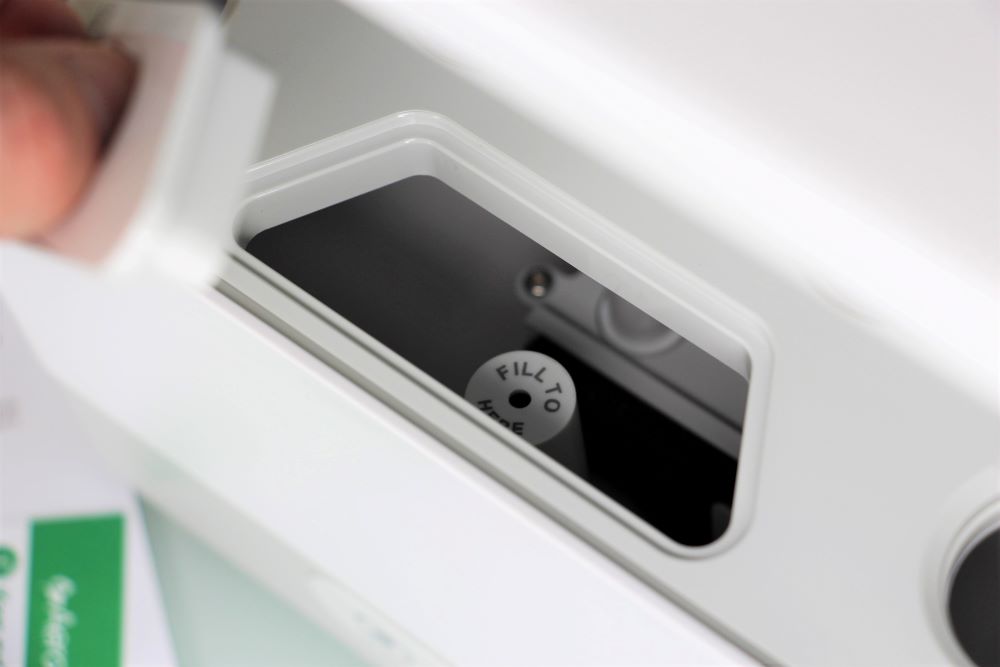
Next, fill the water reservoir to the ‘Fill To’ indicator and add nutrients according to the packaging (1-2 cap fulls depending on how many seed pods).
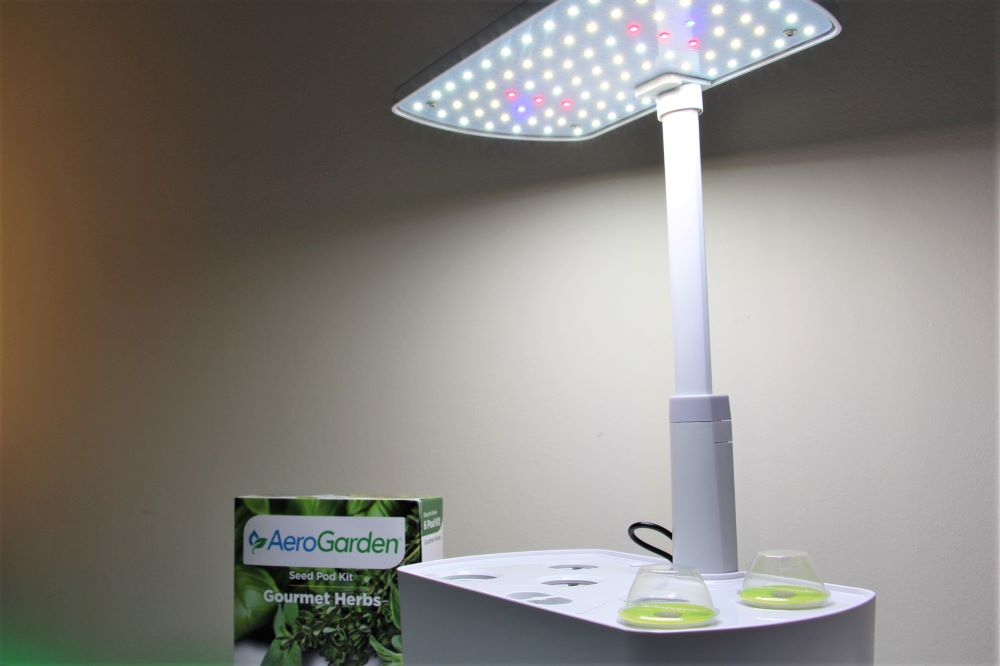
Next, add your selected seed pods to the pod holes. Cover each pod loosely with the tiny humidity domes. These will stay in place until the seeds sprout. Finally, plug in your unit and the lights will come on. Keep the light in the lowest position until the plants have grown to within a couple inches of the light.
A few things to know:
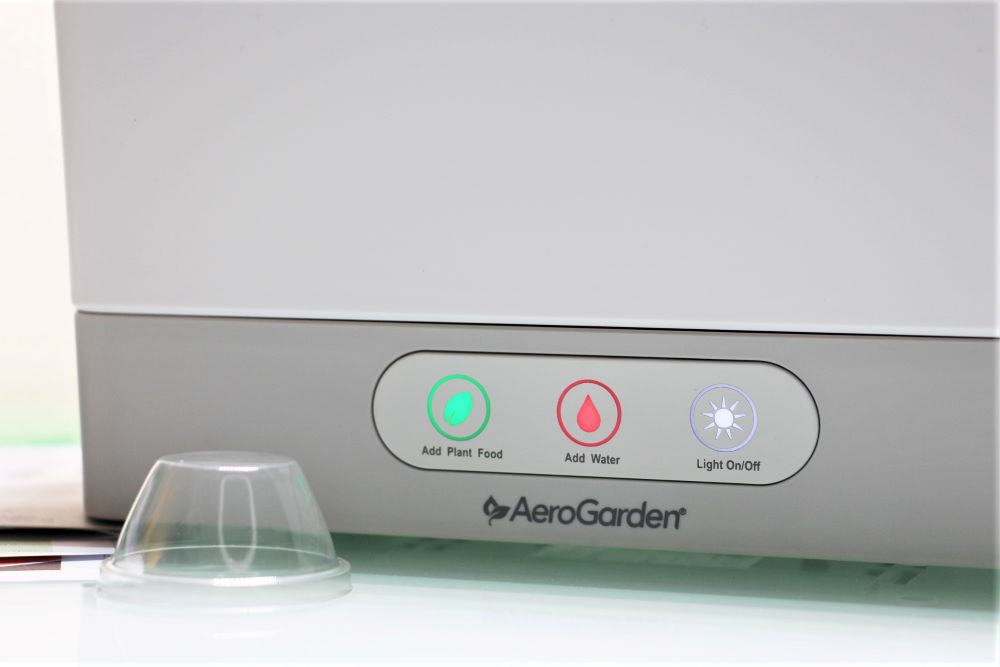
- Lighting timer. When you plug in the unit for the first time, the lights will immediately come on and stay on for 15 hours, then turn off for 9 hours. They will then come on at this same time each day. We chose to have the lights come on early in the morning to simulate natural sunlight. If you’d like to change the ‘On’ time, simply press and hold the Lights On/Off button for about 3 seconds until it blinks. This will now be the new on time.
- The pump. There is a small air pump that is submerged in the water bowl. This provides vital oxygen to the plant’s roots. This is automatically set to come on for 5 minutes, and shut off for 25 minutes. You can test the pump by tapping the green button once. The pump makes a slight bubbling sound when it is on.
- Water level. The water level will go down regularly. There is an indicator light that turns on when the level drops below 1/2 capacity. However, you should try to keep it topped off before that happens. As the plants grow larger, the water level will decrease much faster, so keep an eye on it and add more as needed!
- Crowding. The seed pod holes are positioned just 2.5-3″ from one another. This doesn’t leave much room for each plant to expand. For this reason, we recommend starting at half capacity of your specific unit.
- Unused seed pod holes. If you only plan to use some of the available seed pod holes, be sure to cover the others up. We used tin foil and tape to prevent leaves and other debris from falling into the water bowl.

The Lights On/Off button can also be used to temporarily shut off or turn on the unit’s lights. Tapping this button will not change the lighting schedule.
Different AeroGarden Models
While we worked with the Harvest AeroGarden for this review, there are several models of AeroGarden to suite different grower’s needs. If you are looking to grow many different plants, you may decide to choose one of the larger models.
Below are all of the different options in the AeroGarden lineup of products, with pros and cons for each.
AeroGarden Sprout ($76+)
The smallest available unit, the Sprout can hold just 3 plants at a time. This unit is perfect for a college dorm room, a small office or small kitchen. If you don’t want your AeroGarden to take up too much space, look no further than the Sprout.

Pros: Affordable, small footprint.
Cons: 10 inch light height limit, polarizing design, hard to find.
With a 10W light and a maximum height of just 10 inches, the Sprout is ideal for herbs or lettuces. We ran into height issues with our larger Harvest unit, so this smaller one would be tricky for growing peppers or tomatoes.
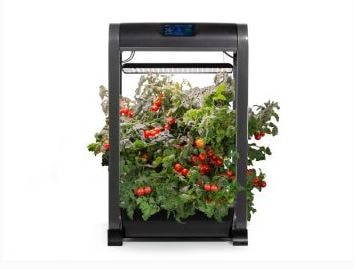
AeroGarden Harvest ($100+)
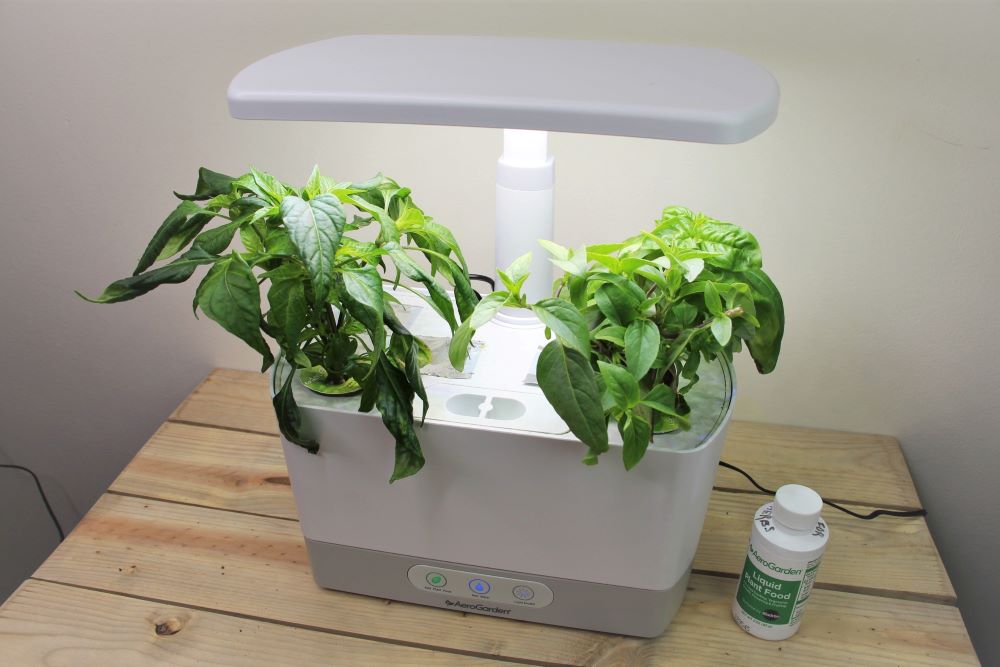
There are currently 5 different ‘Harvest’ varieties of the AeroGarden. They come in different shapes, but they all have room for 6 seed pods per grow. With a more powerful 20W light, this unit is a great middle ground.
Pros: Cost effective, more growing space, taller light unit, simplistic design.
Cons: Larger footprint, limited light height.
The original Harvest unit measures 10.5″ wide by 6″ deep and fits comfortably on a standard kitchen countertop. We keep ours in our office (thanks to the cat nibbling at the leaves), and it adds a welcome, full spectrum glow to the space while the lights are on.
With 20W of power, the light is strong enough to grow up to 6 plants. However, we grew 2 basil plants and 1 pepper plant to allow the pepper plenty of space (which it definitely needed).
The top-of-the-line Harvest Elite series comes in a slim design (just 4.5″ wide), and boasts a digital display. It also matches high-end appliances with a genuine brushed stainless steel finish.
AeroGarden Bounty ($199+)
If you have more space for your indoor garden, check out the Bounty family. These units can hold up to 9 seed pods at once and have a larger 30W LED light.

Pros: Taller light for more vertical growth, more plant capacity (9 pods).
Cons: Bulky footprint (17″ wide, 11″ deep), bright light, pricey.
The major improvement in the Bounty series is that the light can extend up to 24″ tall. This allows much more space for plants to develop and to achieve larger harvests from your grows. We also love the ‘Vacation Mode’ that is included in the Bounty lineup of AeroGardens for keeping your plants happy while you’re away.
AeroGarden Farm ($396+)
Looking for a semi-professional indoor hydroponic unit? The AeroGarden Farm may be the right choice for you. With 12 and 24 pod units available, these mini farms can pump out some serious produce for the family.
Pros: Much more space for plants, highly adjustable light height, stackable design, Amazon Alexa connectivity, trellis included.
Cons: No longer countertop ready (14″ depth, 34″ minimum height), bright lights (60W).
With a 60W LED light, you can be sure that your plants will grow strong and healthy. The WiFi integration is also pretty handy, allowing you to control your garden remotely with your phone.
If you want to grow larger fruits and vegetables like tomatoes, the Farm units will be ideal. They also come with a trellis for supporting heavier, climbing plant varieties.
The stackable design also opens up the option to have multiple farm units working together to grow enough food for the whole family.
What Can You Grow in an AeroGarden?
So, what exactly can be grown in the AeroGarden? While we only grew a variety of herbs and some small peppers, we have seen many accounts of people growing other plants. Here is a list of the possibilities with your unit.
Herbs and Lettuces
Herbs are likely the most commonly grown plants in AeroGardens. There is nothing better than grabbing a fresh bunch of basil or thyme from the AeroGarden and using it right away. You can’t get much fresher than that. The Gourmet Herbs seed pod kit comes with two basils, parsley, thyme, mint, and dill.
Lettuces are also highly productive in the AeroGarden. The Heirloom Salad Greens seed pod kit comes with a beautiful assortment of lettuces. Individual lettuce plants can be harvested several times before needing to be replanted.
Tomatoes
The next question people always ask is whether you can grow tomatoes in the AeroGarden. While the answer is yes, we would only recommend this in the larger Bounty or Farm units which are equipped with a much taller light. Tomato plants also grow to be large and heavy, likely needing support when they begin setting fruit.
If you plan to grow tomatoes in your unit, make sure to choose smaller varieties, like grape and cherry tomatoes. The Red Heirloom Cherry Tomato seed pod kit has a variety of smaller, flavorful varieties.
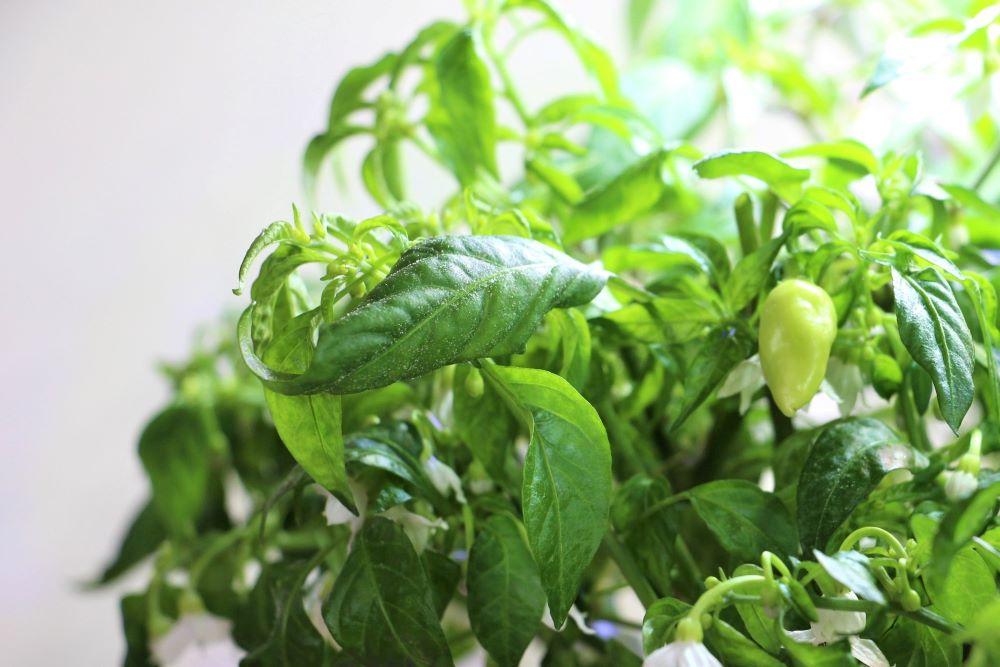
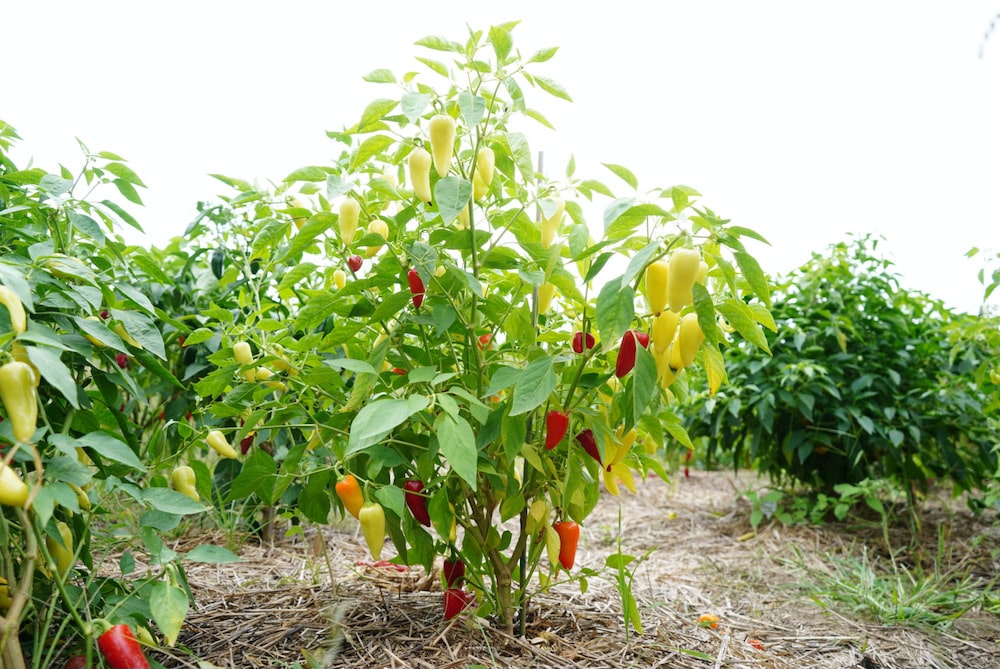
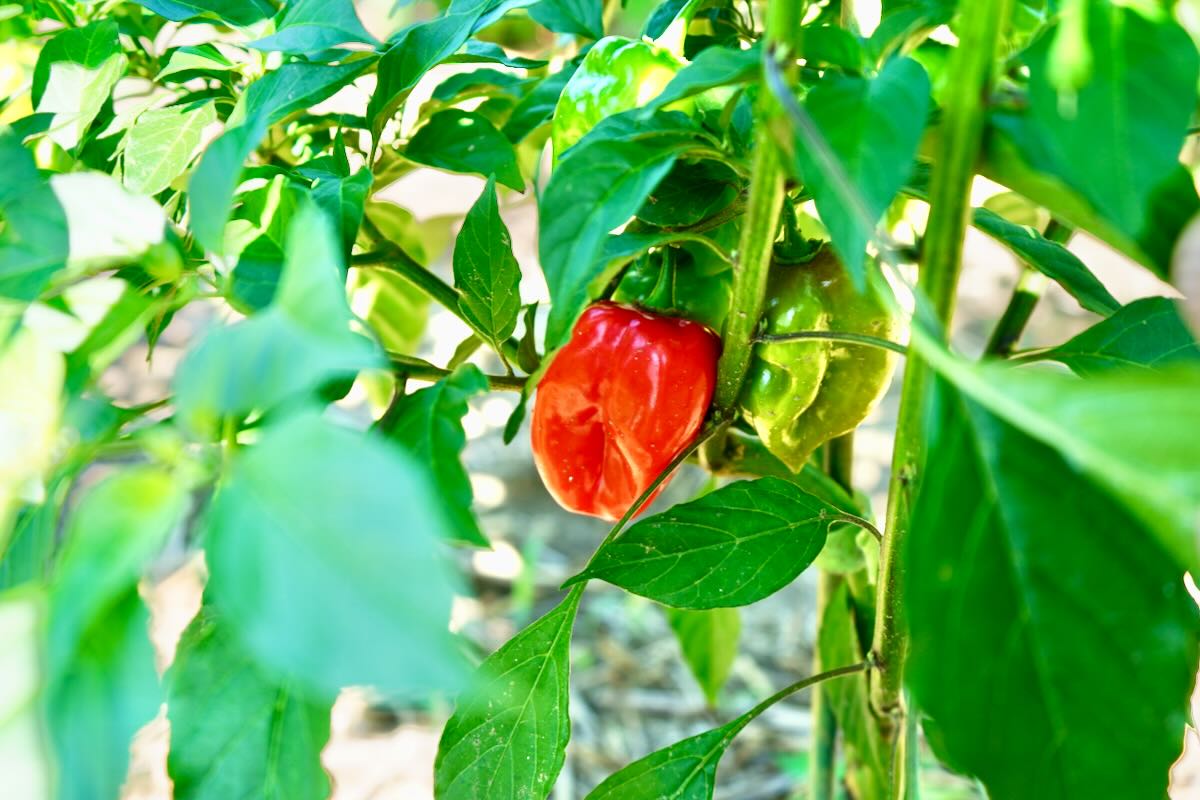
Peppers
Of course, peppers were an important factor to us (we are Pepper Geek, after all). We grew a small hot pepper variety and only had some minor issues with plant height. With only 12″ of vertical space, we had to keep the plant trimmed to avoid burning the leaves on the LEDs.
As for the productivity, we had dozens of small peppers, and they were properly tasty and very spicy! Overall, we were pleased with the outcome of our AeroGarden peppers.
Flowers
Lastly, you may be interested in growing flowers in your AeroGarden. This is definitely possible, with the Cascading Petunias seed pod kit and others. If you don’t want to eat your garden, why not make it colorful, gorgeous and fragrant?
The AeroGarden will also support healthy coleus and other decorative plant growth. Try your own seeds!
Can You Grow Fruit in AeroGarden?
While you won’t be able to grow apples and peaches, you can definitely grow smaller fruit varieties. These include strawberries, tomatoes, and peppers (yes, they’re all technically fruits). Other fruits tend to have larger plants, or require climbing. Some people have had success with growing string beans as well.
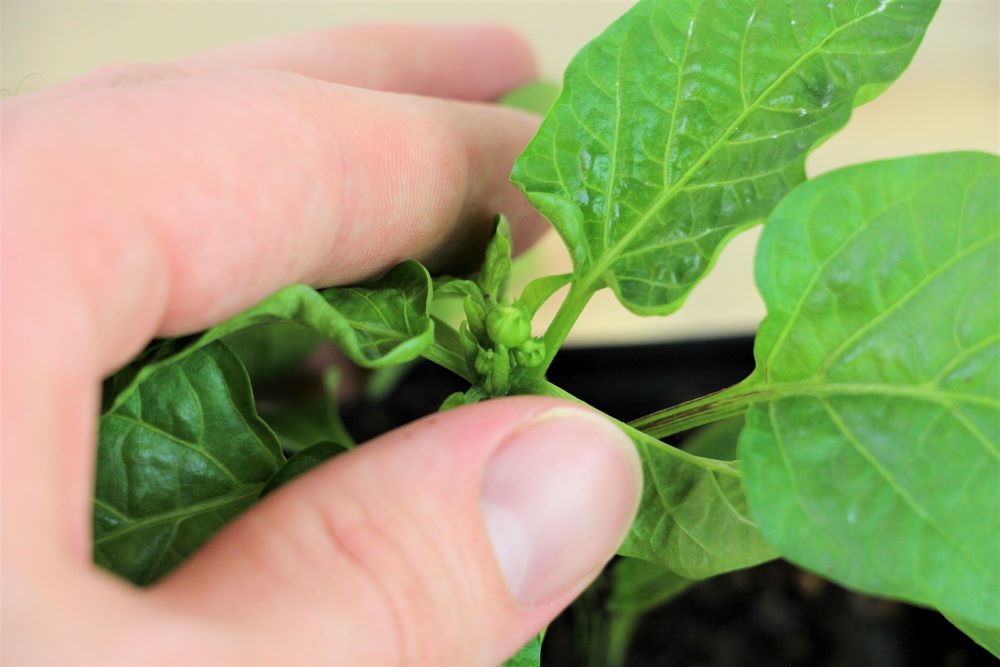
How to Manually Pollinate in the AeroGarden
If you are growing any self pollinated plants (like peppers or tomatoes), you will have to manually pollinate the flowers with a cotton swab or your finger tip. This is because, without bees and other pollinators, your flowers will not be able to fertilize one another. Therefore, you must spread the pollen across the open flowers yourself. Don’t worry, it is easy!
- Identify opened flowers. When your plant begins producing flowers, find an open flower.
- Gather pollen from flowers. Gently brush your fingertip or a cotton swab on the inside of an open flower. You should see a small, white dust coming from the flower’s stamen. This is the pollen.
- Spread the pollen between flowers. Transfer the collected pollen to other open flowers, gently brushing across each flower’s pistil.
- Repeat regularly. Repeat the process every few days as new flowers open up. This is important because only the pollinated flowers will turn into fruits!
We have seen people on the internet grow strawberries, watermelon, cucumbers and more in their AeroGardens. All of these will require some extra work, but if you enjoy a challenge, give it a try (and let us know how it turns out, please)!
Can You Use Your Own Seeds in an AeroGarden?
Yes! AeroGardeners can easily use the ‘Grow Anything Kit‘ which allows you to grow your own seeds. Simply drop a few seeds into the empty sponge and germinate normally.
Or, for a cheaper alternative, try these off-brand replacement sponges. They are made of coco coir and can be used with old plastic seed pod housings.
What To Grow
If you are planning to grow your own seeds, you should keep a few things in mind.
- How tall does the plant typically grow?
- Does the plant require staking?
- Will you need to manually pollinate?
- Does the plant typically climb (cucumbers, beans, etc.)
But hey, don’t let this stop you! We love a good experiment, so why not try growing watermelon or blueberries? You may have to be creative, but I’m sure you can make it work if you are determined!
Common Issues With The AeroGarden
While we’d love to tell you there are no issues with the unit, that would be unfair. Our AeroGarden review wouldn’t be complete without mentioning some of the drawbacks of ownership.
Algae
The unit tends to grow algae around the water hole. This is a bit unsightly, but it is completely safe and natural. After all, algaes are extremely common and will grow when the conditions are right. Keep the area clean with a paper towel and clean the unit thoroughly between grows.
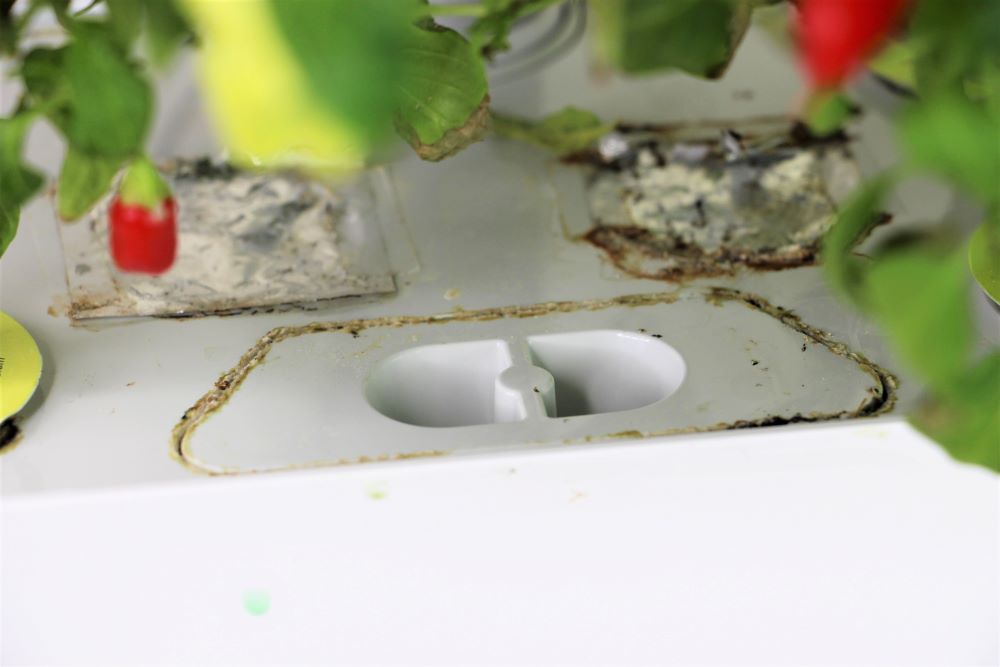
Additionally, the pollen, dropping flowers and dropping leaves caused additional mess. When fruiting plants produce flowers, the petals will eventually die and fall off. This meant regular tidying up around the AeroGarden.
Edema/Curled Leaves
Another potential problem for pepper growers is edema. We have had many issues with plant edema in the past, so it may just be an issue with our water and air circulation.
Edema is essentially a water retention disorder in the plants, causing white, crystalline bumps to form on the leaves. It can also cause leaf curling. The only thing we could do to help is provide better air circulation with an oscillating fan.
Flowers Falling Off or No Flowers
One last issue we have heard from other growers (but did not experience ourselves) is a lack of flowering. Flower drop or lack of fruits can happen when your plants receive too much nitrogen.
If you are having this issue, try switching to FoxFarm’s Tiger Bloom fertilizer instead of the included plant food. We used Tiger Bloom and had more flowers than we could count!
Other than these minor concerns, everything always worked as expected with our AeroGarden. The lights always came on, the bubbling pump always cycled normally, and the plants grew extremely fast. We just kept the water full and added nutrients every 14 days.
Cleaning and Reusing The AeroGarden
After you have collected a healthy harvest, you may want to start from scratch with new plants. After all, that is the fun of using an indoor hydroponic system. Between grows, you’ll want to thoroughly clean out your unit to avoid any bacteria or mold from forming in the water bowl.
For a full guide to cleaning, visit AeroGarden’s help page here.
Here are the basic steps:
- If you have a dishwasher, simply place the grow deck and water bowl on the top rack and run the dishwasher. Dry the pieces, reassemble, and start growing.
- If you don’t have a dishwasher, use a solution of water and 1/4 cup chlorine bleach to fill the water bowl. Alternatively, you can fill the tank with just distilled vinegar. Plug in and allow the pump to come on and circulate the solution once. Pour out the bleach and fill with just water, allowing the pump to circulate once more. Pour out again and rinse and dry completely.

Be careful not to lose your pump filter (small black screen material) while cleaning! It is easy for this to become entangled in the plant’s roots. That’s it! You’re ready to start your next AeroGarden grow with confidence.
Overall AeroGarden Review (Conclusion)
We love our AeroGarden. The perfect application is for someone looking to grow fresh herbs, year round, right in the kitchen. It grows herbs perfectly. However, it is also a lot of fun to experiment with growing different foods (we may try Carolina Reapers or blueberries next).
While we do get much better harvests from our in-ground pepper plants, we were surprised with the harvests we got from our pepper plant. Despite heavy pruning and a small overall plant size, we still got dozens of tasty peppers.
If you are looking to surprise a garden-lover with a gift, the AeroGarden would be an awesome option. I received this from my Pepper Geek partner in crime as a gift, and I was thrilled!
Read Next:

Calvin
One of the original Pepper Geeks! When Calvin isn’t gardening or learning more about peppers and botany, he might be traveling new places or playing some music.


Hi. Thanks for posting all the great content on YouTube! I am a pepper lover also. I have been having trouble growing Hawaiian chili peppers (C. Frutescens) in my Aero Garden using Aero Garden nutrients for 2 years now. My leaves all have browning on the front edge of the blade, the tip, and it moves to the leaf between the veins and there’s some tiny notches along the leaf blade starting from seedling. My eggplants, cherry tomatoes and Thai basil in the same garden look great. I’ve never had this problem with my jalapenos or Thai pepper plants in the past. I transplanted the Hawaiian chilis to potting soil containers last year which fixed the leaf problem. I just started using a fan on them recently. Any advice as to if they might be deficient on N, P, K, Ca, Mg or having an air root or genetic problem? Any suggestions you might have would be truly appreciated. Thanks again for sharing your experience!
Hey there, so the Aerogarden is really meant to be straight forward, especially when using the included nutrients. My only two guesses would be 1. Too much nitrogen – an overabundance of N can cause burning along the leaf edges. Maybe try cutting back on the feeding regimen, especially when the plants are smaller and not using up the available nutrients in the water as quickly. 2. Possible disease – Some diseases are seed-borne, so if the seeds you bought were infected, it could impact hte plant from day 1. But you did say that moving them to soil helped, leading me to believe it is more likely option 1. Hope this helps!
I’ve had great luck with hot peppers in the Aerogarden bounty units. I’ve got lemon drops and habaneros going right now and I’ve done scorpion peppers before. The lemon drops are incredibly prolific. I have found though that the hotter the pepper the more difficult it seems to be to pollinate successfully indoors. I look at the lemon drop plant and 6 more peppers appear but the habaneros and scorpions require a much more hands on approach.
If you try blueberries you have to post a follow up on how it goes. I haven’t heard of anyone doing those in an Aerogarden but I’m intrigued by the idea. I’ve seen watermelons though and am tempted to give that a try myself.
Interesting, I definitely noticed that our annuum plants seemed to pollinate super easily indoors as well, while the superhots were struggling. They also just seem to produce less pollen overall. As for the blueberries, we have a yard now so I would like to get some of them going outside FIRST, then maybe get silly and try to grow in the aerogarden.
Can any of these things like herbs be transplanted in to soil in pots ? I tried to do it with dill and it died.
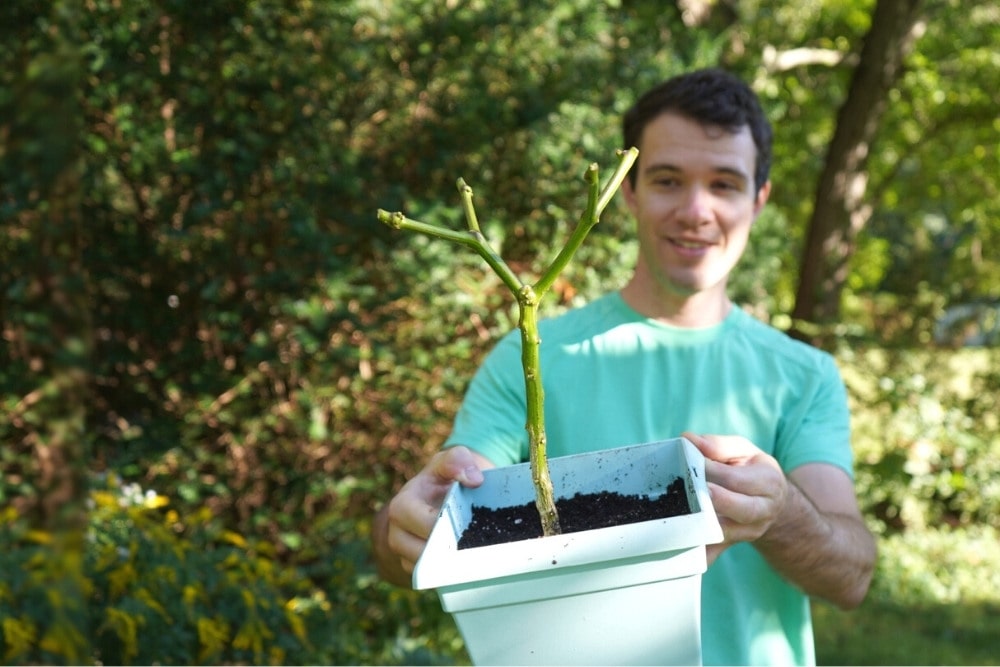
I haven’t tried to transplant out to soil, but it can be traumatic when putting an unprotected root system into soil. I did however trim back a full-sized pepper and clean out the soil, transplanting into another pot, and that worked okay.
Check out this video on YouTube on the AeroGarden seed starting system: https://www.youtube.com/watch?v=DGLK-tWhv_E
@Susie D., yasssss i did! last summer and it worked well! also did with a collard plant and they both outperformed the other plants….also with lavender, and with success there as well! my mother told me that they need a lot of water – moreso than other plants since they are used to abundant water. maybe plant also a water bottle with one small hole or two, to give the plant the constant water source it is used to….or just put a plastic jug of water/nutrient solution on top of the soil near the plant with one small hole on the bottom….i see my answer is two years after your question, but i hope it still helps!
Thanks so much for all the info! Going into the fall, we are wanting to continue to grow produce as our garden goes to bed for the winter. We LOVE your site in general as we love all things peppers. (Does that make us “peppernistas?”)
Glad you enjoyed! We love being able to grow throughout the winter. Thanks for reading fellow pepper geek, (or peppernista) 🙂