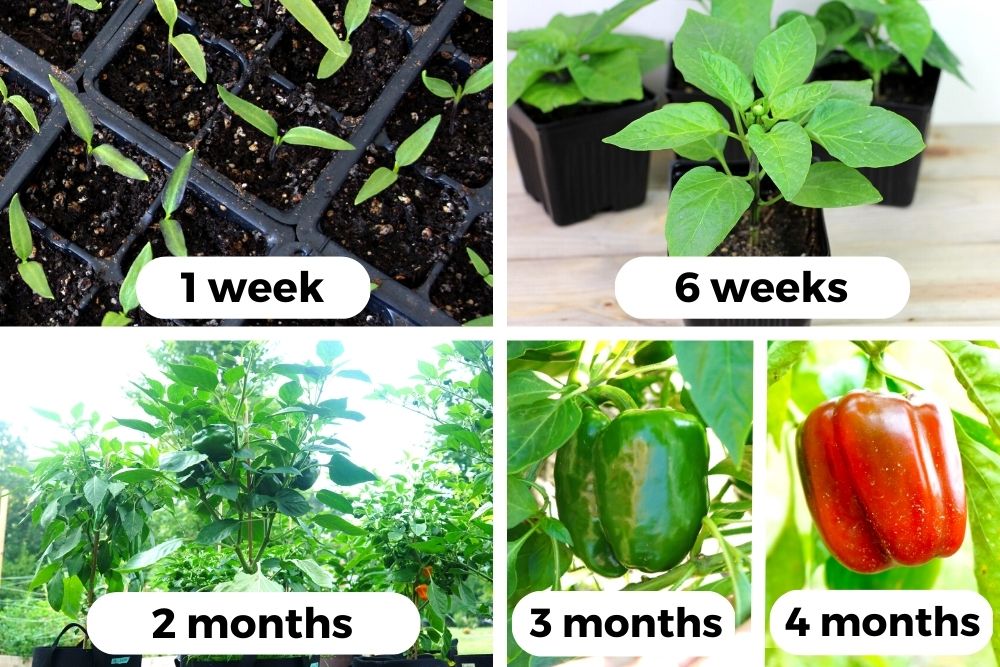
Growing Peppers With NO Fertilizer (A 2026 Challenge)
Disclaimer: As an Amazon Associate, I earn from qualifying purchases. Pepper Geek takes part in various affiliate programs. This means that purchases through our links may result in a commission for us.
This season, we’ve got our hands full. Our first baby arrived this year, and we couldn’t be more excited to be starting a family! However, this does make it tricky to keep up with gardening, writing articles, and making videos…
So I had to come up with one or two great ideas to focus on this year. This article will track one of them throughout the season and provide updates along the way. Here it is: Can I grow pepper plants with no fertilizer?
Let me explain…
After gardening for over 10 years, I’d like to think that I know a thing or two about keeping plants alive and well. But what if I took away my access to store bought fertilizers and amendments? That sounds a lot more challenging.
So here are my rules for the challenge:
- Start with a nutrient-free soil mix
- Start plants from seed
- Grow in containers only (no in-ground plants)
- Create all amendments from scratch, this season (no old compost!)
- No store bought fertilizer, compost, amendments, etc.
I’ve already got some fun ideas brewing and I am as excited as I’ve ever been to garden this year. Follow along and check in on this article throughout the season for periodic updates. I’ll also share this article in our weekly email newsletter whenever there is a new update, so make sure you’re subscribed!
Skip ahead:
Update #1: The Plan (February & March)
Let’s start with a list of things that I normally use that I won’t have access to during this challenge:
- Slow release granular fertilizer
- Fox farm products
- Neptune’s harvest fish & seaweed
- Bone meal
- Blood meal
- Potash
- Compost
- Potting soil (store bought)
These are all of the basic products we use that feed our plants directly. Since almost all potting soils have added nutrients, that’s a good place to start. How can I craft a simple potting mix that has NO nutrition?
The Potting Soil
I decided to keep this relatively simple. Here are the ingredients I’ve landed on, the rough percentages, and what they’ll do to help grow the pepper plants:
- Peat moss (70%) – A nutrient and water sponge that serves as a great medium for root growth. This ingredient on its own has no nutritional value to plants.
- Perlite (10%) – Keeps the medium loose and well-aerated so roots can breathe and excess water drains freely. Prevents compaction and anaerobic conditions that rot roots and kill soil biology.
- Vermiculite (10%) – Another nutrient sponge with a natural negative charge that binds positively charged mineral ions like calcium, magnesium, potassium. This helps hold these nutrients in the root zone instead of letting them flush out with every watering.
- Biochar (10%) – Since I have a fire pit, I threw this into the mix. It’s essentially the half-burned pieces of hardwood. It provides permanent, porous carbon that soil fungi and bacteria colonize during the season. The idea is to encourage beneficial life in the potting mix, helping to break down organic inputs more quickly.

The Nutrient Sources
Plants need more than just NPK. They need calcium, magnesium, sulfur, iron, manganese, boron, and a lot of other things in tiny amounts. I spent hours and hours researching good sources for all of these nutrients so that my plants won’t go hungry for any of them. I’ll list the intended input, how I plan to make it, what it provides, and how often I’ll feed with it.
- Forest soil: I’ll add 2-3 cups of forest soil (per 10 gal container) for fungal and bacterial activity. This will quickly colonize my soil mix with local microbes and is critical for nutrient breakdown, buffering, and availability over the course of the season. This may seem like “cheating,” but I think that without this addition, my soil would fail to deliver. Plus, it’s just a few small handfuls in each large container, so the nutrient addition will be minimal – it’s all about those bacteria and fungi!
- Rain water: For watering, I’ll try my best to use rain water only. It contains dissolved nitrogen from the atmosphere. It won’t harm any soil microbes (like my chlorine-containing tap water might), and it tends to be more acidic, which is good.
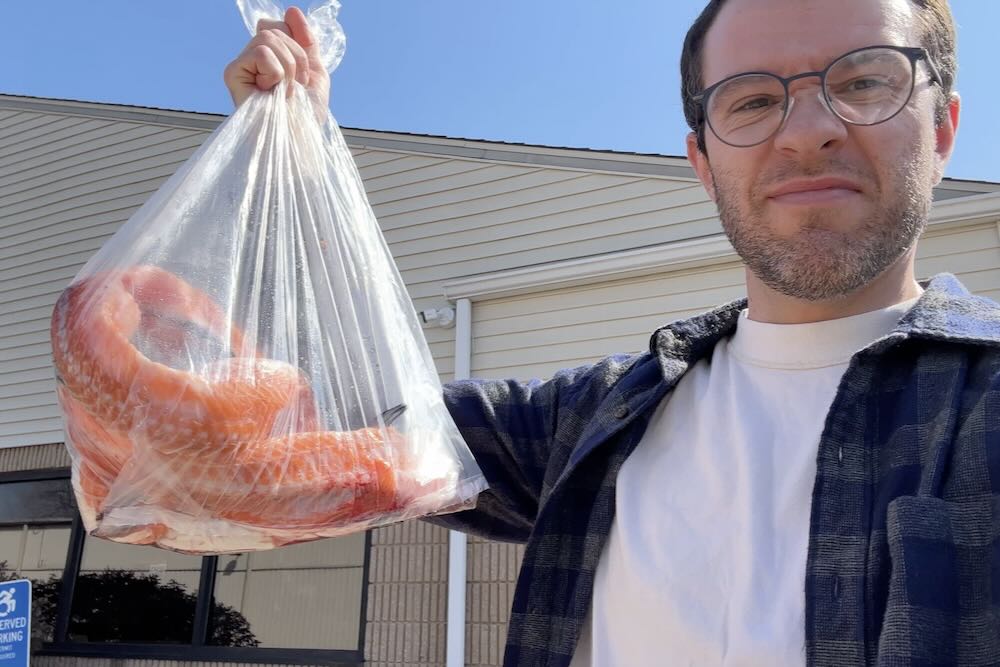
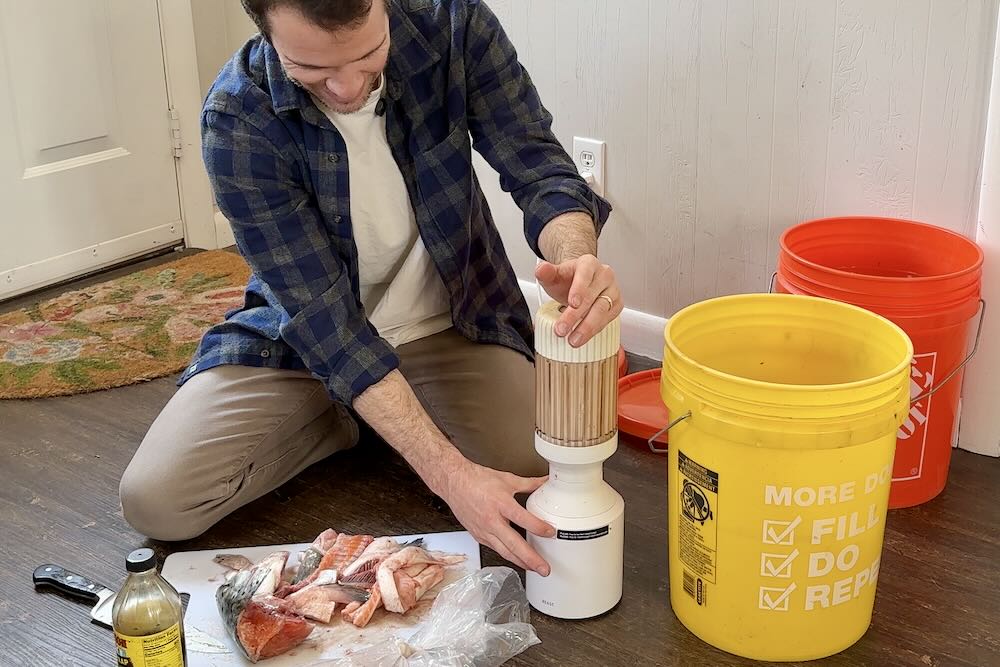
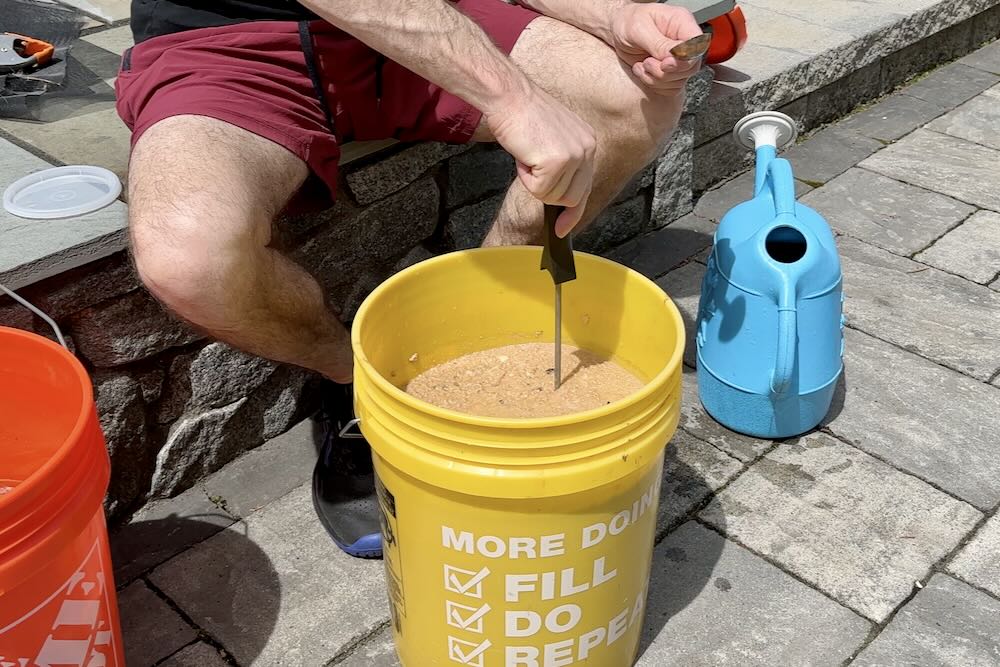
- Fish hydrolysate: This is the primary nutrient source for my plants. Fish have a nice balance of nutrients, from meaningful nitrogen, to phosphorus, calcium and magnesium, and even iron, zinc and iodine. This is my first time making my own fish fertilizer. I found a local fish monger who provided a couple of salmon racks for this project for free (I thought about going fishing, but with the newborn, that wasn’t happening). I blended up about 8 lbs of fish pieces (bones and all) with 3 gallons of rain water (~1:3 ratio). I also added 3/4 cups molasses to feed the microbes early on, and ½ cup of homemade kimchi (as a lactobacillus starter). I’ll let that ferment for about 4 weeks in a covered bucket with an airlock (for the odor) at about 70°F. Dilute at 1-2 TBSP per gallon of rain water with every watering.
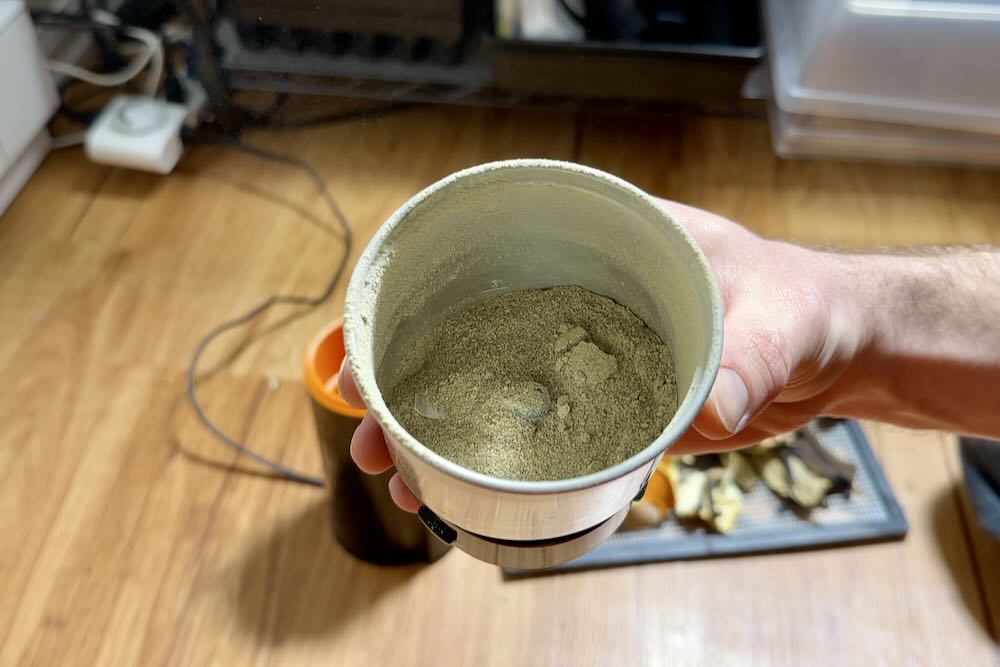
- Eggshells + vinegar: For calcium, I’ll use eggshells, but not just by crushing them and adding to the soil – it’s a bit more complicated to actually extract what I want. First, I dehydrated the eggshells, then ground them into a fine powder. Then, into a jar with about 10x apple cider vinegar by volume. I’ll leave it to steep for at least a week, stirring it regularly. Once it stops bubbling, I’ll strain it and it should be good for the whole season. This one’s potent! Dilute at ¼-½ tsp/gal (less concentrated early in the season, more concentrated once flowering starts).
- Fresh seaweed soak: Seaweed provides a host of minerals and trace elements that are hard to come by from other sources. I thought it’d be fun to go to the shore and get my own, but again, living with a baby is sort of time consuming. Instead, I used some old store bought dried seaweed I had from making kimchi. I rinsed the seaweed to remove excess salt, filled a container halfway with the seaweed, then topped it up with rain water. I’ll let it steep for about 3-4 weeks, then strain. Dilute 1-2 TBSP per gallon 1-2 times per month.
- Banana and orange peels (dried). The main idea here is to provide potassium. The bananas have plenty of that, while the orange peels should help balance the pH and add a bit more nitrogen. Add ½ cup per 10 gallon container early in the season, then 1-2 TBSP monthly.
- Onion, garlic, and apple skins: Onion and garlic contain sulfur compounds that help protect them from wildlife. It’s why they are often used as a natural rodent deterrent. Those sulfur compounds can be used to add a bit of extra sulfur boost. Apple skins/cores contain water soluble boron at low concentrations (which is a good thing) Steep them all at room temperature or in the fridge for 1-2 days and use with next watering (monthly).
PHEW – that’s about 10 different ingredients that I’ll be using the charge up my soil and hopefully feed my plants with everything they need. I have a few other ideas that I might need if I notice and particular signs of deficiency, but we’ll see how the season unfolds.
Looks like I’ve got my work cut out for me this season. It will be a lot more challenging to keep these plants happy, but with more on the line, it will also be more rewarding! Plus, I expect to learn a LOT along the way.
Update #2: April
April has been very productive for this project. Here are a few of the items I’ve checked off the to-do list:
- I mixed my potting soil recipe up (I even crushed up my own biochar from my backyard fire pit). It was very dry thanks to the peat moss, so hydrating it took a lot of work. When all was said and done, it looked like a pretty nice, fluffy potting mix.
- I saved at least 15-20 banana peels and dehydrated them over the course of the month, along with 2 orange peels. These smelled great when grinding them into a powder. I added a good handful to the soil mix to give it time to start breaking down.
- The seaweed soak and eggshell extract have been strained and are on standby for use throughout the season.
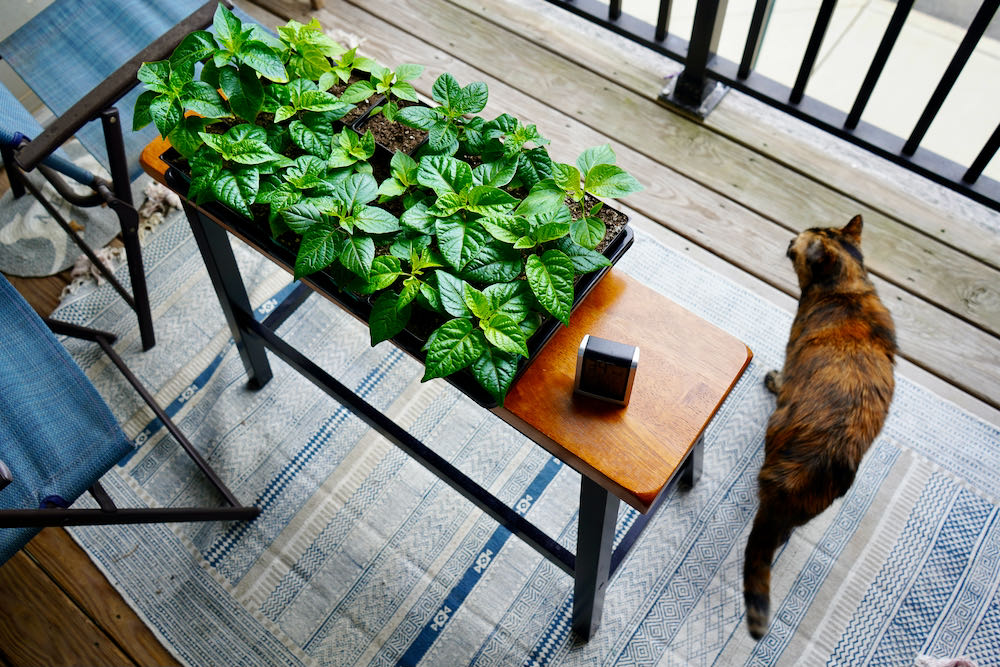
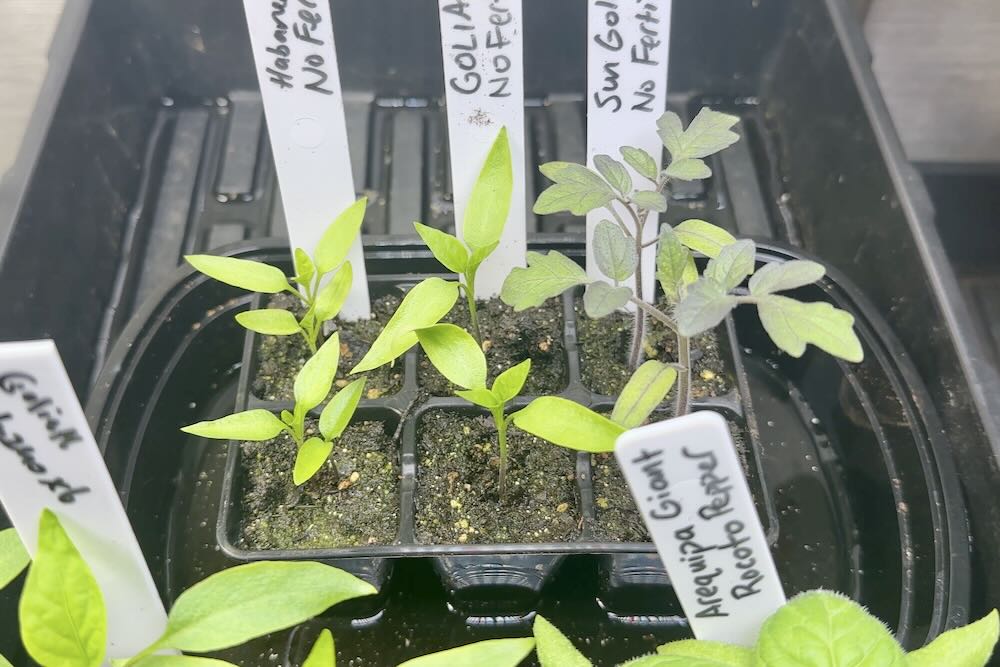
- Planted the seeds! I am growing 6 plants: 2 jalapeños, 2 habaneros, and 2 tomatoes. They sprouted quickly and after a couple weeks I transplanted them up into 3.5″ containers. They’re now growing under grow lights in the basement.
- The fish hydrolysate smells awful (sort of like blood meal or liver pate). I’m not 100% happy with its progress so far, but after planting I needed to use it to feed the seedlings. I added 2 TBSP to a gallon of water along with the other inputs and it seems to be helping the plants so far. But, I’m definitely giving it more time to ferment before fully straining it.
- The rainwater collection is growing, but it’s not ideal. I’d like a more professional collection setup (like a roof catch system), but for now I’ve got my buckets, wheelbarrow, and soil mixing containers catching the rain. I’ll probably have to supplement with some tap water, but I’ll take what I can get. Important note: I have been covering the buckets and adding mosquito bits to any open water (critical in New England!).
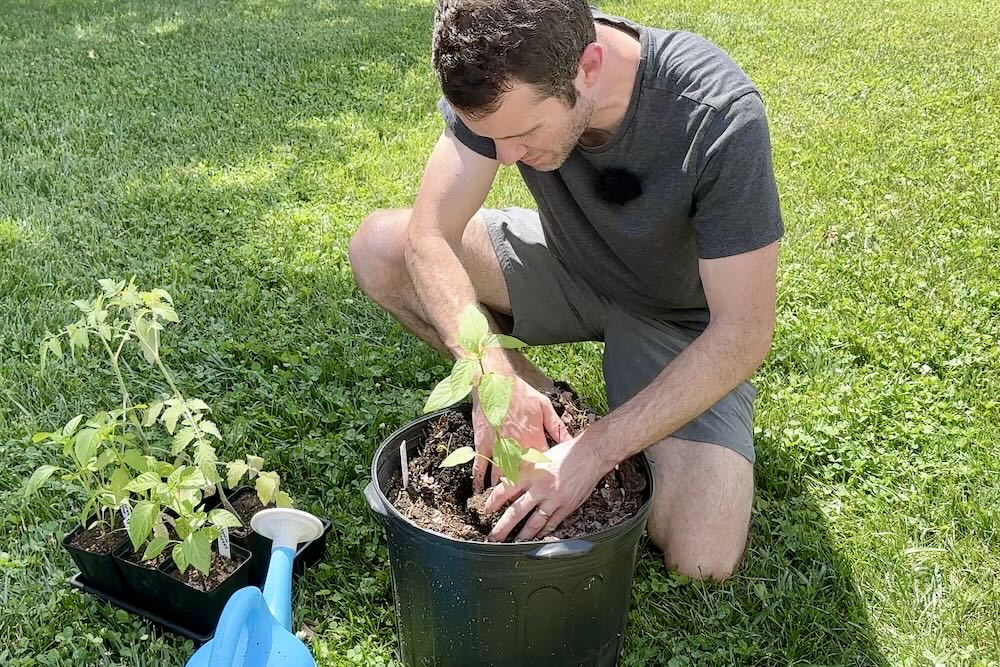
I’m biting my nails at this point since the plants are indoors and the fish hydrolysate doesn’t seem to be “finished.” But now, at the end of April, the plants look healthy and green, so I’m hopeful that things are going smoothly so far. Next month, we’ll expect a lot of growth and I’ll begin to transition the plants outdoors when the weather allows. I’ll also need to uppot into their final containers and set them up with some support to avoid breaking later on.
Update #3: June
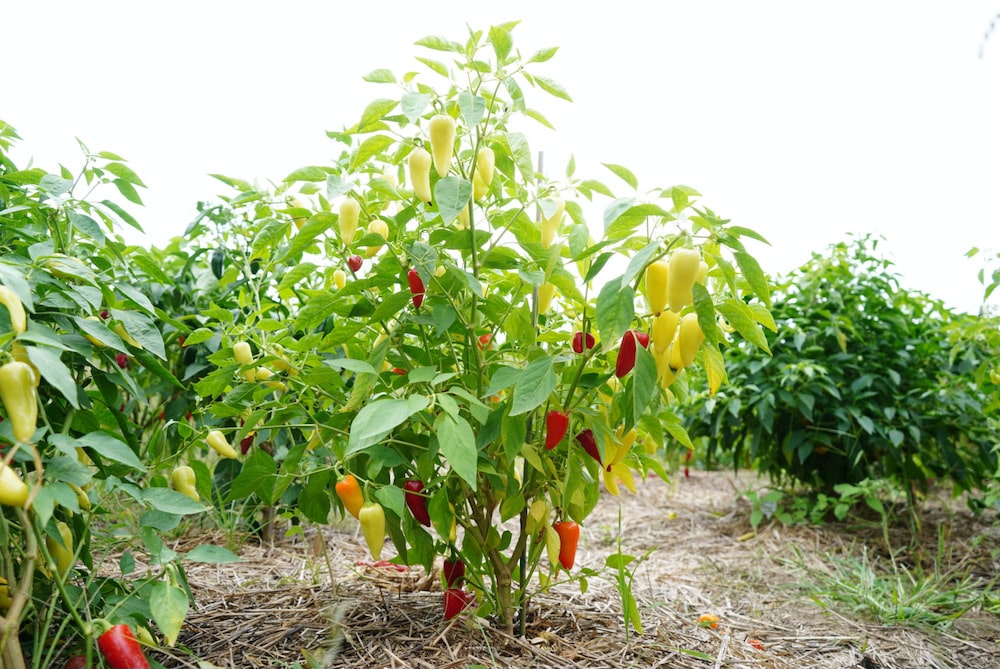
June was a fun month for this no fertilizer project. The plants saw a lot of growth, I finished processing the fish fertilizer, and have up-potted into the plant’s final location!
I decided to just plant 2 of my 6 initial plants, so I have 1 jalapeño, and 1 habanero (though I’m skeptical of the seeds..we’ll see if they are true habaneros).
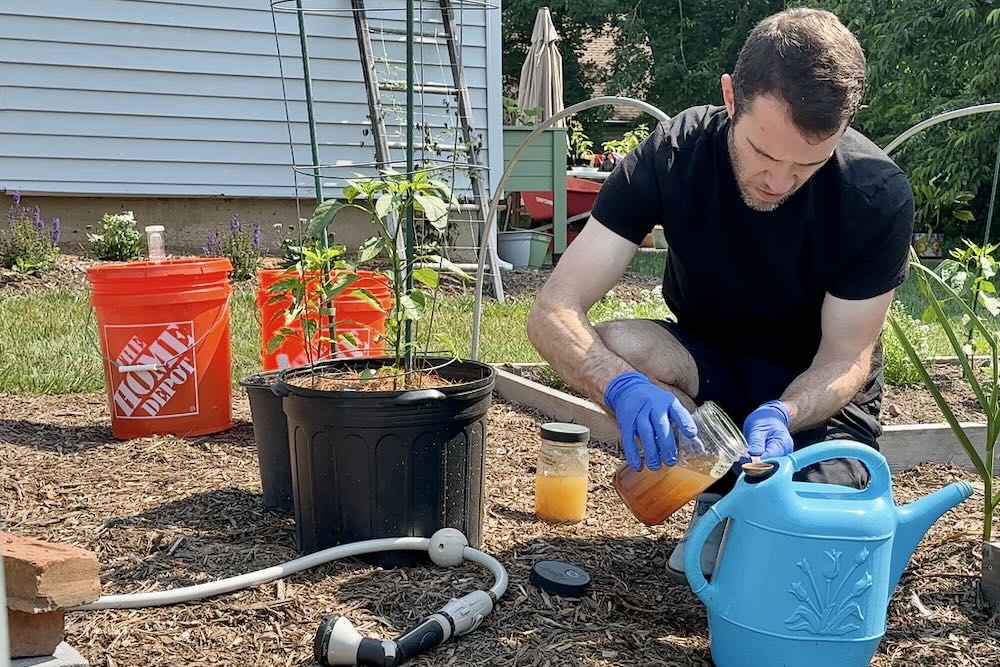
It has now been almost a month since up-potting, and the plants have grown quite a bit. I have had plenty of rainwater to use, along with my fish fertilizer, calcium extract, and seaweed tea.
While the plants look a bit “sparse,” they aren’t too far behind our normal pepper plants that are in other pots of in our raised beds. I’m definitely happy with the growth progess so far!
What wasn’t a happy time was filtering the fish hydrolysate. This was one of the most vile and gag-inducing experiences I’ve had as a gardener…
It involved pouring the goopy, chunky fish liquid through a screen mesh into another bucket. It was so thick that it would clog up the mesh, so I had to do this 4-5 times before it was fully strained and filtered. While I would have loved to use the bits and bones as an amendment for my plants, the stench was just too strong to justify burying it in my pots, so I buried it in the woods instead.
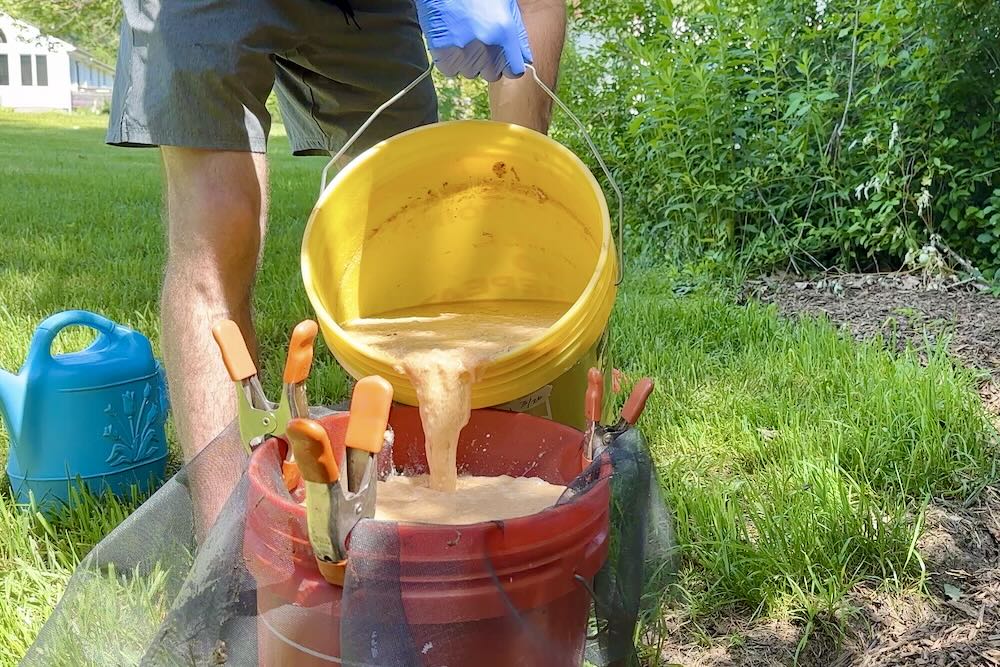
All I can say is I’m glad it’s done.
My latest problem is the arrival of Asiatic beetles, which come out after dark to devour the leaves on all of my pepper plants. For that, I’m using kaolin clay to spray the foliage. Unfortunately, rain washes away the clay coating, meaning it needs to be re-applied.
Hopefully by the end of July, the beetles will be gone and the plants can finish out the season strong!
Next update: July