
Starting Pepper Plants Indoors – A Full Guide To Starting Seeds
Disclaimer: As an Amazon Associate, I earn from qualifying purchases. Pepper Geek takes part in various affiliate programs. This means that purchases through our links may result in a commission for us.
Living in a climate with a winter season can be enjoyable. You can get out and do some skiing, watch the calming snowfall, maybe pack a snowball and throw it at your friends.
However, winter is also downtime for gardeners. Cold weather shortens the growing season for outdoor growers. This means that starting pepper plants indoors is necessary.
This article will cover the basics on how to start pepper plants inside at the beginning of the growing season. Maybe you saved some seeds from last year, or you’re growing chilies for the first time.
We will focus on peppers, but these planting guidelines can also apply to many other slower-growing nightshade plants, like tomatoes and eggplants. Let’s get started!
Skip Ahead:
When To Start Pepper Seeds Indoors
The exact timing for starting your pepper seeds will vary based on your region. In general, pepper plants need about 8 weeks indoors before transitioning to a permanent outdoor spot.
Simply put, start pepper seeds indoors 6-8 weeks before your last date of frost. In warmer regions, the growing season will be longer, and plants can be started earlier to extend the grow season.
When to plant pepper seeds indoors (chart).
One of the best ways to increase your pepper plant’s yield is to start from seed indoors in late winter. This allows the pepper plants to grow into a large bush early in the season, and then fully mature by the end of the season. With a larger plant, you’ll get more peppers.
In Northern climates, plants are typically started later (we New Englanders start most of our pepper seeds in mid or late March). With the proper grow light setup, you can start your plants very early to truly maximize the growing season.
Note: If you are growing superhot varieties, start them 2 weeks earlier than other pepper varieties – they take a long time to germinate and mature!
For an exact recommended start date, enter your postal code here.
How To Start Pepper Plants Indoors
When starting pepper seeds, they require little or no nutrition to germinate. This is because the seeds themselves contain the necessary nutrients to get started. All that a pepper seed needs to begin germination is water, oxygen and warmth.
See our top tips for germinating pepper seeds fast here.
For peppers, the best seed starting mix is something organic with good aeration. This mix on Amazon will work well, as it contains peat moss and perlite to promote healthy root structure.
Tip: It is important to use fresh soil when starting plants indoors to avoid insects. Using leftover soil from outdoors can invite pests into your home, so beware!
Starting your seeds generally consists of the following steps. Keep in mind that the germination process is usually pretty quick for peppers, and transplanting to larger pots with nutrient-rich soil is next.
How to Start Pepper Seeds Indoors:
- Use a starter mix.
Seed starter mix has no nutrients and provides good aeration. We recommend something organic like this on Amazon.
- Get seed starter trays.
We love these built-to-last trays and seed cells from Bootstrap Farmer. Make sure your trays have a humidity dome to keep the seed mix moist during germination.
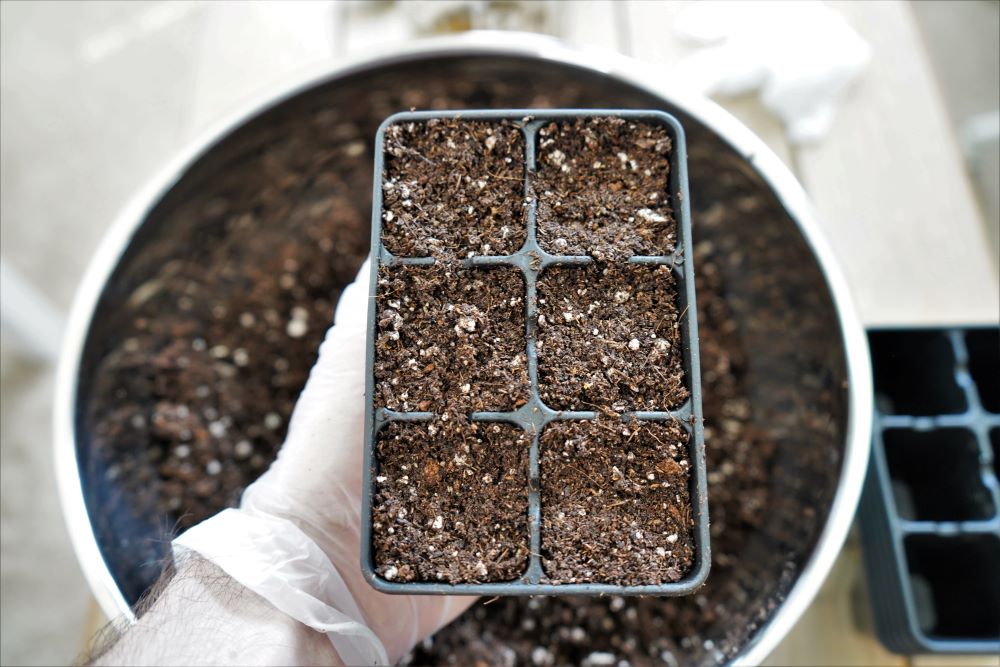
- Pre-moisten the soil.
This helps with root formation and better water absorption in the future. Thoroughly mix with water until the soil is damp and sticks together when squeezed, but doesn’t drip.

- Fill containers with soil, compressing lightly.
Compress until you feel resistance, and then add more soil until each cell is filled to the top.
- Push a small hole 1/8-1/4u0022 into the soil.
Alternatively, place the seeds on the surface and push them below the soil with a pen or pencil tip. Any deeper than 1/4u0022 and pepper seedlings may have trouble properly surfacing above the soil.
- Drop 1-2 seeds into each hole.
If you have limited seed quantities, just use one seed per cell. Using 2 or more seeds helps increase the odds that at least one will sprout. If you end up having multiple seeds sprout, you can simply pluck one of them or transplant it to another cell.
- Cover with soil.
- Water lightly.
Use a spray bottle to lightly mist and moisten the soil around the seed. This ensures enough moisture is on the seed to initiate germination.
- Keep warm with a seedling heat mat.
We use an affordable heating mat to keep our seedlings at a consistent 80°F. It comes with a probe that stays in the soil, measuring the temperature and automatically turning on and off the heating mat to reach the desired temperature. Highly recommended for the best germination rates!
- Cover with a humidity dome.
To help prevent the soil from drying out, cover the seed tray with a dome. Most seed trays come with a dome, but you can also make your own with plastic wrap, a plastic baggie or something similar.
- Keep in a dim and warm area.
Pepper seeds typically take around 7-10 days to sprout, and before sprouting they do not require light. The ideal temperature is between 80-90°F. This will ensure that the seeds germinate as quickly as possible.
Mist as necessary, or provide water to the bottom of the trays to keep the soil moist (but not soaking wet). Once the seeds sprout, immediately move them under grow lights and remove the humidity dome.
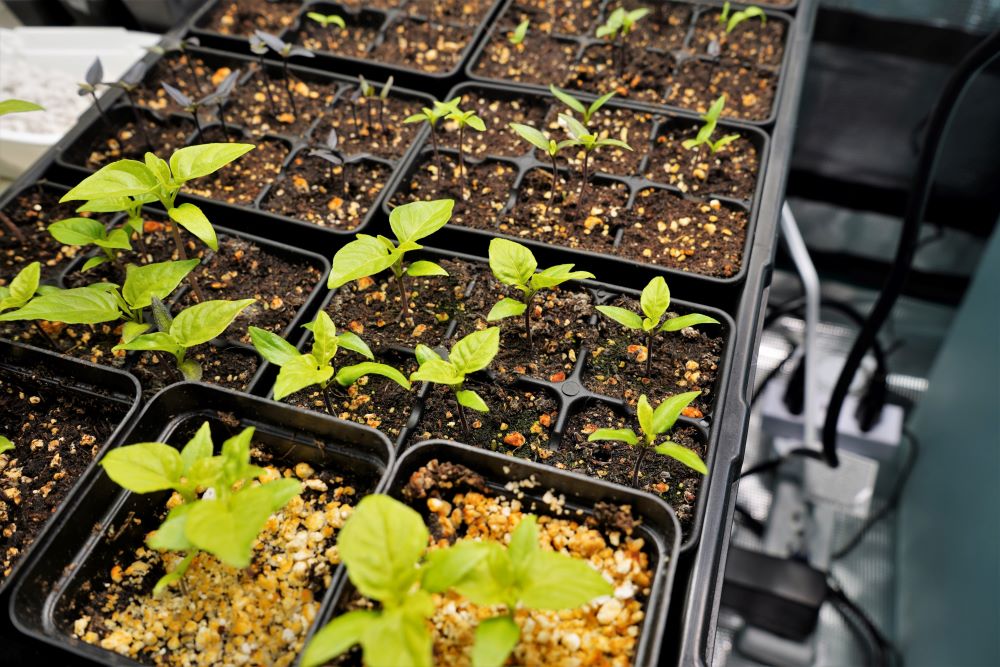
After your seeds have sprouted, you will need to provide ample lighting. Without enough light, your plants will grow to be leggy and weak. This may translate to a tall, lanky pepper plant that may under-produce.
To give your seed starts the light they need, we highly recommend using a grow light.
Which Grow Light Is Best For Starting Seeds?
Seed germination does not require light. However, once the seeds have sprouted, a grow light should be used. This will allow the leaves to photosynthesize and produce their first sets of leaves efficiently.
See our recommended grow lights for peppers here.
Can I Use A Sunny Window?
It is common for new gardeners to put their seedlings in a sunny window for light. While this may seem like enough, it is not ideal for peppers. When choosing a window for your seedlings, consider these factors:
- Is the window south-facing? (South gets the most sunlight)
- Are there any obstructions to the sunlight outside? Trees? Fencing?
- How many hours of direct sunlight does the window actually receive?
- How far north are you? The farther north, the less winter sunlight you are receiving each day.
The reality is that most windowsills are not ideal for young seedling growth. Your seedlings want LOTS of strong light for at least 12 hours per day, but ideally for 16-18 hours.
While a windowsill will certainly help the plants grow, you will likely find that they become leggy (tall and lanky). It is also usually colder near windows, leading to slower growth. This can cause weaker plants and lower yields in the long run.
What Kind Of Light To Use?
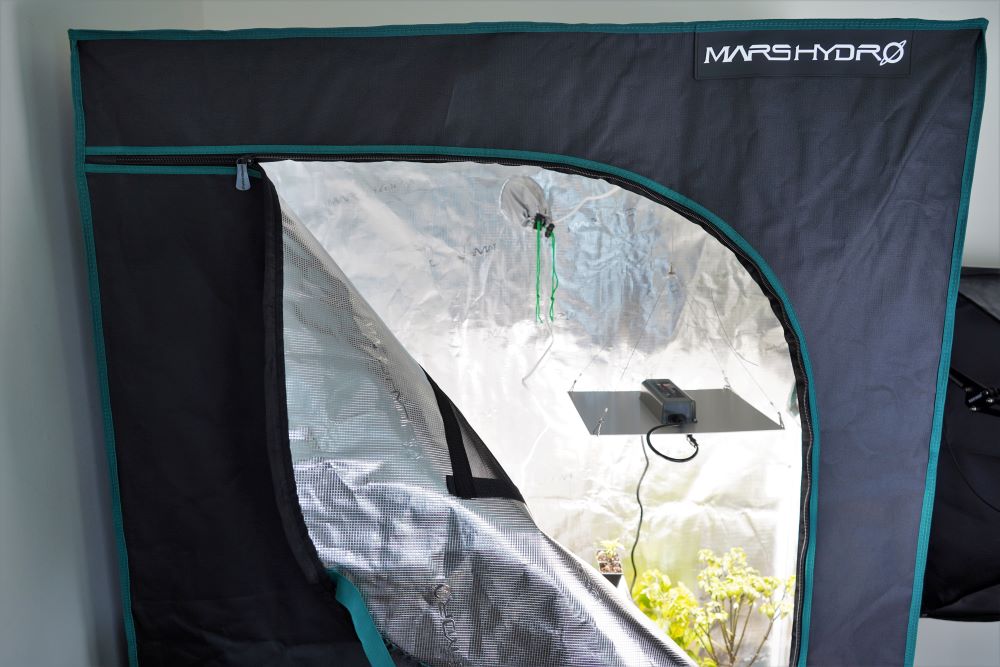
There are an overwhelming number of grow light options available. For the purposes of this article, we will recommend two grow lights. One that is great for just starting seeds, and another that can be used for both seed starting and growing peppers indoors year round.
If you expand your garden, you can always use additional grow lights and be creative with your setup.
- Long seed starting light. If you’re just starting seedlings indoors and moving them outside, a longer form factor may be perfect. This light covers a 2’x4′ area, perfect for starting lots of seedlings inside.
- LED panel light. This light has the power to grow peppers and other plants indoors year round. We use this type of light to grow plants from seedling to harvest. I particularly like the dimmer knob and the water-resistant coating.
This is by no means a comprehensive list of grow lights. However, one of these will almost certainly be adequate for starting your pepper seeds indoors. If you don’t want to hang a light, there are clip-on lights, but in our experience, they don’t last long.
How Close Should A Grow Light Be To Seedlings?
This is a critical element of starting plants indoors. Once your seedlings sprout, you want your lights to be as close as possible to the plants without causing damage.
For typical LED grow lights with low power (~20W), the lights should be positioned 2-3 inches above your seedlings. Stronger LED lights (80-150W) should be much higher, between 15-24″. Lights can be closer as the plants grow larger and become more hardy.
Look for the manufacturer’s recommended hanging height for your specific light. If you use fluorescent lights, they can typically be much closer than when using LEDs.
How Long Should Grow Lights Be On?
For the first 1-2 months of a pepper plant’s life, keep the lights on a 16-hour-on, 8-hour-off schedule. If the plants appear to have burning or rolling, the lights may be too close to the foliage. Move the lights higher to avoid further plant damage.
As the plants grow larger and begin to fill out their foliage, they will outgrow the small seed starting trays. This is when we recommend transplanting the pepper plants into larger pots indoors.
Tip: Be sure you have enough lighting and space for the number of pepper plants that you have planted. If you use inadequate lighting, your plants may not reach maximum potential.
Transplanting & Fertilizing
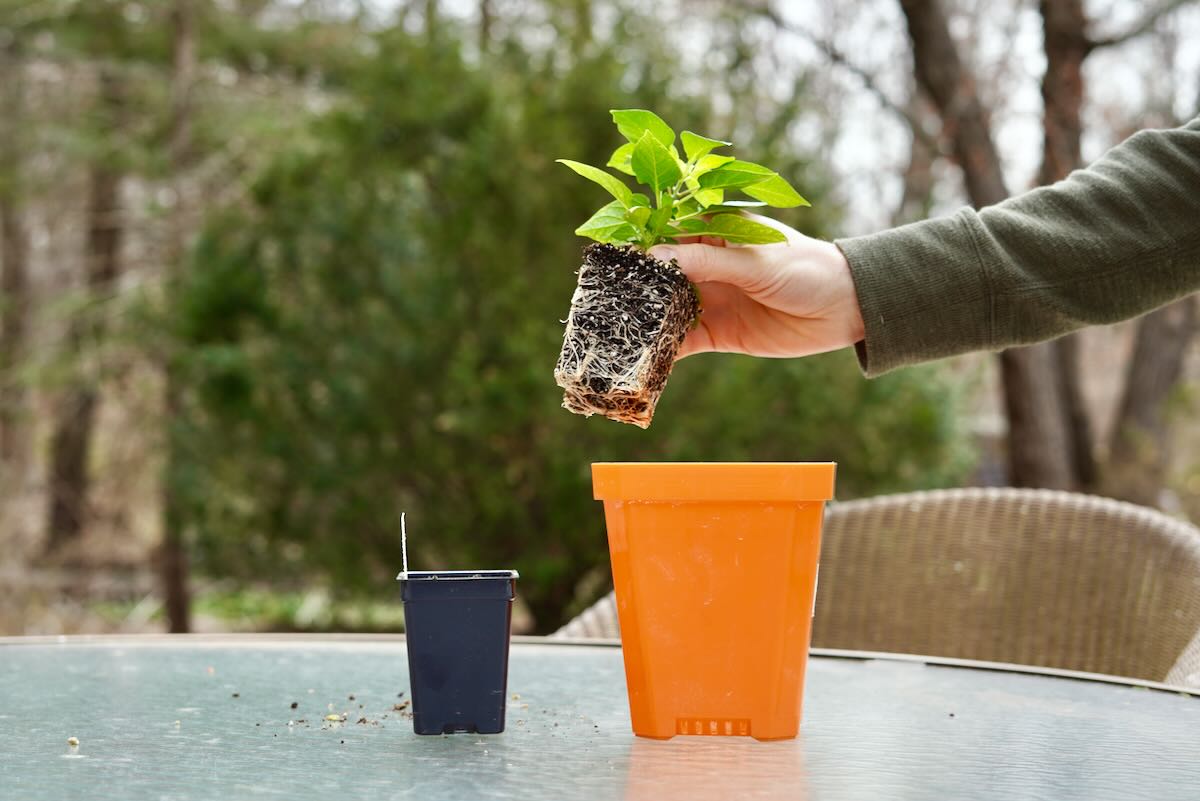
If you started seeds in small seed trays, they will soon need a larger container. Once your seedlings reach 2-3 inches in height, it is time to transplant to a larger pot. With proper lighting, the plants will develop a strong root system. This will help make transplanting easy.
Steps to transplanting your started plants:
- Get 3-inch nursery pots. These are perfect.
- Get some standard potting mix. Get something with a full range of nutrients. Choose a high-quality option if possible to give the plants everything they need.
- Pre-moisten the potting soil. Wet the soil with water and mix thoroughly until evenly moistened, but not soaked. Use a large bowl or a wheelbarrow for larger gardens.
- Fill each pot with soil. Fill the pots with soil, compressing until you feel some resistance. Don’t over-compress, but don’t be too gentle either!
- Dig out a hole. Make sure it’s large enough to fit your seedling’s root system.
- Place each plant in its new pot. Be careful not to damage the root system while handling the plant. Try to pull the plant out gently by the base of its stem. Loosening the soil slightly can help. Also, I like to make sure the started plants are lightly watered before transplanting.
- Cover with soil and compress. Be sure to avoid burying any of the plant stem that was not below the surface. Keep the plant at the same level above the soil where it was previously. Young pepper stems can rot if buried with moist soil.
- Water immediately. Water thoroughly to ensure the root system is moist and integrates well.

This is almost an identical process to starting the seeds, but instead of putting seeds into the soil, you’re moving the whole plants. Giving your starts adequate soil and space allows the plants to continue to grow without getting stunted. Without enough room, the plants will stop growing.
Fertilizing
Once you have transplanted your peppers, it is time to start your fertilizer regimen. Potting soil often contains some nutrients, but it is best to supplement with the ideal nutrients regularly.
At this stage, we like to start lightly fertilizing every 1-2 weeks with a nitrogen-rich fertilizer. Any fertilizer with an even 5-5-5 or 10-10-10 makeup will work well, but organic is best to avoid burning the plants. Use at 1/4-1/2 the recommended strength to start, and increase as the plants grow larger. Don’t water too heavily when fertilizing, and be sure not to over-soak the soil.
We have had good luck with this fertilizer for early growth. Later in the season, when the plants are fruiting, reduce the amount of fertilizer back to 1/2 strength.
Tip: Make sure you have good drainage for your pots. If the water is forced to stay in the soil, it can cause rotting and low oxygen levels.
As the plants grow larger, and your lights are moved higher, the light will become more scattered and less effective. The plants will either need stronger artificial lighting or, ideally, to be moved outdoors into the sunlight.
Hardening Off Pepper Plants
After the risk of frost has passed in your area, you can begin hardening off your pepper plants. “Hardening off” is the process of transitioning your plants from indoors to outdoors.
Read more about hardening off pepper plants properly here.
It may be tempting to simply put your plants directly into the ground, but this often results in sun scald on the tender leaves. The strong UV radiation and powerful sunlight is too much for young, indoor-grown peppers.
The proper method is to gradually increase outdoors time for the plants each day. Doing so allows your pepper plants to get used to the elements, like direct sunlight, wind, and fluctuating temperatures.
Here is our method for hardening off plants:
- 1st week: 20-30 minutes sunlight, or 1 hour of shade
- 2nd week: 1-2 hours sunlight, or 3-4 hours of shade
- 3rd week: 2-4 hours sunlight, or all day in shade
- 4th week: Transplant outdoors permanently
Tip: Start hardening off as early as possible on any days when temperatures are above 65°F. Also, cloudy days are a great time to start!
Hardening off can be time-consuming and tedious, but if you keep your plants on a tray or a wagon, it can make the moving process easy. You can also do this more aggressively, as our method is very conservative and safe.
For a full pepper growing guide, read our article here!
Read Next:
Once your plants are used to the outdoors, you can transplant into the ground or large nursery pots for the season. Make sure they get the nutrients and sunlight they need. Enjoy and good luck!

Calvin
One of the original Pepper Geeks! When Calvin isn’t gardening or learning more about peppers and botany, he might be traveling new places or playing some music.

Hey Peppergeeks! First off thank you so much for all of the free information you have online, while I think it’s sufficient I am still encouraged to buy your eBook. Now to my question, in this article you state that you start giving the fertilizer to the young plants once they’ve been transplanted. By this do you mean transplanting from their seed starting cells to a 3-4″ pot? Or do you mean once they’ve been transplanted outside?
Follow up question, if I’m going to use the fox farm trio liquid fertilizers once the plant is outside… should i just be using that the entire time? Or would it be fine to use the powder fertilizer you linked here while they’re inside and then once being fully hardened off and up potted again outside I can switch to the liquid fox farm trio again?
Thank you for your time and contributions!
Since we use a nutrient-rich potting soil in 3-4″ pots, we usually don’t fertilize them until the plants are transplanted outside. If they spend longer in the 3-4″ pots than expected, a light fertilizer can help.
For the fertilizer type, you can certainly use multiple types. I’d say use the type highest in nitrogen during early growth, and later in the season the plants will want more potassium (but also still need nitrogen and phosphorus).
Thanks for reading and your support!
I followed the instructions, and after 8 days I had 6 seedlings going. As per your instructions, I took off the cover and used a grow light. Within a day 3 of them had died, but then rest looked good – they were about an inch high with leaves for maybe 2 days. Then one day after the other they wilted and died leaving none.
Was I underwatering? Should I have turned off the heating mat?
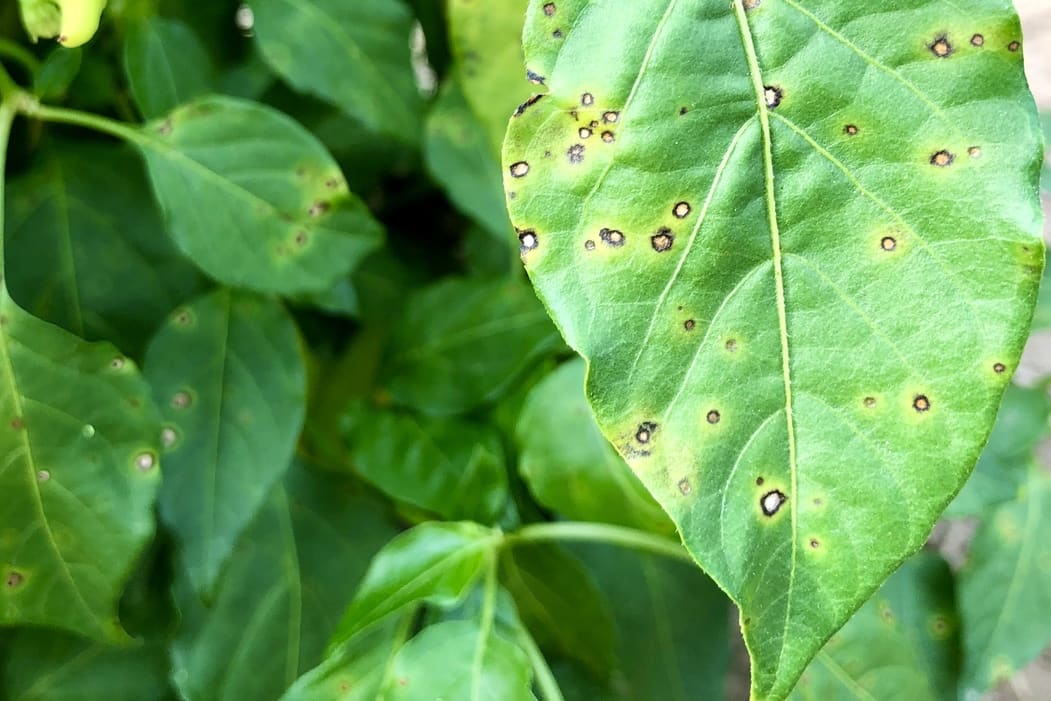
Hm, hard to know exactly what happened. I would look into damping off disease, and yes make sure that the soil stays evenly moist and doesn’t become overly dry. If they wilt from dry soil, watering should perk them up within an hour or so.
@peppergeek, I looked into damping off this morning, I don’t think that’s it. New trays, new soil, etc.
To be sure, how often should I be spray watering once I take the cover off? I was only doing it once a day. And again, I should leave the heating pad turned on correct?
You can turn off the heat mat, room temp is good for seedlings after sprouting. You can water the plants properly with a watering can or bottom watering, spraying won’t be enough to saturate the soil
Thanks so much for the invaluable information on your site! All of my Fresno seeds have germinated this year and I’m now using the Vipar Spectra P1000 LED grow light. It is positioned about 17” above the top of the seedlings for 16 hours on, 8 hours off. The seedlings are about 10 days old, so still quite small. The problem I’ve noticed over the past few days is that the seedling leaves are raised upwards (I’ve seen it referred to as “praying”), which makes me think they’re light stressed. I’ve tried turning the light intensity down to 50%, but the situation hasn’t improved much. There are no areas that look like leaf burn. I’m wondering if you have any other suggestions?
Hi there – so this “praying” is normal, especially at nighttime. If you are checking in during the evening hours, it may be the natural rhythm of the plants. They will fold open during the day, and close upwards slightly at night. If they are up all day and night, then lighting may be too intense, but at 17″ and 50% power, I would not expect this to be too much. I would give the plants a week or two to adjust and grow and assess from there!
Hey! Brand new pepper grower here. Lots of great info on the sight. used your method for planting seeds and is so far working out great! I have a number of pants currently on a heating pad with a humidity dome. Four out of 8 of my rows have sprouted, so I’m super excited. This being said, do I wait out the other superhot seeds, or do I need to be providing light now for those that have already sprouted? I do have a grow light that can be used.
Thanks in advance.
It’s best to give the sprouts light as soon as they come up. This is one reason I like to plant similar varieties in separate containers so that they can be removed from the humidity dome and put under lights. Alternatively, you can just put the lights on above the humidity dome until the others sprout
Hi,
Did you mean to link to Miracle Grow for tomatoes here “We have had good luck with this fertilizer for early growth.” ?
We have had similar success using both the Tomato formula and the all purpose, so either works!
Way to much work and expense to grow 6 or so plants. Who has the time and space to be moving plants in and out of the house every day for a month. Easier for me to buy my plants from a small greenhouse gardener and support small business at the same time. It would be nice to have a neighborhood green house, instead of a neighborhood garden.
I have my seedlings in a starter tray. They are in a portable greenhouse to retain moisture and they are currently getting nearly a full day sun through a window and a light at night. They are on a heat pad that keeps the soil temp around 85 degrees.
Question: Once I move them to nursery pots, do I need to keep them on the heat? The room that they are in fluctuates between 62 and 68 degrees.
Thanks!
This is a good article yet I’m a senior on a fixed income and cannot even come close to getting all things you suggest or recommend. I have the pots, growing medium and seeds. Thank you. You didn’t mention about possibly soaking the seeds for a little bit or overnight. Does this help them to germinate quicker or just not necessary.
You can certainly soak the seeds, especially if they are older. This helps to degrade the seed’s coat. With pots, soil, and seeds, you should be able to grow your peppers, so long as you have a nice sunny window. I would also recommend moving them outdoors when you can to take full advantage of the sun. Nutrients may be needed later on, but most potting soil comes with some nutrients added in. Best of luck!
@Jackie R Lowe, I save the clear plastic containers from baked goods etc and use them as little green houses to germinate seeds. The worst problem I had in starting seeds indoors was the warmth on the bottom. I was lucky to find a water bed heater at a thrift store and I use that under a 1/4 inch piece of plywood. works well. I am far north and have a short growing season so I have to start indoors. I think the containers in a sunny window would work. I also have heard of people putting seeds on top of a refrigerator as that is a very warm spot.
Hello, thank you for all of your thoughtful expertise and the down to earth, understandable way in which you present it!
I’m wondering if you remove your seedlings from the heat mats when you transfer them to under the lights or if you remove them from the mats at this time (even if the ambient temp isn’t at that “sweet spot” as it doesn’t often reside there here in the New England territory).
Thank you!
Hey Erika, thanks for the kind words! We remove the seedlings from the heat mat as soon as they sprout. The warmth is for germination. Roots actually prefer cooler temperatures. Hope this helps, and good luck!
Hey Calvin! Thanks for all the great info you provide on your site! This will be my first year growing 500 hot pepper plants for our line of hot sauce. I wonder how other commercial hot pepper growers do when it comes to hardening? I can’t see bringing my 500 seedlings in and out of my basement every day for 3 weeks. Thanks for any insight!
Wow, that is going to be a huge harvest! Another option is to us shade cloth and gradually remove layers or the cloth over the course of 2-3 weeks. We use floating row cover last year and it worked out well. Hope this helps and would love to try the hot sauce later in the year!
Hello peppergeeks, I have a 5 gallon ceramic pot. Above it, I put a spider farmer grow light in a light dome light fixture (aesthetics). I want to grow a pepper plant indoors that looks good and also produces a mild heat, good flavored pepper. I was thinking about growing the Brazilian Starfish, but pictures of the plant look leggy with spaced out leaves. It’s not very “house plant” pleasing. Can you offer suggestions? I’d like to keep the plant 3 feet in height max.
That is a good question. For indoor plants, I like smaller pepper varieties, such as the thai peppers or cayennes, but those are fairly spicy. Great flavor though. For really mild peppers, you could try the shishito, lombak, or one of the milder jalapeno hybrids
Hi Calvin !! Thanks for everything, this is big help..
Question.. Is this recommended to add more than one pepper plant in one bigger pot ? I’m planning to make a 2x Habanada plant in one 3gal fabric pot but I don’t want it to be bad for both plant either.. the goal is to have more pepper on the same footprint, for a grow tent setup. Any advice ?
Again, as a new grower, huge thank you to you and PepperGeek. Site and Youtube channel is simply awesome and became a go-to.
Hi! thanks for the kind words, we’re happy to be helpful to you. As for the habanadas, you could definitely plant 2 in a 3 gallon pot, though I can’t be completely sure the harvests will be bigger than just a single plant. However, it is unlikely to be less, so I say go for it! We have a few big pots with 2-3 plants each and they are all doing well, though they are a bit crowded for foliage space, all are producing well.
Hi Calvin,
I’ve successfully germinated pepper seedlings but they now appear to be having difficulty growing a third set of leaves. The seedlings are in peat pots with seedling starting mix; I feed with dilute liquid fertilizer every other watering and am careful not to overwater. The seedlings are under grow lights much of the day and the indoor temperature is about 75 degrees. What can I do to further encourage growth? Would a heat mat be at all helpful at this stage? Sun exposure outdoors? Transplanting them into more nutritious potting soil?
Thanks!
Hi there,
Well it sounds like the environment is good (temp, light, etc.), so you may just need to transplant to larger containers – how big are the peat pots? Getting them outside should also be prioritized as soon as the weather permits, just be sure to harden off the plants gradually. If they’re just in peat moss, then yes, I’d recommend moving to a more well-rounded soil mix or into the ground. Good luck with your plants!
Hi Calvin,
They are in 3” round Jiffy pots and seedling starter mix. I can certainly transplant them into better soil and begin hardening them off if you think that will help. They just seemed so small and fragile, I didn’t want to move them unless it seemed like doing so would be helpful.
Thanks!
I have a tsw2000 led light, my question is how far above the peppers should light be? We are at 1-2 sets of true leaves and have the light turned right up and about 8” above them. Day time temps are roughly 75 f, night time 66-67 f. Humidity runs around 40-45. First time grower any suggestions are greatly appreciated, thanks.
I would definitely raise the light up to around 20″ or so if it is on full-blast. If you can dim it, I’d do that too, maybe to around 50%. That is a 300W light, so very powerful.
Hi Calvin,
First time pepper seed growing and my plants are a little leggy because I didn’t realize they had started to sprout before adding the light. I have since added light and they are standing now and look much better, but is it too late?
Never too late! Leggy plants will adjust and recover if they are given better lighting. Let us know how things turn out as the season progresses.
Hi Calvin, would it be recommended to leave the grow lights on 24 hours a day?
No! We accidentally had one of our lights on for 24 hours a day last year and we had some pretty bad leaf curl. The timer was accidentally set to “ON” instead of “TIMER.” I recommend 14-16 hours a day for new seedlings on a low intensity or higher hanging height.
Good luck!
-Calvin
Hi Calvin, what sort of room temperature should I be aiming for at the 4th true leaf pair stage, is it still around 80 deg F or can it be cooler?
Many thanks!
It can be cooler, anywhere between 68-75°F is fine, no need to bake the house! The warm temps are most important for germination.